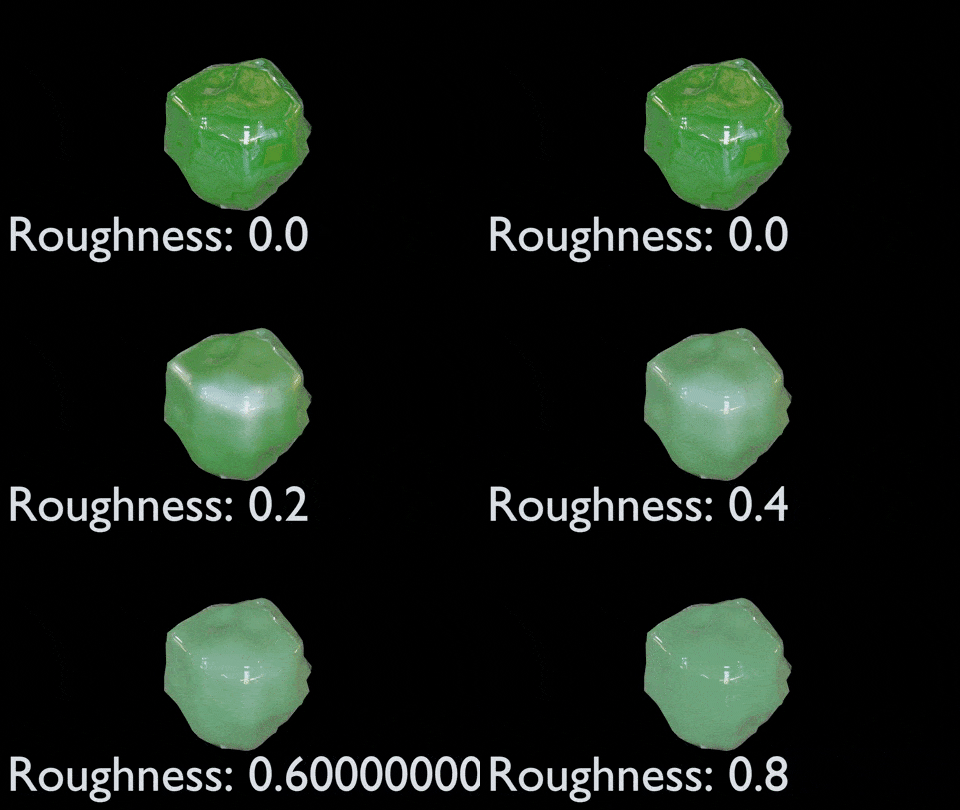
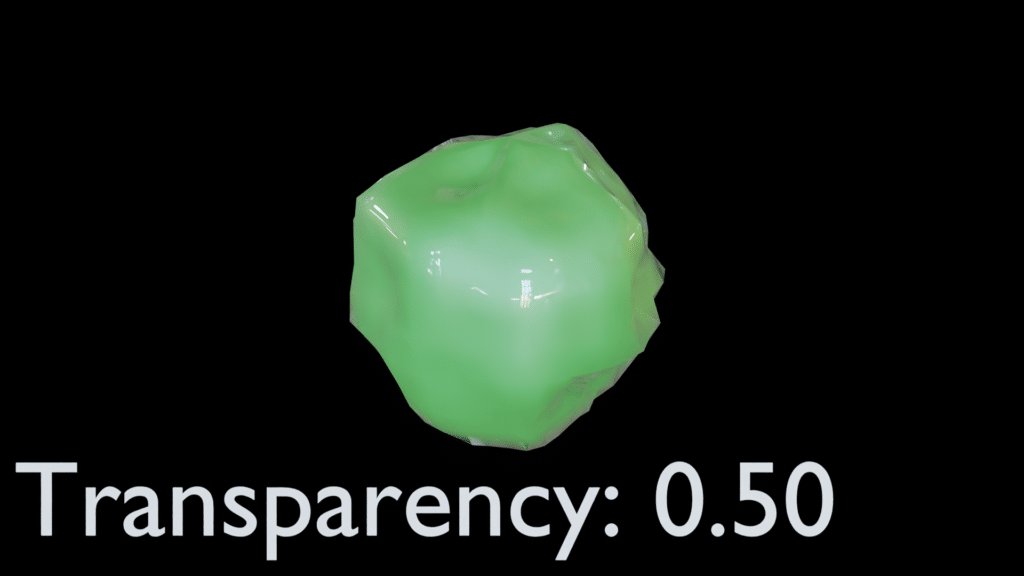
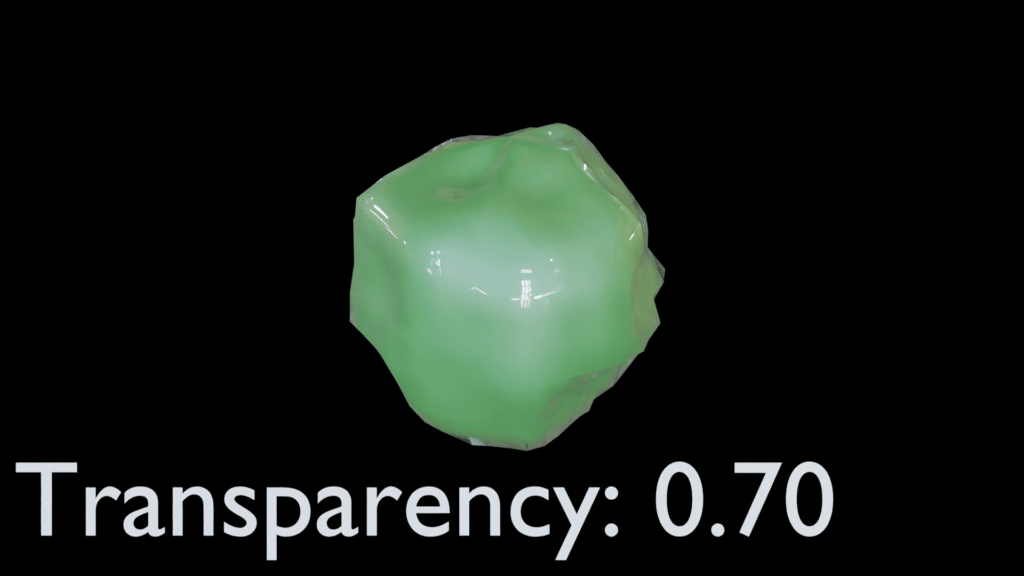
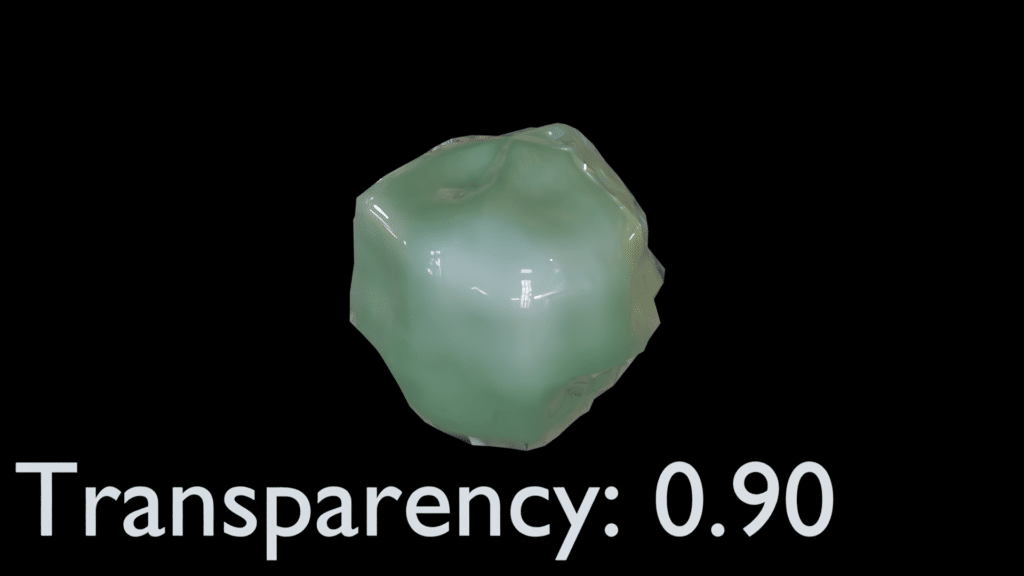
Sometimes, I want to look at different versions of a setting, but want to remember what setting I used. Therefore, I created a render comparison add-on that renders multiple versions and adds text to the images so you can compare different versions.
To test out this add-on, I used our Alien OSL shader. The full code for this add-on is available in our GitHub repository.
How to Use the Render Comparison Add-on
Open the script and run it. This will add the add-on to the 3D Viewport n-panel. You can access it by pressing n and selecting the Misc tab.
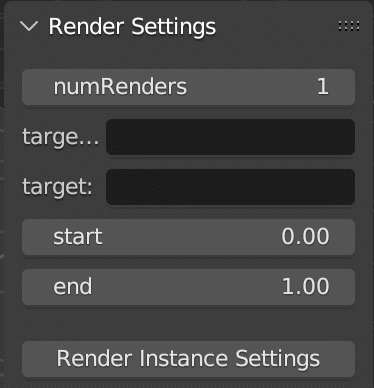
- numRenders: how many renders you want, this is limited by the number of the render slots.
- targetName: name of the property to print on the screen
- target: full datapath to the target
- start: starting value of the property (float or int)
- end: ending value of the property (float or int)
To get the full path of the property you want to change, right click on the property you want, select copy full data path. Paste this in the target box.
Set the starting and ending values and press the “Render Instance Settings” button. Keep in mind that rendering will take some time. There is a progress indicator, but it is easy to miss.
The Render Comparison Script
Below, we explain the following parts of the script:
Add-on Basics
For the basics of creating an add-on panel, see this post. This explains the:
- bl_info dictionary
- RenderSettingsPanel class
- register() function
- unregister() function
Property Group
The UI panel collects five different fields. We will store these in properties attached to the scene. We set up these properties in the RenderSettingsPropertyGroup class. For additional information on how Blender properties work, see this post.
# Property Group for the settings
class RenderSettingsPropertyGroup(bpy.types.PropertyGroup):
    numRenders: bpy.props.IntProperty(name="numRenders",default=1)
    targetName: bpy.props.StringProperty(name="targetName",description="Name of the setting that will change.")
    target: bpy.props.StringProperty(name="target", description="datapath of setting we want to change")
    start: bpy.props.FloatProperty(name="start", default=0.0, description="starting value")
    end: bpy.props.FloatProperty(name="end", default=1.0, description="ending value")
Create Text Object
Blender doesn’t provide an easy way to add text to a render. I wish this was an option in the compositor. Maybe a future project. For now, we need to add a text object to the scene. We use the object add operator. We parent it to the camera, set the location and scale. Then we call CreateMaterial, sending the text object as a parameter.
# Create the text
bpy.ops.object.add(type="FONT")
currText = bpy.context.object
currText.parent = bpy.data.objects["Camera"]
currText.location = (-1.4,-0.696,-4.0)
currText.scale = (0.3,0.3,0.3)
self.CreateMaterial(currText)
Create Material
We need to add a material to the text. In particular, we want the text to appear regardless of where the light in the scene is. Therefore, we need to add an emission shader. However, we don’t want the shader to affect the scene, so we set the emission low (0.3).
We start by checking whether we already have the texture. If not, we create the material. We turn on the nodes. The default setup uses Principled BSDF. We set the emission input color to white and the strength to 0.3.
Finally, we add the material to the text object.
    def CreateMaterial(self,text_object):
        mat = bpy.data.materials.get("TextMaterial")
        if mat is None:
            mat = bpy.data.materials.new(name="TextMaterial")

        if not mat.use_nodes:
            mat.use_nodes = True
            nodes = mat.node_tree.nodes

        # Add emission
        bsdf = mat.node_tree.nodes["Principled BSDF"]
        bsdf.inputs['Emission'].default_value = (1.0,1.0,1.0,1.0)
        bsdf.inputs['Emission Strength'].default_value = 0.3


        if text_object.data.materials:
            text_object.materials[0] = mat
        else:
            text_object.data.materials.append(mat)
The Render Comparison Loop
Next, we set up the basic loop. We start by creating our iteration variables. To create the variables, we need to know whether the Blender property is a float or int.
        # Determine the type of the target

        isInt = eval('type(' + context.scene.render_settings_prop.target + ')== int')

        # Set the render seetings
        startingValue = context.scene.render_settings_prop.start
        iterations = int(min(context.scene.render_settings_prop.numRenders,len(renderSlots)))
        incrementalValue = (context.scene.render_settings_prop.end - startingValue)/max(1,iterations-1)

        if isInt:
            startingValue = int(startingValue)
            incrementalValue = int(incrementalValue)
Note that the Python eval() function is not safe. A malicious user could inject anything into the function. However, this was the simplest way to use the path. A safer, alternative method would be to present the user with drop downs (similar to the drop downs in the driver panel).
Next, we set up the progress indicator. I am not a big fan of the progress indicator. It changes the cursor to show what iterations are complete. To me, it is not intuitive to the user. In addition, it is inconsistent. Sometimes it shows and sometimes it shows the OS spinning indicator. In the future, I would like to change this to a progress bar.
        wm = bpy.context.window_manager
        totalProgress = iterations
        wm.progress_begin(0,totalProgress)
Finally, we execute the loop. Each iteration, we:
- Update the render slot
- Change the property value
- Update the text
- Render the image
- Update the progress indicator
        for index in range(0,iterations):
            renderSlots.active_index = index

            # Change the setting - using exec is not safe
            currentValue = startingValue + incrementalValue*index

            exec(context.scene.render_settings_prop.target + "= " + str(currentValue))
            currText.data.body = bpy.context.scene.render_settings_prop.targetName + ": {:.2f}".format(currentValue)
            bpy.ops.render.render()
            wm.progress_update(index)
Clean Up
Finally, we clean up everything. We delete the text and end the progress indicator.
        # Delete the text
        bpy.ops.object.select_all(action="DESELECT")
        currText.select_set(True)
        bpy.context.view_layer.objects.active = currText
        bpy.ops.object.delete()
        wm.progress_end()
Conclusion
This script allows a user to render multiple versions with a changing setting. This is useful for finding just the right setting. There is definitely more we can do to improve this script. In future iterations, we plan to add more settings that we change (e.g., color), potentially allow us to change multiple settings at once, and add a better progress indicator.
