It is Christmas break for my children, which means finding ways to keep them busy. My oldest wanted to set up a Minecraft server so my two boys could play Minecraft together. I have set up a Minecraft server for my son before. However, this time, I decided to create the server using Amazon Web Services (AWS).
Bedrock or Java
The first decision when setting up a Minecraft server is whether to set up a Bedrock or Java version. In my case, the decision was easy. My son wanted a Java server. If your requirements are less specific, you may want to take a look at these links for a quick overview of the differences:
- Differences Between Minecraft: Bedrock Edition and Minecraft: Java Edition
- Minecraft Java Vs. Bedrock: Which version is best for you?
Setting Up Amazon Web Services EC2
With the version decided, the next step is to set up the server. If you do not have an AWS account, it is really easy to create one.

Setting up a server is easy. Once signed into AWS, search for the product “EC2”. EC2 stands for Elastic Compute Cloud. It is a service that lets you rent a virtual server for a period of time. You can create new virtual servers or delete servers in minutes. AWS EC2 is charged by the hour ranging from a fraction of a cent to several dollars per hour depending on the computing power. The specific type of server that we are creating should cost less than 10 cents an hour. I save on the cost by only running the server while my children are using it.
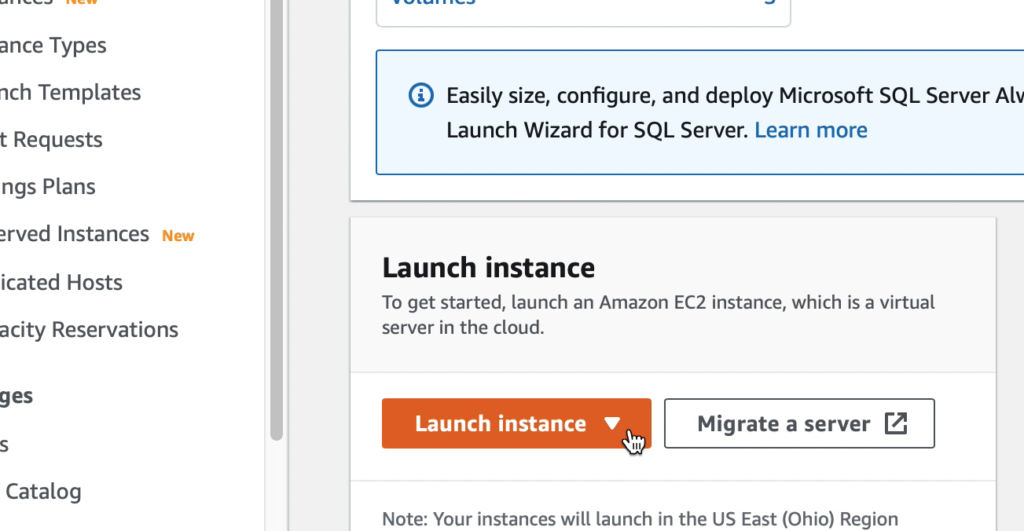
From the EC2 page, click “Launch Instance”.
Name the server, in my case “Minecraft” and select Ubuntu. The next step is selecting the instance type. The instance type determines the number of processors and memory (and cost). I initially tried t2.small, which should meet the minimum requirements for the server. However, when my sons played, it was laggy. Therefore, I changed to a t2.large, which has 2 vCPUs and 8 GB of memory. This instance worked much better than the t2.small. However, it is approximately $0.07/hour more expensive than the t2.small. Again, I conserve costs by only running the server when the boys are playing.
In order to access the server, we have to create a key pair, if you do not already have one. The key pair is a file that is like a password. You will download a file that you will use every time you access the server. Treat this file like a password. Anyone with this file can gain access to the server. In addition, don’t lose this file since you cannot access the server without it (if you do lose the file, you can terminate the instance from the AWS console and start over).
Next, you will set up the security group. The security group establishes who can access the server. You can start with the default, but add an inbound rule for SSH. This will open port 22 on the server to incoming traffic. We will use SSH to access the instance and set up the Minecraft server. For more details on creating access rules, see this link.

The default storage size is 8 GB. I increased to 16 GB, which slightly increases the cost, but I have found that the default Ubuntu takes up a majority of the 8 GB, and I wasn’t sure how much additional space we would need for Minecraft and the world files. With everything installed, my server is currently using 6.1 GB, so 8 GB may have been enough.
Finally, click “Launch Instance” and your server should start. You can check whether your server is running by clicking “Instances” on the left menu. You should now see your server listed and under instance state, you should see “Running” with a green checkmark. Click the instance ID, and it will take you to more details about your instance. Most importantly, we need the public IP address of the server. This will allow us to access the server. Note that this IP address is dynamic. Every time you stop and start the server, you may receive a new IP address.

With the IP address, you can access the server. On Mac/Linux, go to the terminal (Windows users can use the command line) and enter the following command from the same location as the key pair file that you downloaded when you set up the server:
ssh -i [keyfile_name.pem] ubuntu@[ip address]Replace keyfile_name with the name of your key file (no brackets) and replace ip address with your IP address (no brackets). For example, if your keyfile was named “my_key.pem” and your server’s public IP address was 1.1.1.1, you would enter the following:
ssh -i my_key.pem [email protected]If everything works correctly, it should now login to the server and show you the server command line.
Install Minecraft Server
Once your are connected to the server, you can begin installing Minecraft. The first step is to update the server using the following commands:
sudo apt update
sudo apt upgrade
Most likely, there will not be any updates since you just set up the server. However, whenever you run the server, you should run these commands to keep the server updated.
Next, we need to install Java. For this server, we will use OpenJDK. OpenJDK is the open source version of the Java Development Kit.
sudo apt install openjdk-17-jre-headlessTo run the server when we are not connected, we need to install screen. Screen allows you to run multiple terminal sessions in the background.
sudo apt install screenWe also need to open a port that allows the server to communicate with the players. There are two ways that you can do this. You can open a port through the AWS EC2 dashboard like you did for SSH above, or you can type the following command:
sudo ufw allow 25565This command opens port 25565 in the firewall.

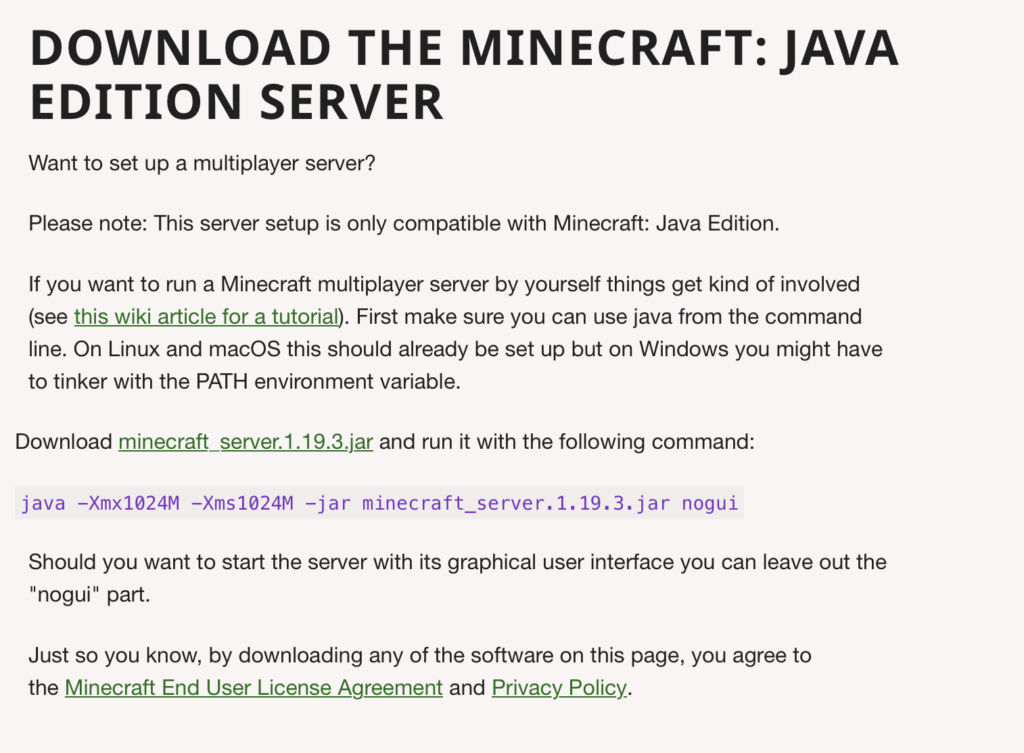
Finally, we are ready to install Minecraft itself. Get a link to the current version of Minecraft. Right click on the minecraft_server.jar and copy link. In my case, it is version 1.19.3.
I am going to create a new directory for the installation and then install the files.
mkdir minecraft
cd minecraft
wget [url]
Once the files are downloaded, you can run Minecraft.
sudo java -Xms2G -Xmx4G -jar server.jar noguiThe -Xms option sets the minimum Java heap size to 2GB and the -Xmx sets the max heap size to 4GB. -jar server.jar tells the Java runtime to run the server file, and nogui runs the server at the command line.
The first time you run Minecraft, it needs to perform initialization. Within the minecraft folder that we created, it will install a number of necessary files. Two of the necessary files are server.properties, which will allow us to customize the server, and a file called eula.txt, which is the End User License Agreement. Since both of these files are just being created, the initialization will give an error.
To fix the error, we just need to do two things. First, we need to accept the EULA.
sudo nano eula.txtChange eula=false to eula=true. Press ctrl-o to save the file and ctrl-x to exit.
The next file we need to edit is server.properties.
sudo nano server.propertiesThis file contains many properties that can customize the server. We are going to add a property. Create a new line and add:
enable-query=trueThis will allow us to check whether the server is running or not. This enables the GameSpy4 protocol. You can use several online websites as well as the MCStatus API to test the server.
Now you can run the server again.
screen
sudo java -Xms2G -Xmx4G -jar server.jar nogui
Once the server is running, you can press Ctrl-a-d. This will return to you the command line, but it will keep the server running. You can type:
screen -listThis will show you the running sessions. Note the number to the left of each session. This is the process number. You can reconnect to a session at any time by typing:
screen -r [process number]You can join the server in Minecraft by selecting Multiplayer and typing in the IP address of the server.
Running the Minecraft Server on Startup
The steps above are sufficient for running the server. However, I wanted to add one additional step. I wanted the server to start every time I start the instance. To do this, I needed to create a systemd unit file.
Start by creating a user that will run the server. This provides security to the server, limiting what the server has access to.
sudo useradd minecraft
sudo passwd username
Next, create a systemd unit.
cd /etc/systemd/system/
touch mc_service.service
sudo nano mc_service.service
I used the following file.
[Unit]
Description=Minecraft server
Wants=network.target
After=local-fs.target network.target

[Service]
User=minecraft
Group=minecraft
UMask=0027

KillMode=none
SuccessExitStatus= 0 1 255

NoNewPrivileges=true
PrivateDevices=true
PrivateTmp=true
ProtectSystem=full

WorkingDirectory=~
ExecStart=/usr/bin/java -Xms2G -Xmx4G -jar server.jar nogui

[Install]
WantedBy=multi-user.target
Once we have the file, we need to test it and install it. To test it, try starting the service.
sudo systemctl start mc_serviceTo check whether it is running, we run systemctl again and search for mc_service using grep.
sudo systemctl list-units | grep mc_serviceIf everything works, then we can enable the service for boot.
sudo systemctl enable mc_serviceNow we can reboot the server and then try connecting to the Minecraft server.
sudo rebootConclusion
That’s it. Those are the only steps you need to set up a Minecraft server on AWS. The next step, and a future blog post, will be to create a way to start and stop the server. That way my boys can start the server when they want to play. I also want it to alert me when it is running for a certain period of time to help keep the cost lower.


