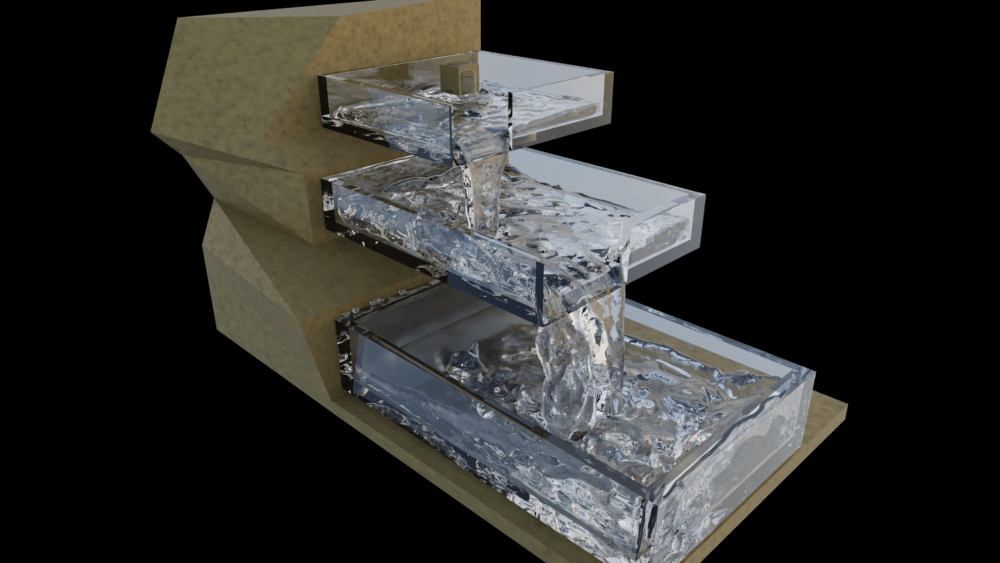
Based on our work with Blender fluid simulation. We decided to make a calm water simulation. Creating the models took a short time. Baking the simulation took several hours, and rendering in 4K took days. Despite the time it took to create, I am happy with the final result. If you are interested in recreating, we walk through the steps below. If you want to skip the process of creating and just play with the simulation, scroll to the bottom of this post to download the blend file.
Create the Water Levels
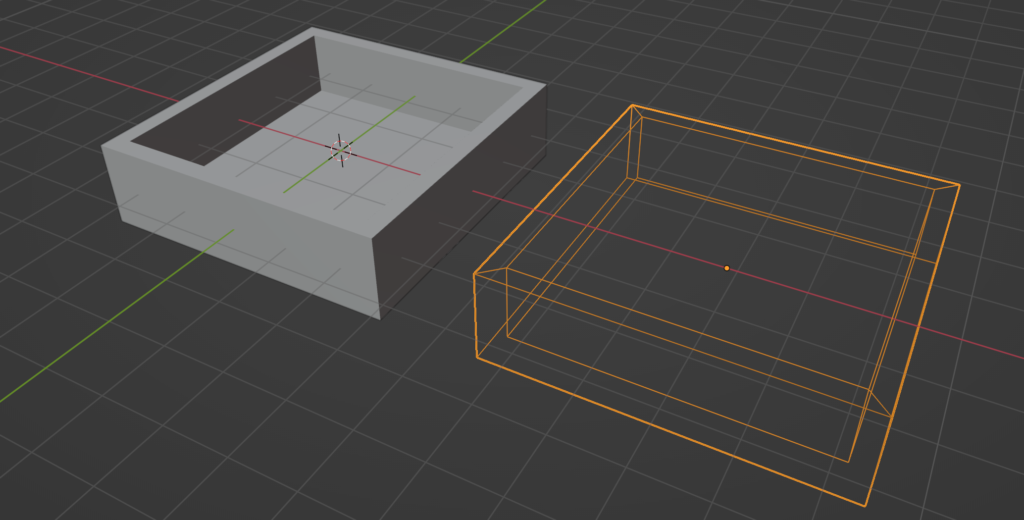
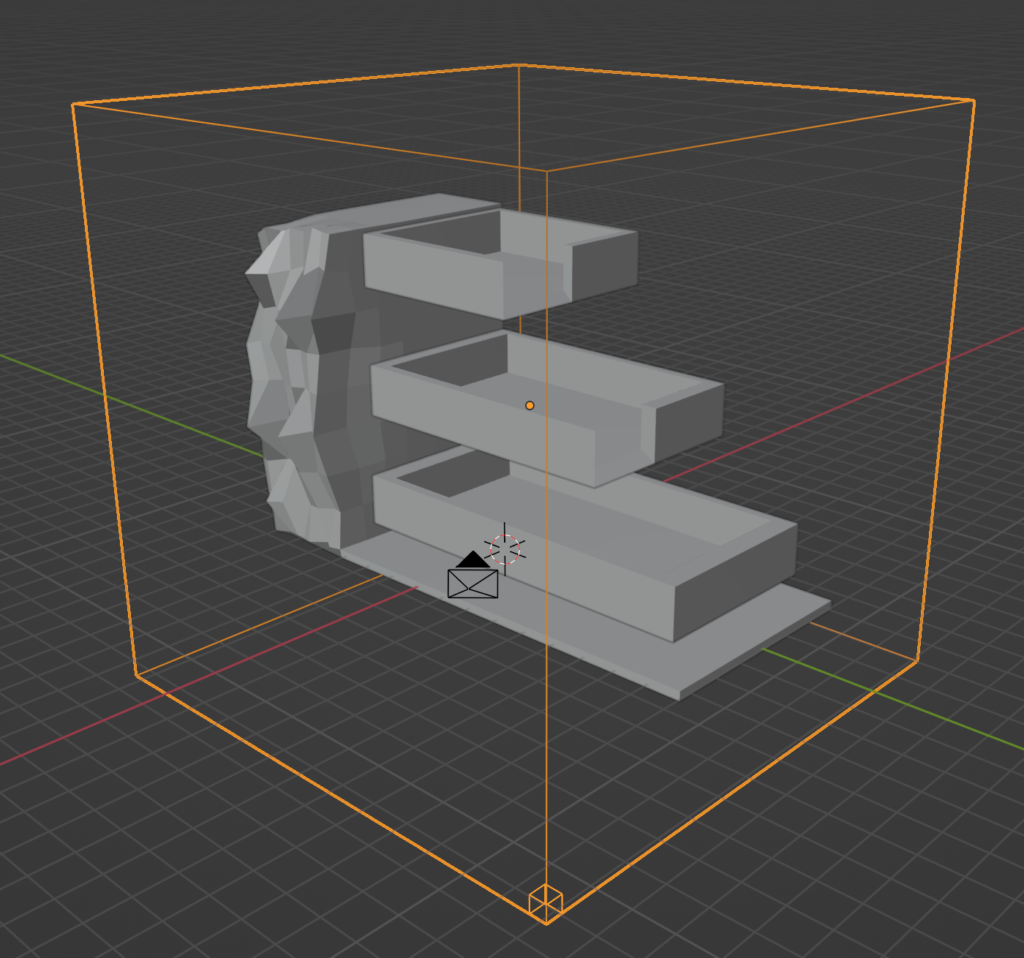
We started by creating the containers or water levels that will hold the falling water. We wanted the boxes to be glass so the viewer could easily see the water splashing around inside.
Modeling the Box
To create the boxes, we use the default cube. We scaled it larger to create a larger base in the X and Y directions (s). Then we scaled it down in the z direction (s + z).
Next, we are going to extrude to create the box shape. Change to edit mode (tab), switch to the top view (numpad 7) and select the top four vertices. Next, press e to extrude and then s to scale the extrude along the top plane of the model. Switch to side view (numpad 1 or numpad 3). For this next part, I like to use wireframe mode (z + 4). Press e to extrude and z to constrain to the z direction. Now you should have the basic shape of the box.
Creating the Shader
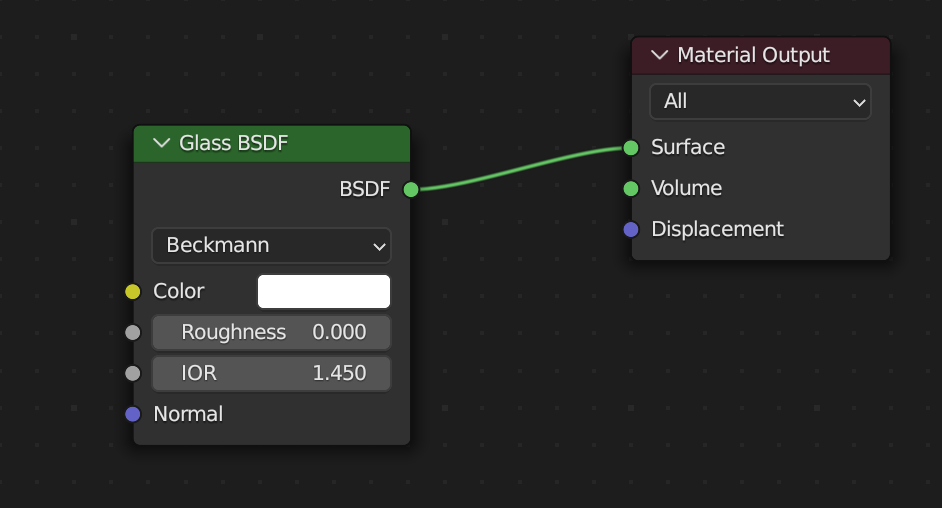
Now, we will add the shader. In this case, the shader is very basic. Switch to Shading and delete the Principled BSDF shader. Add the glass shader (shift + a, Shader->Glass BSDF). Connect the output of the glass shader to Surface on the material output.
You can get fancy with the glass, but I left with the basic settings.
Add a World Shader
The glass shader does not work well with the Eevee engine. Therefore, I changed the render engine to Cycles. Before I test render the box, I also like to add HDRI lighting.
My favorite site for HDRIs is Poly Haven. Their collection of HDRIs is amazing. Definitely worth supporting.
In the Shading tab, switch from Object to World and add an environment texture. Since I want just a black background and not the HDRI in the background, I add a light path node and a mix node.
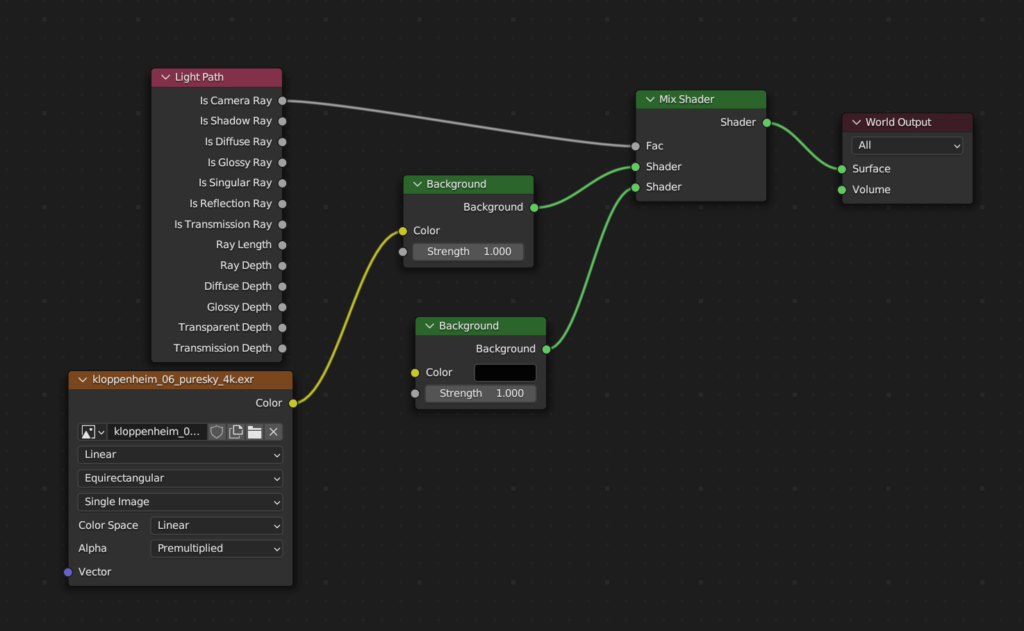
I frequently forget to add my texture file in the environment texture node. If when you render, you see a lot of pink in the render, it probably means you have a missing texture file.
Go ahead and do a test render to make sure that everything looks ok.
Duplicate
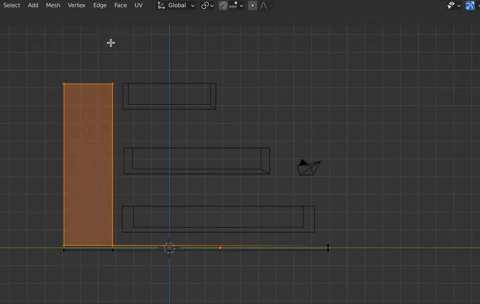
Once you are satisfied with the box, duplicate twice. Rename each one so we can keep track. We are going to scale the boxes so they are slightly overlapping with the bottom cube being the longest.
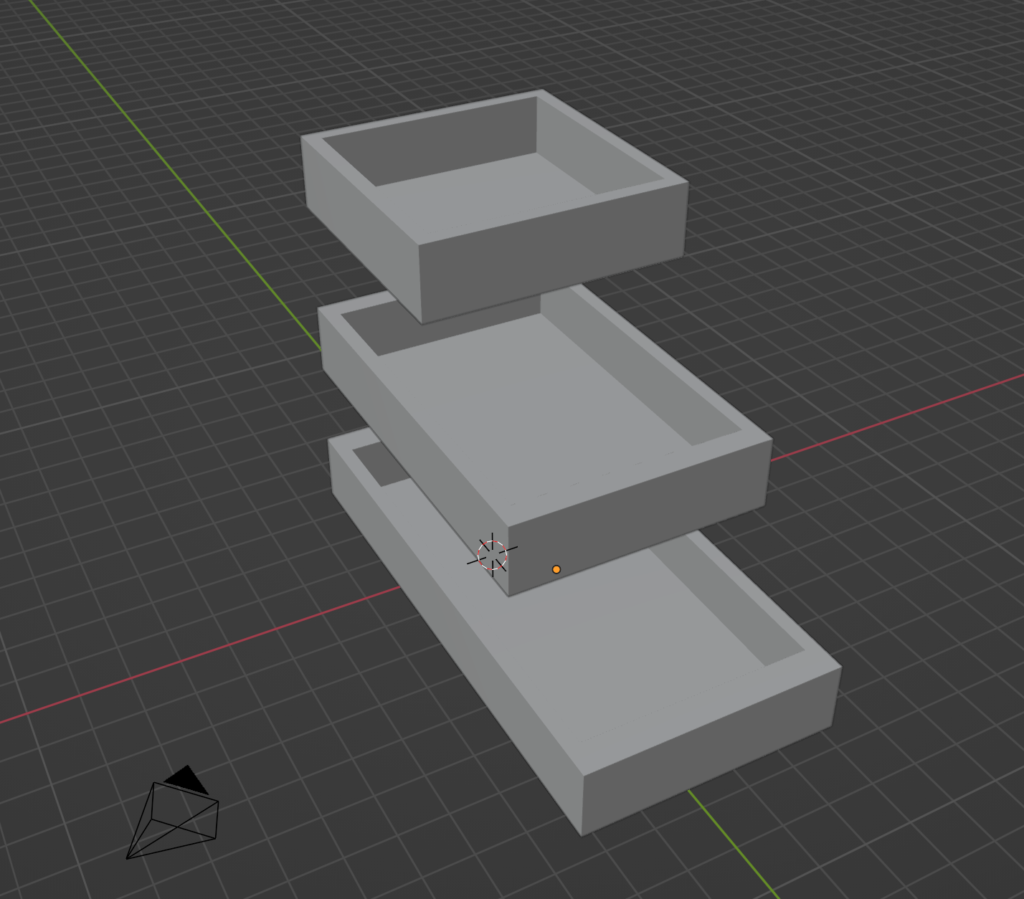
After you finish scaling each, we are going to apply the scale (ctrl+a, apply all transformations). This step is important for the simulation. It doesn’t matter that much if you uniformly scale in all directions. However, if the scale is not uniform (in our case, the y is greater than the x scale), the simulation may not end with the correct results.

Cut the Openings
Once we have the boxes arranged, we will now cut the opening in each box. We are going to make a loop cut in the middle of the box. You will want to be in wireframe mode for this.
To make a loop cut, press Ctrl + r. You should see a yellow loop appear that shows where the loop cut will occur. Click once to select the direction and then you can adjust the location left and right. We want the cut to be slightly left of center. Click again to make the cut. Keep in mind, we can always adjust this cut by selecting the cut vertices and using the grab tool to move.
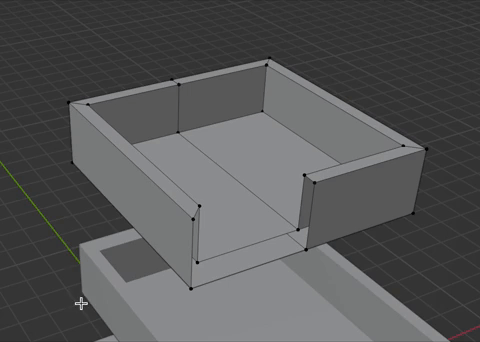
Next, we will switch back to solid view (z + 6). We are going to delete faces. Switch to face select. Select the first face and press x and delete face. Do the same with the other faces to create the opening.
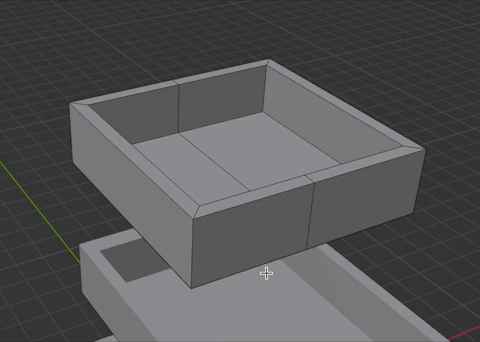
Now we will add new faces. Select 4 connected vertices and press f to create a face. Do the same with the remaining vertices. However, make sure to deselect all vertices before you select another group of four. Otherwise, you will end up with some weird faces.
Now do the same with the remaining boxes. We probably could have done this before we duplicated.
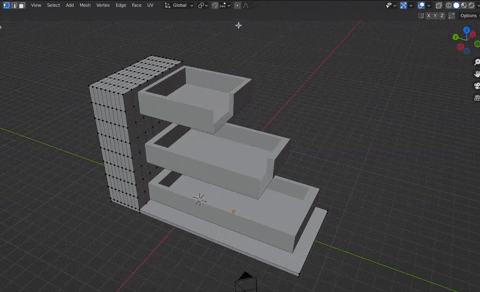
Create the Base
Next, we will make the base structure. I wanted to make something that looks rocky. Add a cube to the scene (shift+a, Mesh->Cube). Flatten to create the part that goes under the bottom box and scale in the X and Y directions to make it slightly larger than the box.
Extrude to one side to make the larger part of the structure. In edit mode, select the four vertices for the larger structure and subdivide (Edge->Subdivide). I subdivided 3 times.
Enable the proportional editing and select random. Move the vertices. You can change the area of effect for the proportional editing by scrolling the mouse wheel. Once you are happy with the rough placement, you can switch proportional editing to another option (e.g., smooth or sphere), to fine tune placement.
Add the Material
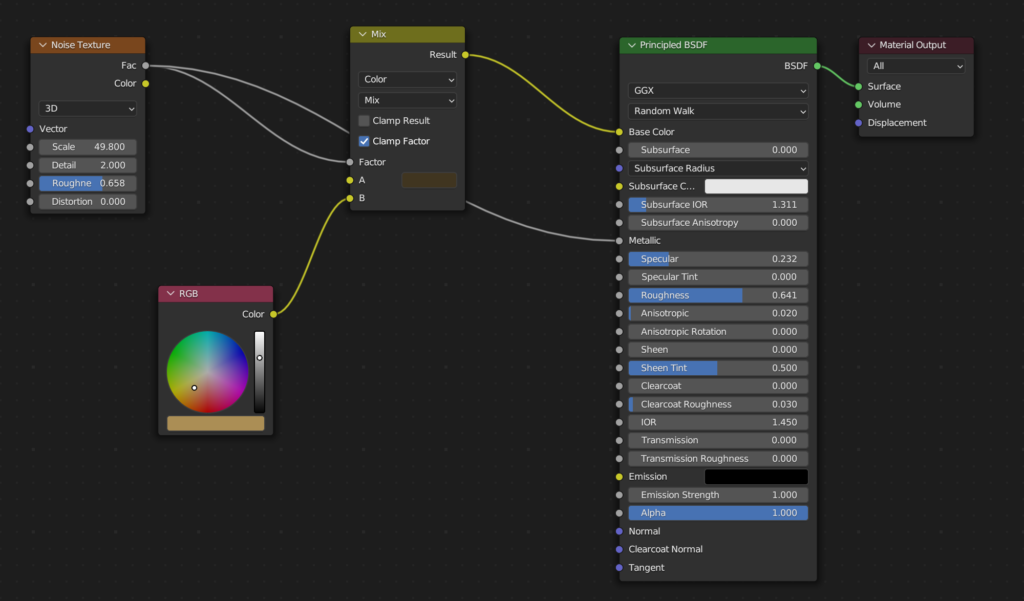
Now we will add the texture. Keep the principled BSDF and add a noise texture (shift + a, Texture->Noise Texture), RGB node (shift + a, Input->RGB), and a color mix node (shift + a, color->mix color).
Connect the factor output of the noise texture into the factor input of the mix color node and to the metallic node of the principled BSDF. The noise texture will both determine which color to use and how metallic the material should be. Our lighter color will be more metallic than our darker color.
With our RGB node, I selected a light tan color. I connected the output from the RGB node to input B of the mix color node. For input A, I selected a dark brown. I could have just selected both colors in the mix color node. However, when I initially created, I wasn’t sure if I would want to use the tan color for other purposes. In the mix color node, click the Clamp Factor box. This will ensure the input is between 0 and 1 (probably not necessary here since we are only using a noise texture).
Now, we want to adjust the noise settings. I significantly increased the scale to 49 or 50. This made the dark spots of the material much smaller. I also increased the roughness to around 0.65. Below is a screenshot of my final settings.
Blender Fluid Simulation
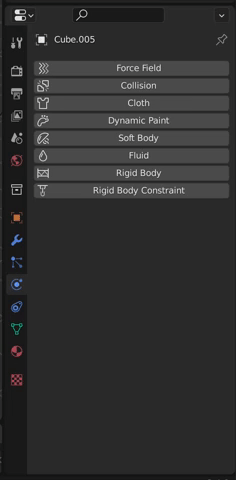
The final step in the process (and the longest part) is to create the fluid simulation. We start by changing the base and the boxes to Effectors (click the Physics tab in the property viewer on the right and select Fluid->Effector). Now, we are going to add four objects: the domain, inflow, two outflow objects.
The Fluid Domain
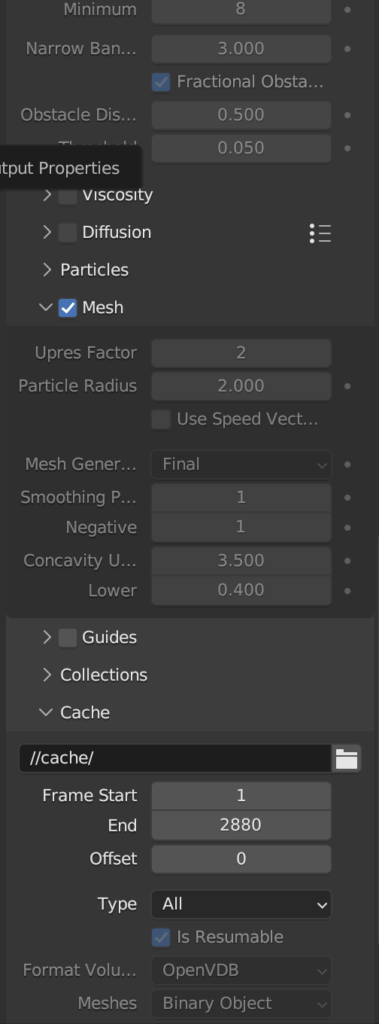
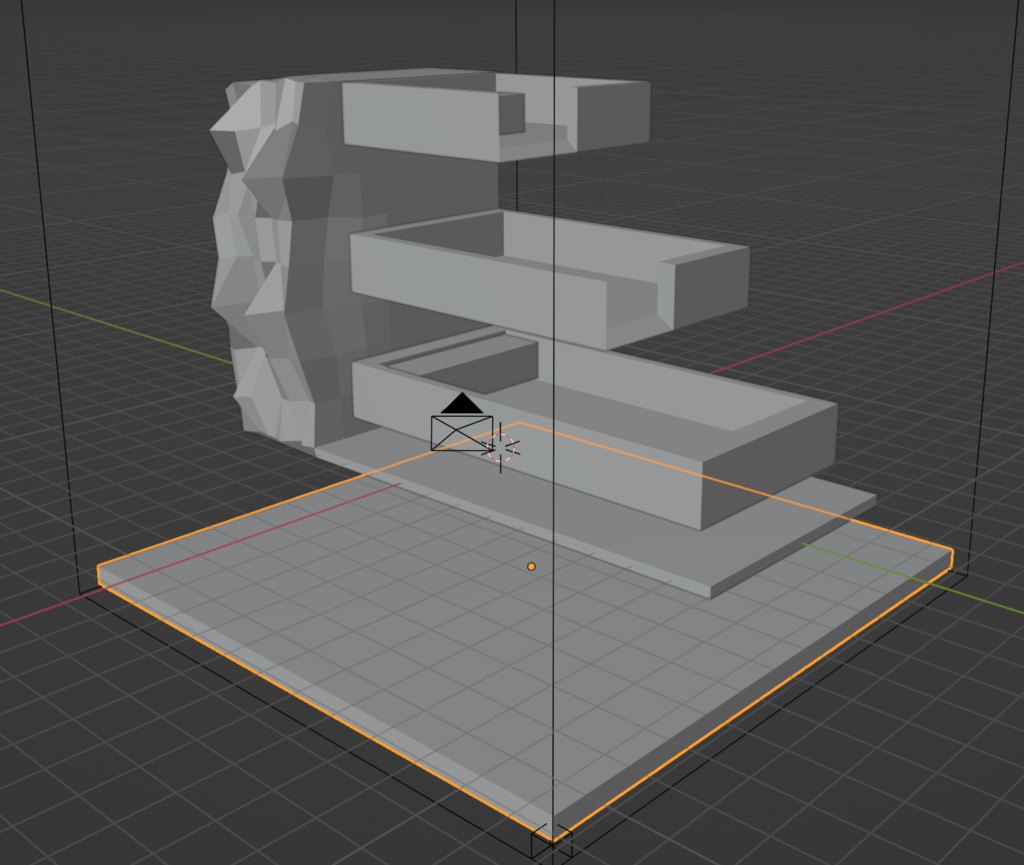
First, add a cube (shift + a, Mesh->Cube) and scale it up to cover all of our models (s). This cube will be our domain. The side of the domain shows the volume in which the simulation calculations will occur. Anything outside of the domain box will not affect the simulation. From the property panel, select Physics->Fluid->Domain.
There are a few settings that we need to select. Change the Domain Type to Liquid and the Resolution to 64. For our final simulation, we will change it to at least 128, but for now, we want the simulation to calculate quickly. Scroll down and click the mesh checkbox and, in cache, change the type to All and click “Is Resumable”. This will allow us to pause the baking early and ensure that the results are as expected before we bake the whole simulation.

To give the mesh the “watery” look, we will use a glass shader. Go to the Shading tab and from the dropdown, select the glass shader we used for the water level boxes.
Inflow
Next, we are going to add the liquid inflow. Add another cube (shift + a, Mesh->cube) and scale it down. Place it in the top box. Initially, I wanted this cube outside of the camera frame. However, the inflowing water splashed everywhere, so I decided to make it more like a fountain. I set the material of this cube to the same as the rocky base. Set this cube to inflow by selecting Physics->Fluid->Flow. Change Flow Type to Liquid and Flow Behavior to Inflow.
Outflow
Once we have the inflow, we need to add an outflow. Otherwise, the water would overflow the bottom container. We will add another cube (shift + a, Mesh->Cube). We will move this to the bottom box and scale the width and height to match the bottom box. The length will be approximately 10% of the bottom box.
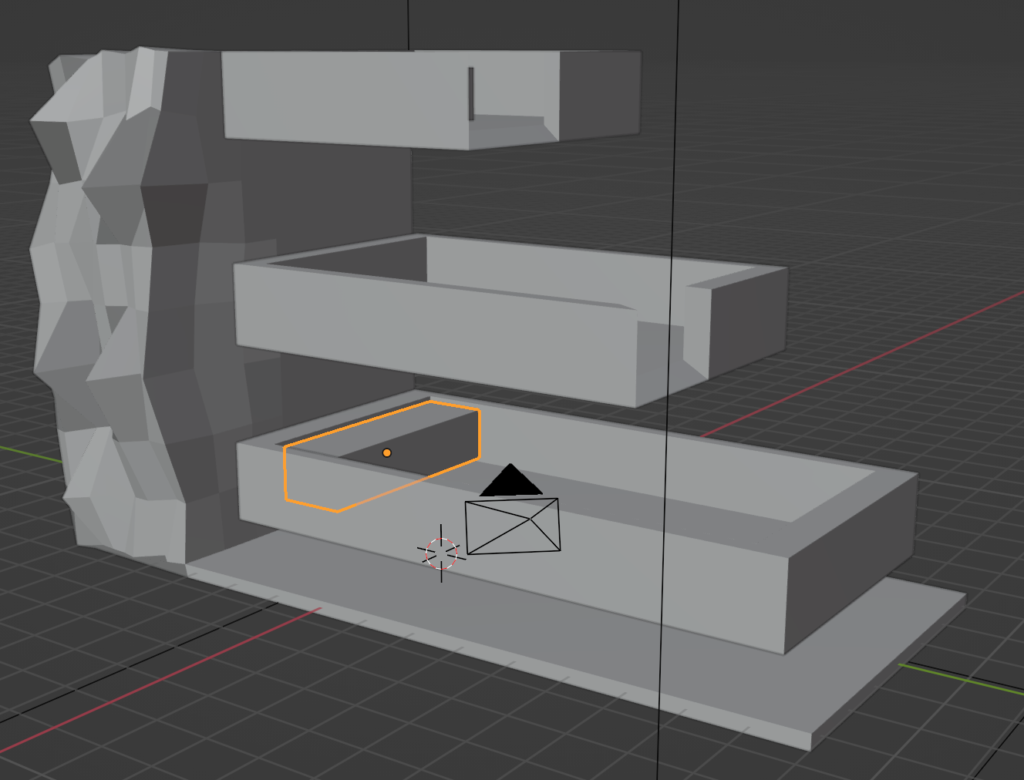
We will turn this to an outflow. Select Physics->Fluid->Flow from the properties panel. Set the flow type to Liquid and the Flow Behavior to Outflow.
Next, we will set the material. Go to the Shading tab and create a new material. Delete the Principled BSDF node (x). Add a glass shader (Shift + A, Shader->Glass BSDF). Connect the BSDF output to the Surface input of the Material node. To give it a frosted look, increase the roughness to 0.9.
Domain Outflow
The final piece for the fluid simulation is an outflow at the very bottom to capture drops of water that splash out. We don’t want any stray water rolling around the bottom of the fluid domain.
Add a cube and scale to the size of the bottom of the domain. Scale the cube in the z direction to flatten (s + z).
We don’t want this outflow to be seen, so we will add a transparent material. Switch to the shader tab and add a new material. Delete the Principled BSDF and add a transparent shader (shift + a, Shader->Transparent BSDF).
Let’s Bake
Now we Bake. Select the Fluid Domain and in the Physics properties scroll down to the cache and click Bake. Settle in because we will need to do this a few times. Depending on the speed of your computer, it may bake quickly or slowly. At any time, you can press esc and take a look at the current bake. Since we selected the resumable option, if everything looks ok, we can press bake again to continue the bake.
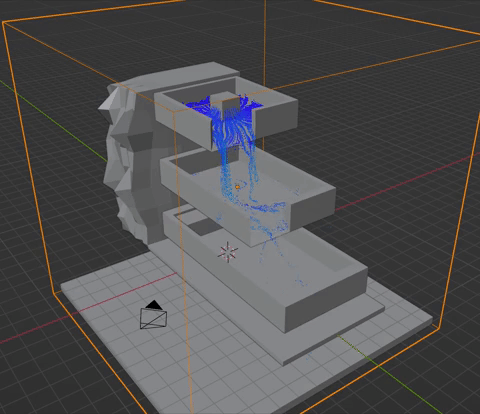
This process will require minor adjustments to get the right look. I had to modify the lengths of each box to ensure the water flowed properly across all three. You can increase the amount of water by increasing the inflow cube. If the bottom level is overflowing, you may need to increase the outflow cube. You may also have to increase the resolution of the simulation in the domain settings. However, this will increase the amount of time it takes to simulate and the size of the simulation file.
Conclusion
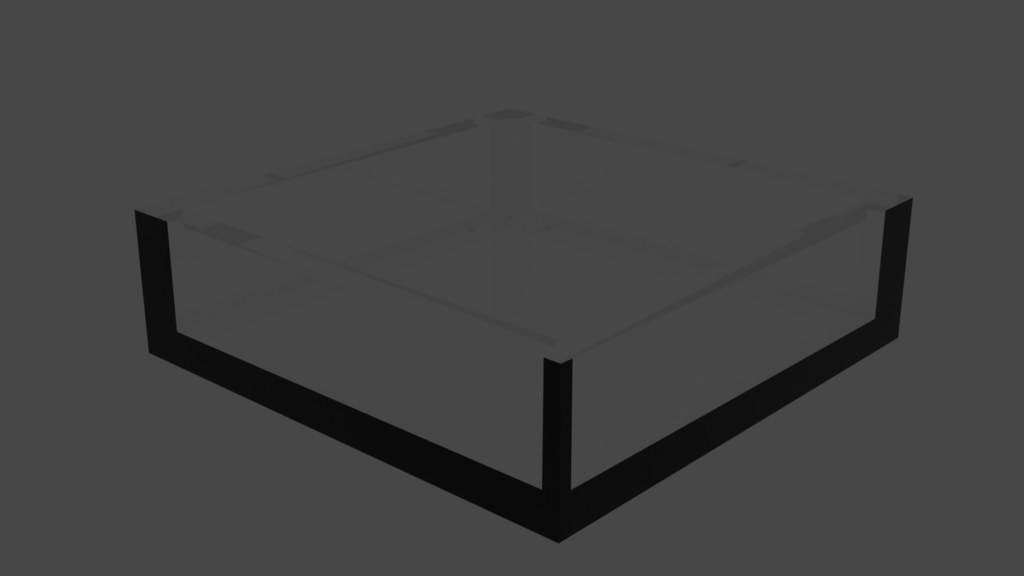
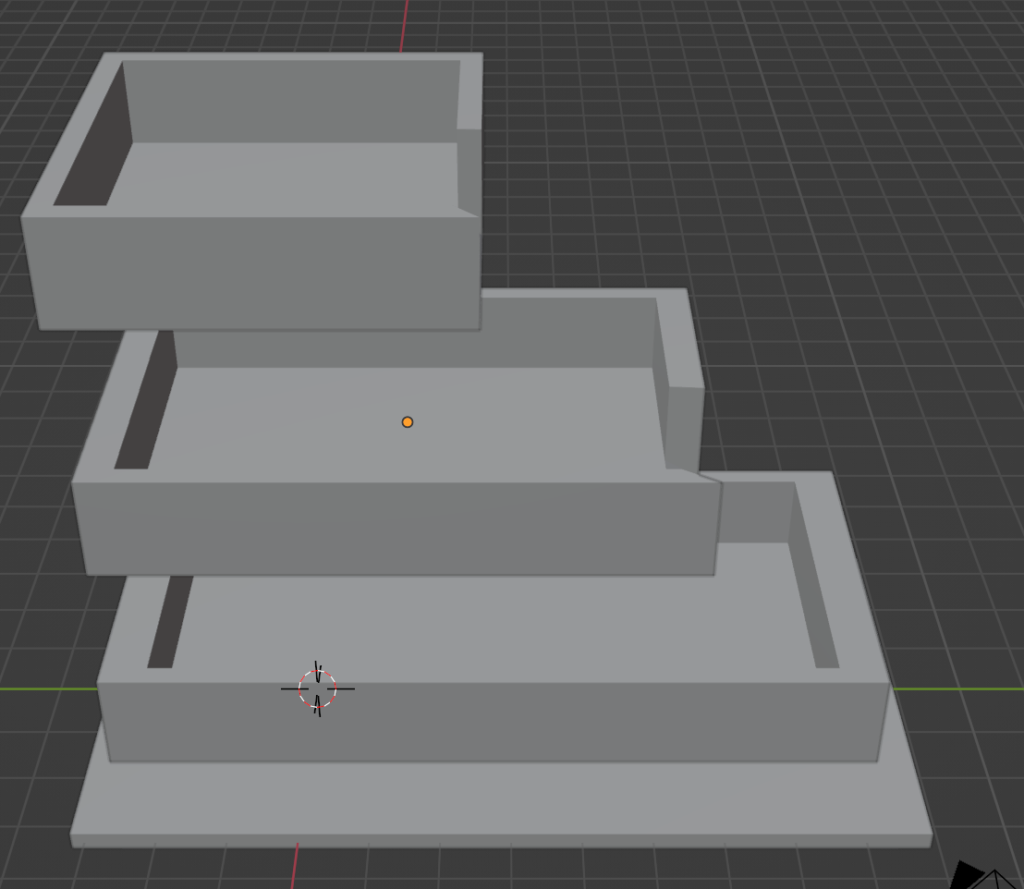
Here is the final render:
Now that we have our simulation, you can sit back and enjoy. If there is a simulation that you would like to see, feel free to drop it in the comments.