

Playing with water is fun, creating a Blender water simulation is even more fun. Every so often, I get the urge to play with water in Blender. However, every time I return to the water simulation, I always forget how to make it. This is a quick tutorial on setting up a basic water simulation in Blender 3.4.
What is the Blender Water Simulation?
The current Blender water (as well as fire and smoke) simulator is based on the open source Mantaflow simulator. Mantaflow was integrated into Blender version 2.82 through a Google Summer of Code Project. It was a significant improvement over the previous simulator. Without getting too technical, Mantaflow is a FLIP solver, which combines both particle and volume.
Blender Simulation Basics
For our scene, we are going to use three components:
- Domain: This is a volume in which the simulation will take place. We will use a simple cube for this volume.
- Flow: This is an object that controls the flow of liquid into the scene. We will use an ecosphere.
- Effector: This is an object that will interact with the water.
Mantaflow uses a concept called voxels, which is basically like a pixel, but in 3D space instead of 2D space. When we talk about resolution later, it is referring to the size of the voxel. Low resolution is like a pixelated image, using large voxels, while a high resolution is a much better image (but takes much more time to simulate).
Getting Started: Setting up the Scene
To get started, we will add our basic meshes to the scene. We will use a cube for the domain, a cube for the effector, and an icosphere for the flow.
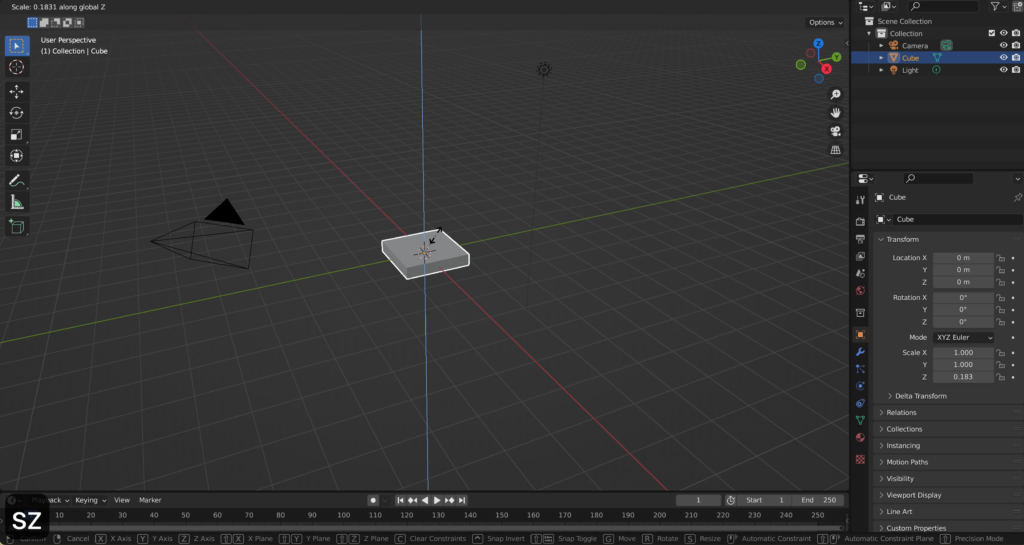
First, with the default cube selected, press s followed by z to scale the cube in the z direction this will make the effector.
Next, let’s add an ecosphere. Press shift+a and select mesh->Ico Sphere to add an icosphere. This will be the object from which the liquid flows.

Lastly, press shift+a and select mesh->Cube to add a cube. This cube will be the domain. Scale the cube so it is larger than the effector and the icosphere (press s to scale). You can press z+4 to change to wireframe view so you can see all of the objects.
Creating the Fluid Domain
Next, we will create the fluid domain. Click on the domain cube. Select Physics->Fluid from the menu on the right. From the Type drop-down, click on Domain. Change the Domain type to liquid. Note the resolution field. This field controls the quality of the simulation, but also significantly impacts the simulation time. A higher resolution results in smaller voxels (or units of the liquid simulation). The size of the voxels are represented by the little cube in the bottom corner of our domain cube. If you change the resolution to 64, you will notice that the little cube becomes half the size. Change this value back to 32 for now so the simulation calculates faster.
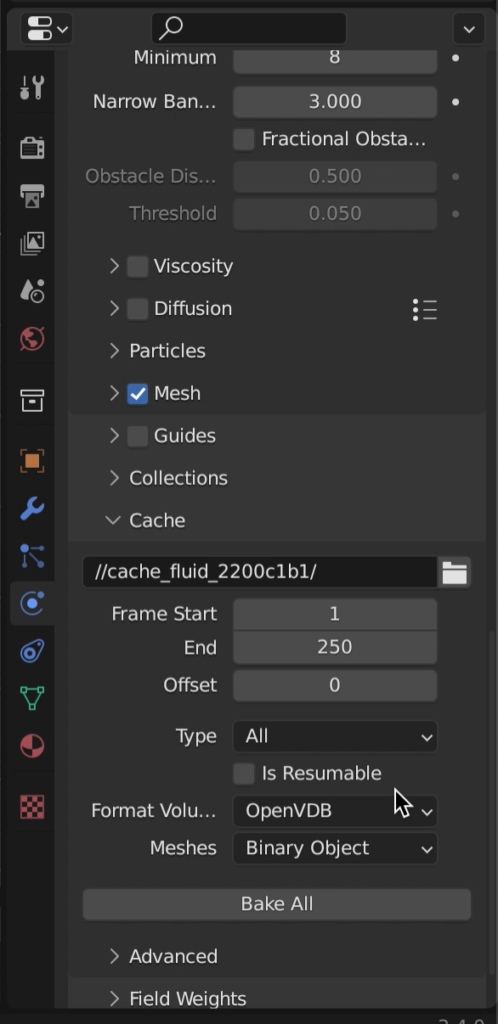
Scroll down and click the Mesh checkbox. This will make the liquid simulation a mesh.
The last setting we will change in the domain is the most important. I always forget this step. Change Cache Type from Replay to All. This enables the Bake All button that will allow us to bake the simulation.

Check out the Blender manual for additional information on the other domain settings.
Adding the Fluid Flow
Next we will add the fluid flow. Select the icosphere. In the physics panel on the right, click on Fluid and then select “Flow” as the Type and “Liquid” for the Flow Type.
For Flow Behavior, select “Inflow”. Inflow creates a constant stream of liquid. The size of the icosphere will determine how much liquid is flowing. For a small drizzle of liquid, you would scale the icosphere down. If you want to fill the domain with liquid, scale the icosphere larger.
The alternative to Inflow is Geometry. If you just wanted a splash, you could select Geometry. Geometry would start the liquid in the shape of the icosphere.
We will take a quick look at the simulation to this point. Click the Domain again and Bake All in Cache. The simulation will iterate through each frame calculating the liquid in that position. When the baking is done, you can run the animation. The liquid will flow from the icosphere into the shape of the domain. As you can see, the domain limits where the liquid can flow.
Adding the Effector
Now that we have liquid, let’s add the effector. Select the effector cube that we started with. Click physics and then fluid. Change the Type to Effector.
Now rerun the simulation by clicking on the domain. Scroll down to Cache and click Free All. This releases the previous bake. Click Bake All and then run the animation.
If we render the result, we get something that looks like the image below.
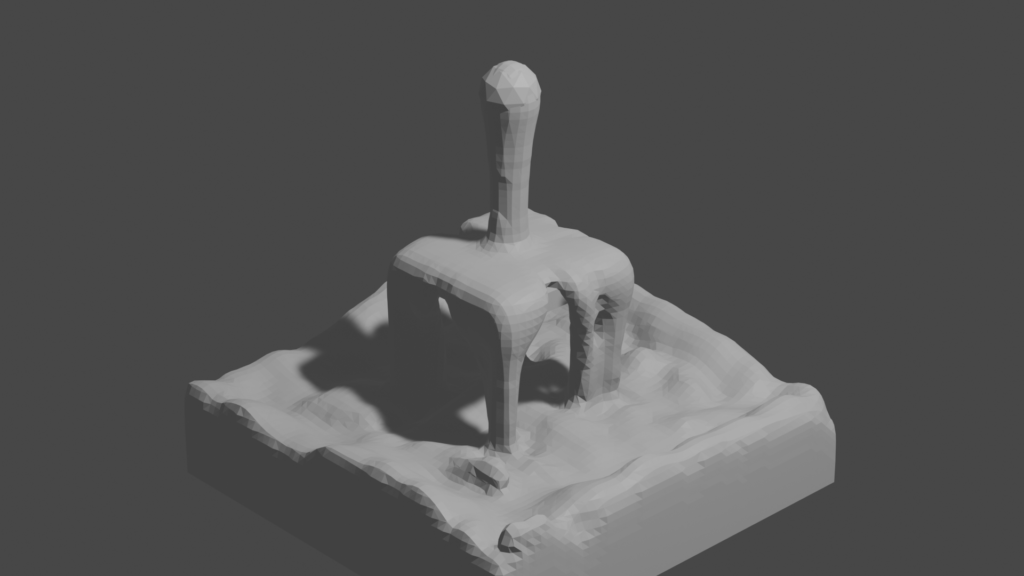
The liquid looks good but blocky. We can fix that by adding a Subdivision Surface modifier to the domain.

Create the Materials
The last step is to add the materials. This is not necessary for our basic simulation, but more fun.
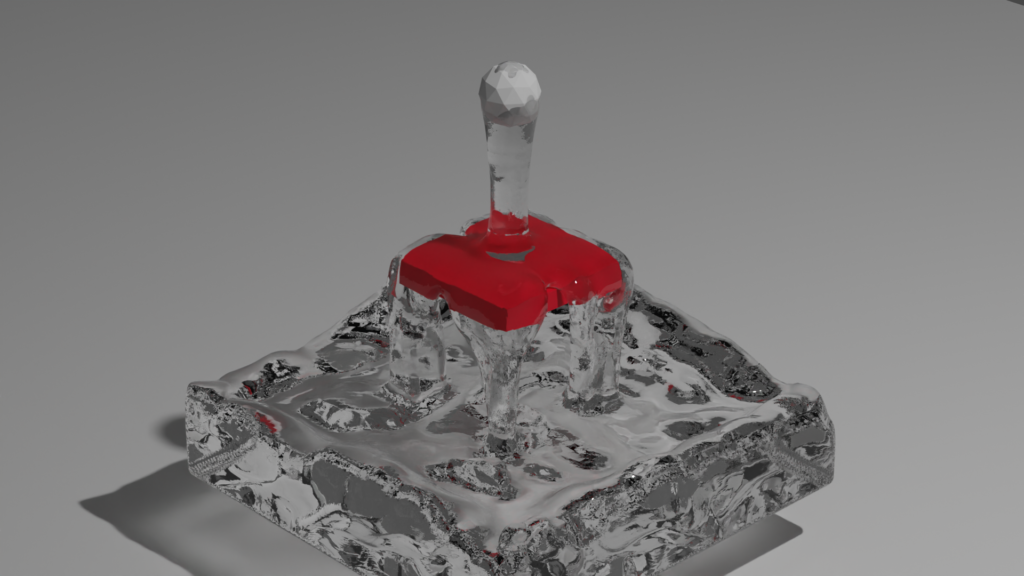
For the liquid, I wanted to make something that looks like water. I will use a glass material. Click on Shading and click New Material. Delete the Principled BSDF node. Click Shift-A->Shader->Glass BSDF and connect the BSDF output to Surface on the Material Output.

For the Effector, I used the default Principled BSDF shader and changed the color to red to make it stand out.
Render again, and you will notice that it looks terrible. Go to the scene panel on the right and change from Eevee to Cycles. I don’t know why, but the glass shader does not work well in Eevee. Trying rendering again. For the image below, I added a plane with a plain white Principled BSDF shader.
Conclusion
The steps above show how to create a basic fluid simulation in Blender. With this process, we can create some fun animations using different types of effectors.
If you enjoyed this post, consider subscribing to the newsletter where I share work-in-progress updates, upcoming tutorials, and the occasional behind-the-scenes look at what I’m building.
One Comment