

Today, we are focusing on driving animation through Blender Drivers. This post provides an overview of drivers, how to set up a driver, and some more complex uses.
Blender animation tools provide incredible flexibility and power. In our last post, we talked about keyframes. Today, we will cover drivers. Most Blender animators focus on keyframes. However, keyframes are not the only way to animate. Drivers provide a powerful alternative tool. Drivers can be applied to any property that can be animated and are particularly valuable for repetitive action (think cyclical) or action that is based on another property.
In this post, we will cover:
- What is a Blender Driver?
- Creating our First Blender Driver
- The Math Behind Cyclical Movement
- Bigger Movement
- The Wheels on the Car Go Round and Round
What are Blender Drivers?
Drivers allow you to “control the value of a property through a function or mathematical expression.” They take their name from the fact that you are driving a property through some set of input values.
As a simple example, imagine you have a cube and an empty. You may decide that you want to use the empty’s Y values to drive the cube’s Z values. You can create a driver in the cube’s Z values and assign the empty Y values as the target. The result looks like the following.
This is definitely a simple example. We will show how to create this, and then we will create a more complicated version.
Creating our First Blender Driver
Before we create the driver, let’s set up our scene. Start with the default cube, and add an empty.
Creating a driver is easy. Almost any property can have a driver. With the empty selected, right click on the empty y location and select “Copy as New Driver”.
Select the cube and right click on the z location. Click “Paste Driver”. Notice that the background color of the property changes to purple so you know there is a driver. Now you can move the empty in the Y direction, and the cube will move up and down.
Animating Blender Drivers Based on the Current Frame
This is a great starting point, but often we want something more complicated. In particular, I like to use drivers when we need cyclical motion. We are going to add a simple expression to give us the cyclical motion.
Select the empty and right click on the location Y property. Click “Edit Driver”. The Driver Property Window will pop up. Note that if you click anywhere outside of the window, the window will disappear. You can get back to it by right clicking the property again and select “Edit Driver”. Alternatively, you can click the “Open Drivers Editor” and you will get a dialog box that doesn’t disappear as easily.
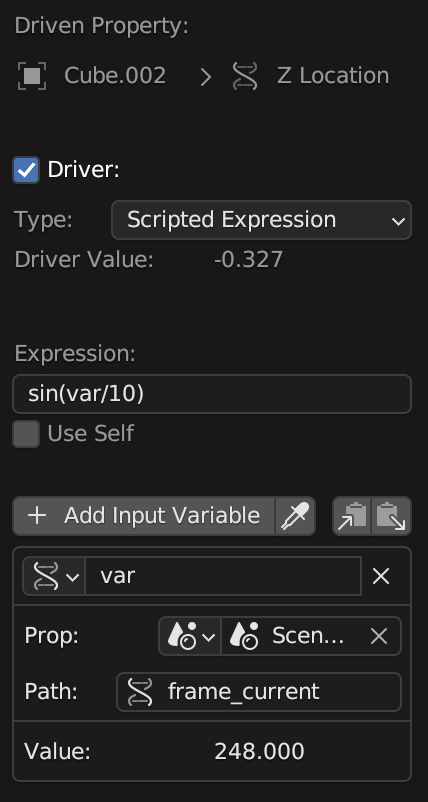
- Change the type to “Scripted Expression”.
- In the expression, type sin(var). This will use a sine function to determine the z position.
- Toward the bottom of the panel, there is a section for variables. This is where we set our target property. We can use almost any property in Blender. In our case, we want to use the current frame number.
- Select the drop down that looks like (x) and select single property. It looks like a RNA strand because it is referencing the fact that data passed within Blender is called RNA.
- For the property ID type, select “Scene”.
- In the empty box to the right of Scene, select Scene again.
- Type “frame_current” without the quotes in the path. If you prefer not to type, you can right click on the current frame number at the bottom of the window and select “Copy Data Path”.
Your panel should look like this.
- Press play on the timeline.
The box should jump up and down very quickly. If we want to slow the animation, we need to change the expression from sin(var) to sin(var/10).
The Math Behind Cyclical Movement
If you are interested in the underlying math, read this section. If you don’t care about the math (or you are a math wizard), jump past this section.
The sine function is a basic math function. The output of the sine function ranges from -1 to 1. For our purposes, the benefit of the sine function is that it repeats.
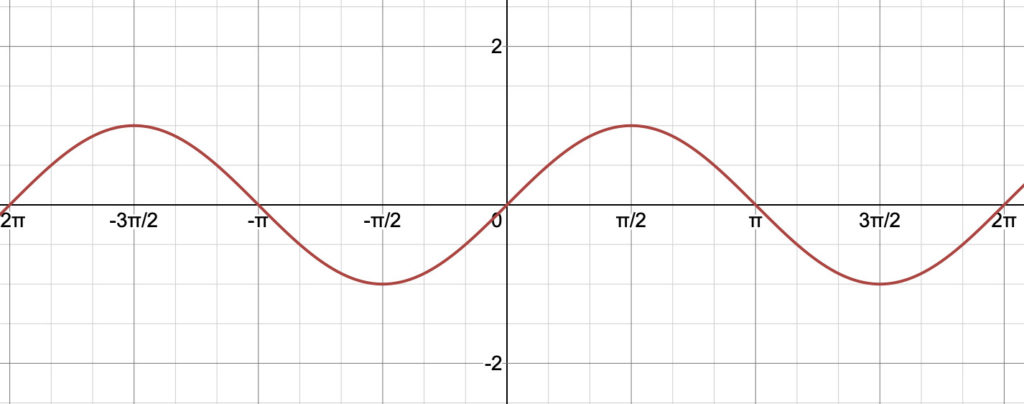
The sine wave repeats for every 2*𝛑. 𝛑 is the mathematical constant that is equivalent to approximately 3.1415.
With this information, if we wanted our cube to complete a full cycle every second, we would need the input to the sine function to cycle through 2*𝛑 in 24 frames (our framerate). Therefore, we would divide our current frame by 24 and multiply by 2*𝛑. If, like above, our current frame is in the variable frame, we would type the following equation.
sin(frame/24*2*pi)
Note that the input to the sine function in Python is in radians. If you work better using degrees, just remember that 2*𝛑 = 360 degrees.
What if we want a bigger movement?
With the equation sin(var/10), the cube moves between z=-1 and z=1. What if we want the cube to move farther? In that case, we simply need to multiply our equation by however far we want the cube to move. For example, if we wanted to double the movement, we would write:
2*sin(var/10)
Now the cube will move between -2 and 2.
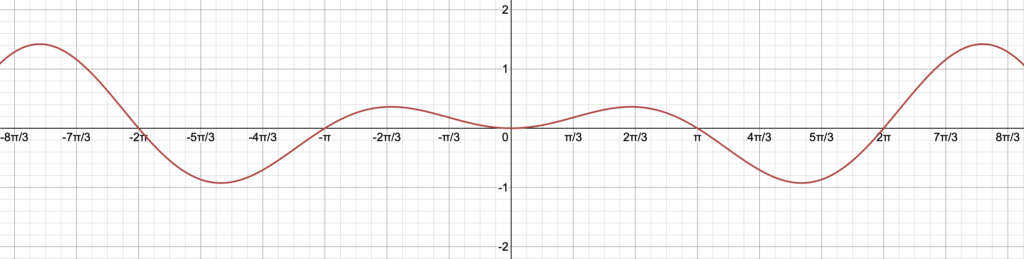
We can make the movement more complex by multiplying sine waves together (or any math operation). For example:
sin(frame)*2*sin(frame/10)
When creating driver motion, sometimes I like to use a graphing calculator to visualize the movement. The graph of the equation above looks like this:
The Wheels on the Car Go Round and Round
One of my favorite uses of drivers is to rotate wheels on a moving vehicle. This allows me to move the vehicle and the driver takes care of the wheels.
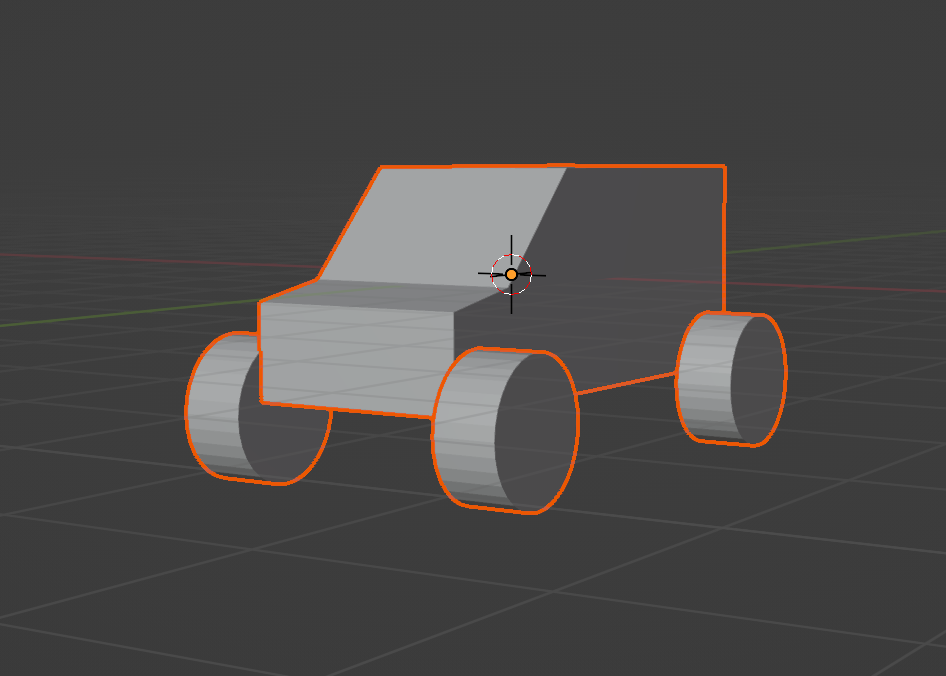
To cover the concept, we are going to start with a simple scene. We will use a cube as the car, and a cylinder as the wheel.
Creating the Scene
With the default cube, stretch it so it looks like a rectangular bus. I added two loop cut (ctrl + r in edit mode) and adjusted the top left vertices to make a windshield. This is not necessary for the driver steps, but I wanted a “car” look.
Next add a cylinder. Scale it and move it so it looks like a wheel on the bus. Duplicate for the other wheels. We need to apply the transformations on all objects. Select all objects and press Ctrl + a and select all transforms. This is important since we scaled the cube in a non-uniform way.
Now we need to move the origin to the center of mass. This will ensure that the wheels rotate around the center of mass. Select all objects and click Object->Set Origin->Origin to Center of Mass (Volume).
Parenting the Wheels to the Body
Next, select each wheel and then the body (order of selection matters). Press ctrl+p and select “keep transform” to parent the wheel to the body.
Our default scene looks like this.
The Math of a Rotating Wheel
Next, we need to find the diameter of our wheels. Press n in the 3D view, and an information panel pops up. If you look at the z dimension, you can see the diameter. In our case it is 1.29.
With the diameter, we can find the circumference of the wheel by 𝛑*diameter. Every time your vehicle moves 𝛑*diameter distance, the wheel should rotate a complete circle. Conceptually, I think about this as if you cut the tire and it unrolls as the vehicle moves forward. The vehicle will move x units forward where x is the circumference of the tire to fully unroll the tire.
To flip this around slightly, the number of rotations will be equal to the amount the car moved (location) divided by the circumference of the tire.
x/(pi*diameter)
We multiply this by 360 to change from radians to degrees and times -1 since our car is facing (and moving) toward the negative y.
rotation = -360*location/(pi*diameter)
Adding the Wheel Driver
We create a driver on the x rotation for a wheel.
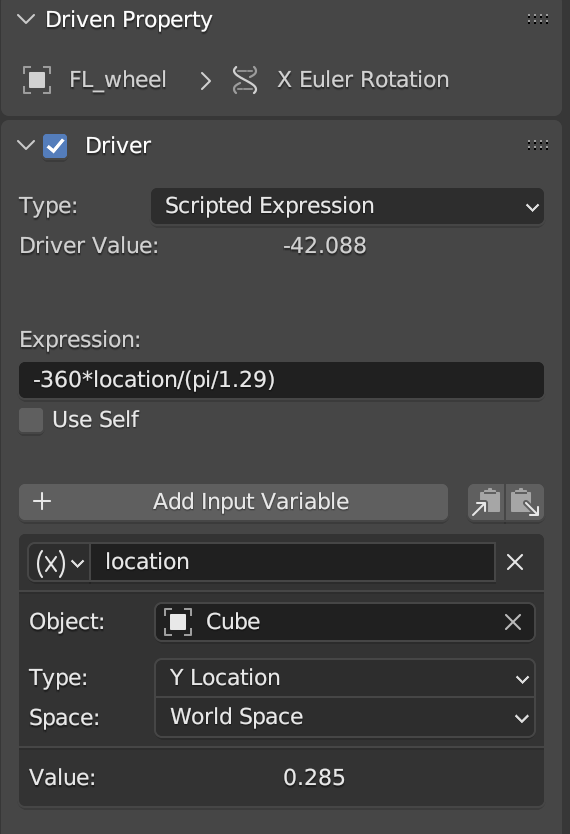
Now copy and paste to each wheel. Right click on the wheel with a driver and select “Copy as New Driver”. Click each wheel, right click on x rotation and select “Paste Driver”.
Since this car is not too exciting to look at, I made a quick example using a free car model from Turbo Squid.
This shows the basics of driving the wheel rotation. In my case, I parented everything in the scene to an Empty object. I then parented all of the parts of the wheel that turn to the hub (e.g., the tires and lug nuts). Next, I added the equation we created above to the hub and set the location variable to the Empty y location.
Conclusion: Blender Drivers are Simple and Powerful
This post shows how to create and use Blender drivers. Drivers are an incredibly powerful tool, particularly to create cyclical motion or to create movement based on another property. Hopefully, you found this helpful. Let me know in the comments how you typically use Blender drivers.
One Comment