Originally written for Blender 3.4 — updated for Blender 4.5
A few weeks ago, I explained how to create a water simulation in Blender. Following that project, I wanted to continue learning the fluid simulator, Mantaflow, by playing with liquids that have different viscosities.
The Basic Setup
As discussed, we need three elements for the Blender simulation:
- a domain,
- an inflow, and
- an effector.
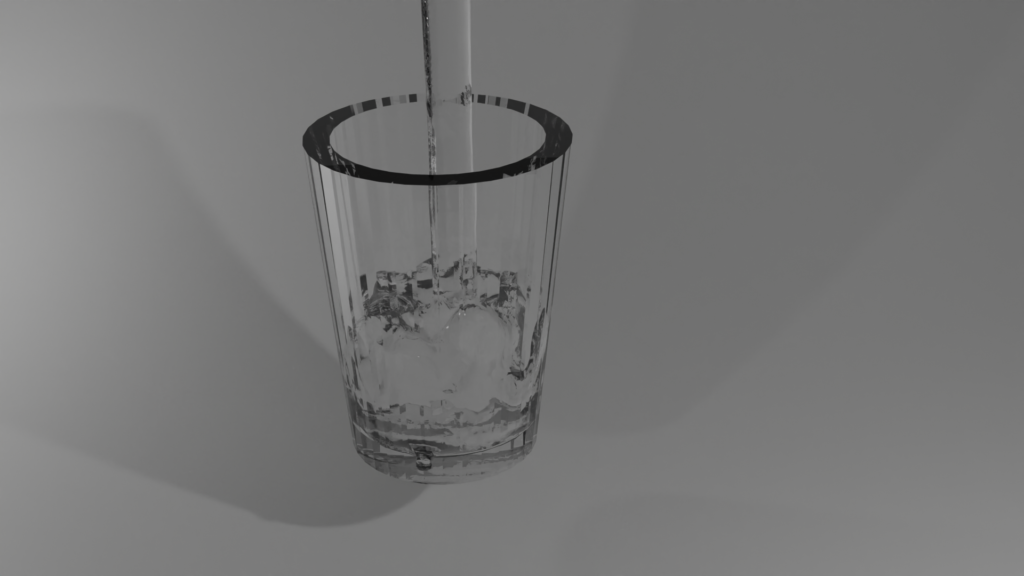
I started by creating the effector. In this case, I created a glass.
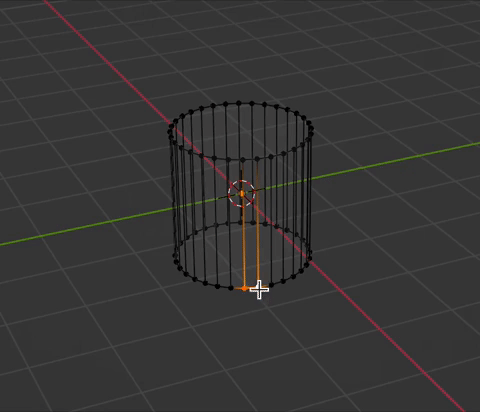
Add a cylinder. Press tab to enter edit mode. When in edit mode, I like to work in wireframe view (z+4). Select the vertices at the top of the cylinder and scale slightly larger than the bottom. For selecting vertices, I tend to prefer the box select, but an alternative is the loop select.
Next, we are going to extrude to create the interior of the glass. With the top vertices selected, press e to enter extrude. Next press s to scale the extruded vertices. This creates the glass thickness. Now press e again to extrude and move along the z axis. Scale to fit within the outer walls of the glass.
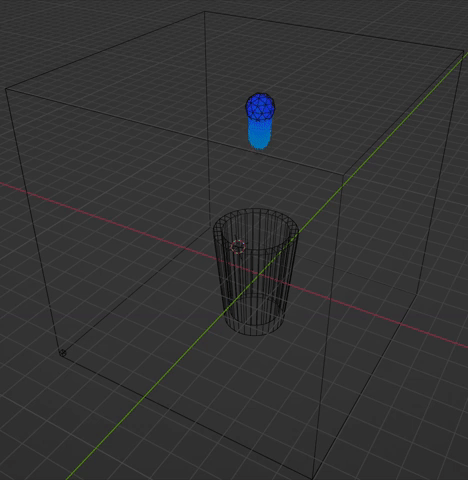
To create the flow, simply add an icosphere. Move it somewhere above the glass.
The domain is just a cube scaled to fit both the glass and the icosphere.
Domain Settings
I added Physics->Fluid->Domain to the cube with the following settings:
- Domain Type: Liquid
- Resolution: 64 (if you see your liquid leaking from your glass like mine does, you can increase the resolution but it significantly increases the bake time)
- Select the checkbox for Diffusion
- Select the checkbox for Mesh
- Change Cache->Type to All
Initially, I tried to use Viscosity instead of Diffusion. However, I could not figure out the scale of viscosity numbers, and the Blender manual did not provide much information. However, while reading through the documentation, I came across the diffusion page, which includes a subheading for viscosity including a table with various types of liquids and their corresponding viscosity.
Once you set up the domain settings, add a subdivision modifier to the domain that will smooth the final liquid.
Flow Settings
Select the icosphere and add Physics->Fluid->Flow
- Flow Type: Liquid
- Flow Behavior: Inflow
I animated the “Use Flow” checkbox. Around frame 48 (approximately 2 seconds), I right clicked on “Use Flow” and selected “Insert Keyframe”. I moved forward one frame, removed the check from the checkbox, right clicked and inserted another keyframe.
Effector
Last, click on the glass and add Physics->Fluid->Effector.
Now let’s bake. With the domain cube selected, click “Bake All”.
Creating the Background
For the background, I like to use a seamless white background. I create a plane. Next, in edit mode, I subdivide several times, and then I add a Subdivision Surface Modifier.
I select the vertices farthest from the camera and enable proportional editing with sharp falloff.
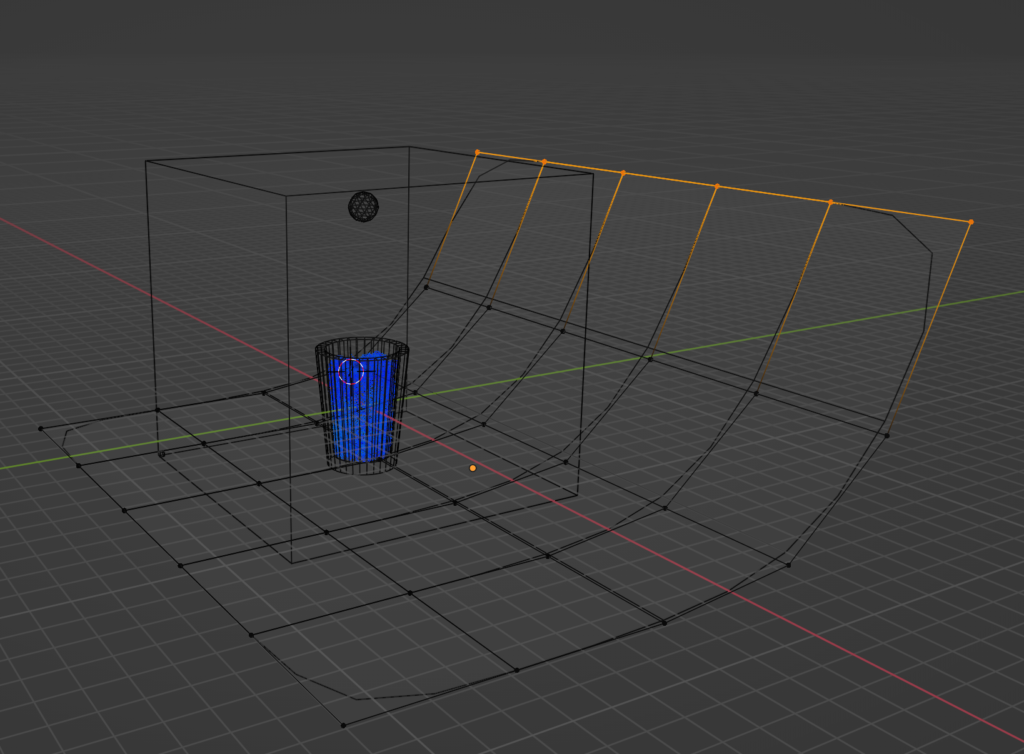
I move the vertices in the z direction. I add a basic principled shader with a white color (no other changes.
Shaders
For the glass and liquid, I create a shader for each. I actually use the same shader setup. However, I keep them separate to allow me the ability to adjust either if necessary.
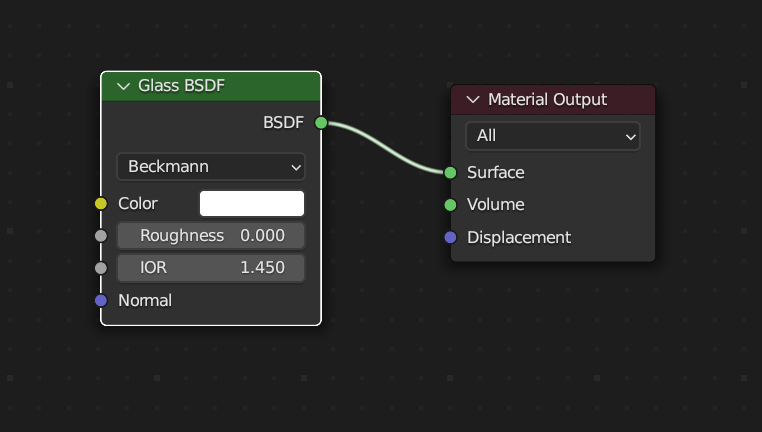
Make sure to change the Render Engine from Eevee to Cycles. Otherwise, the glass will look terrible. Although, some people have found workarounds to create some great Eevee renders, suggesting it is possible. I will stick with Cycles.
Now we are ready for a quick render.
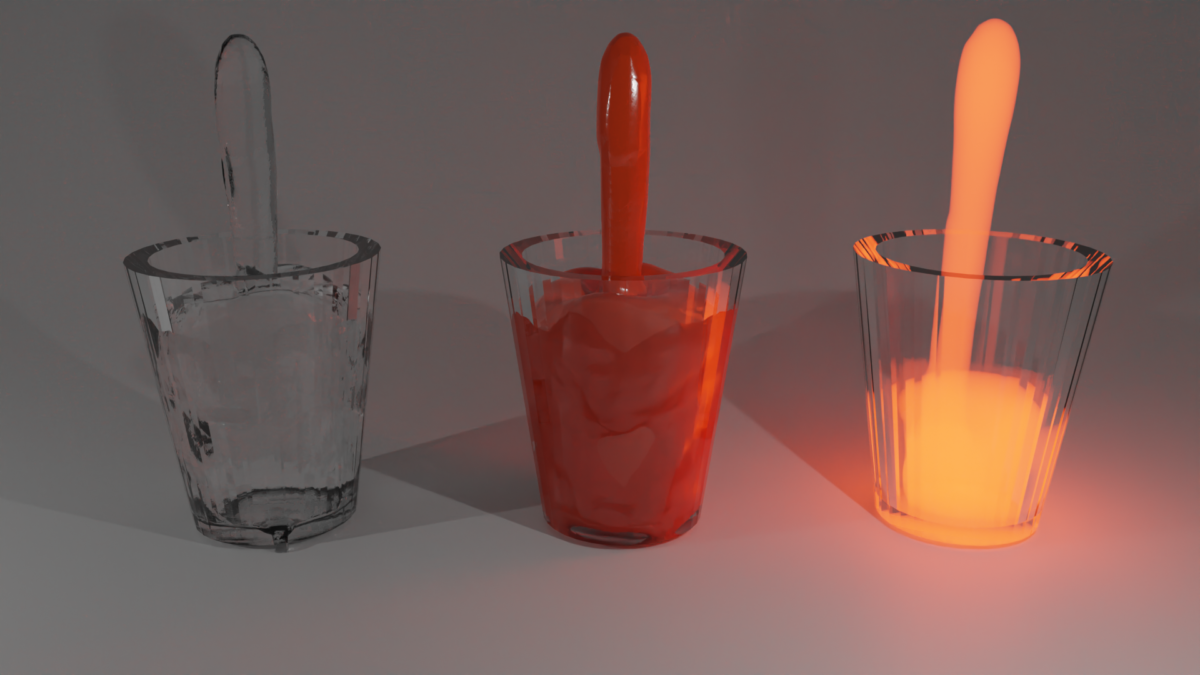
Adding Additional Domains
Now that we have the basic setup, we can duplicate the domain, effector, and glass two times. We will have to bake the domains separately. Go into each domain and change the cache location to avoid overwriting the cache when we bake a different domain. I usually just change the last number of the cache, since it appears to be a random number anyway.
Next change the viscosity of the other domains, I used the following:
Ketchup:
- Base: 1
- Exponent: 1
Melting Glass:
- Base: 1
- Exponent: 0
Finally, bake each domain. This will take some time. This may be a good time for a cup of coffee.
Creating the Liquid Shaders
Now to make the render pretty. We can add shaders to the liquids. Here are the shaders I used:
Ketchup: This is just a red principled shader with high specularity (specular = 0.895).
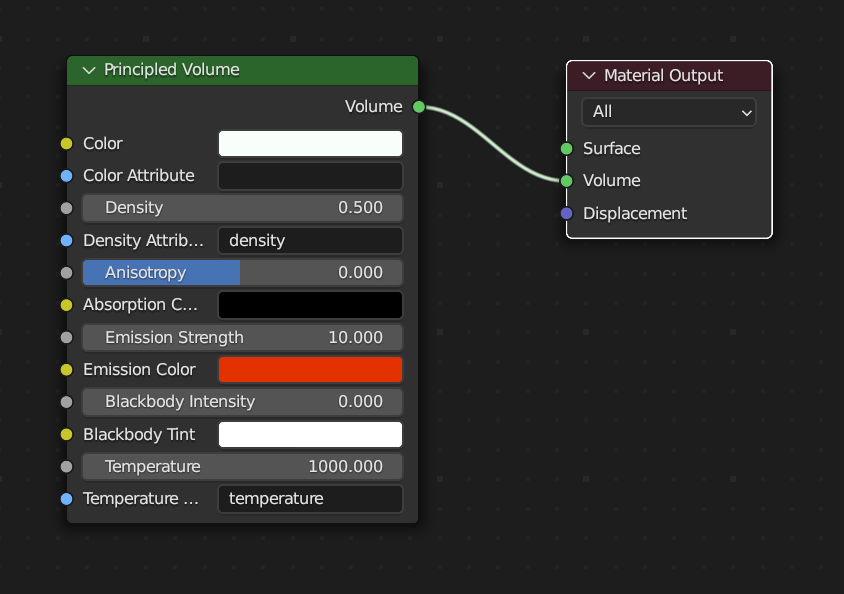
Melting Glass: I used the principled volume shader. Glass cools faster at the edges. Therefore, I wanted the density to affect the color.
For adding extra surface detail to your liquid domain or container, using a displacement map can add even more realism to the final render.
Simulation Complete
It was a lot of fun playing with the liquid simulation and different viscosities. Now, I want to create some longer simulations using flowing water (perhaps a relaxing waterfall).
If you’re interested in other fluid simulations in Blender, check out 5 Easy Steps to a Colorful Blender Smoke Simulation.