Originally written for Blender 3.x — the core displacement workflow is the same in Blender 4.x, but Eevee Next handles displacement differently. If you’re using Eevee rather than Cycles, some material settings steps may vary.
Sometimes, you want to create a complex 3D model without complex geometry. There are many reasons why you may want to do this. First, you may have computational limitations. For example, when working in game development, every vertex counts. Second, you may want to change a model quickly without re-modeling the model. Third, you may want to animate the shape of a model.
All of these are good candidates for bump and displacement maps. In this post, I will cover the difference between the two and then show how to use a displacement map.
What is bump and displacement?
Bump, normal, and displacement maps are three different ways of using a 2D image to change the way a 3D model looks without actually changing the underlying geometry.

- Bump Map: Bump maps are used to show subtle detail on the surface of a model. The bump map doesn’t change the physical geometry of the model, just the way the camera perceives the model.
- Normal Map: Normal maps, like bump maps, don’t change the geometry of the model. Normal maps also change the way the model looks to the camera. Unlike the bump map, the normal map records the angle of the normal, which affects how light bounces off the model.
- Displacement Map: A displacement map, unlike bump and normal maps, changes the geometry of the model. It moves vertices based on the map.
A normal or bump map is fine if you want to subtly change the surface. However, sometimes, you want to change the surface more significantly while keeping the model fairly simple. That is where displacement comes in. Displacement actually changes the geometry in the render.
Since displacement maps change the geometry, they create real shadows. This gives the model a sense of depth and also allows you to move the camera, without the model looking fake. Normal and bump maps are faster to compute, but may depend on the angle. You are also more constrained in how much variation in height you can show in a normal map.
The Basic Displacement Setup
So now that we know what a displacement map is, how do we use one in Blender?
The first step is to change the render engine from Eevee to Cycles. This method of displacement only works in cycles.
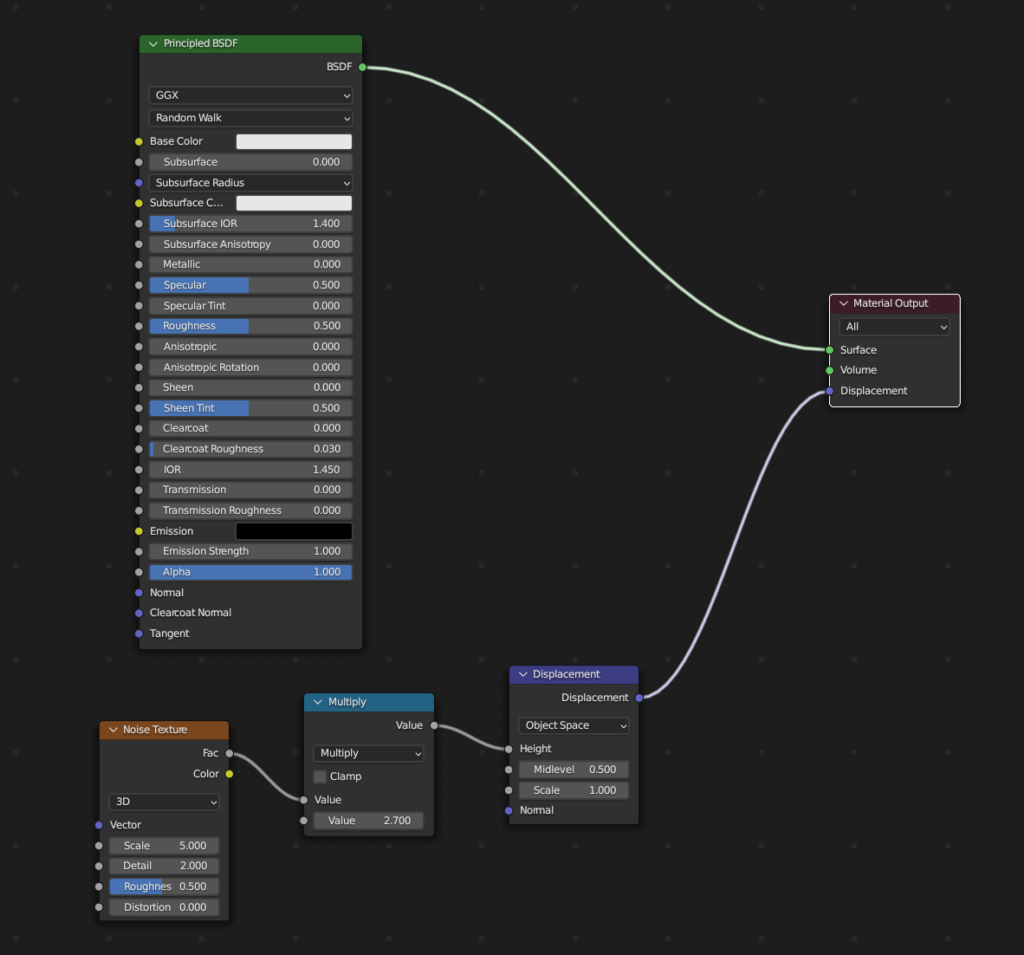
Next, we need to add the nodes. Switch to the Shading Tab. We are going to use three nodes:
- Displacement: This node is the star of our nodes, handling the actual displacement. We will plug the other nodes into the height parameter to change the displacement of the model.
- Math Node: We are using this node to change the strength of the effect.
- Noise Texture: This creates the map that we will use to displace the model. If we had an actual displacement map, we could use the image texture instead of the noise texture.
Here is what the final node setup looks like:
Now for the critical step. We need to change the settings. In the materials tab on the right, under settings, change “Displacement” from “Bump Only” to “Displacement and Bump”.
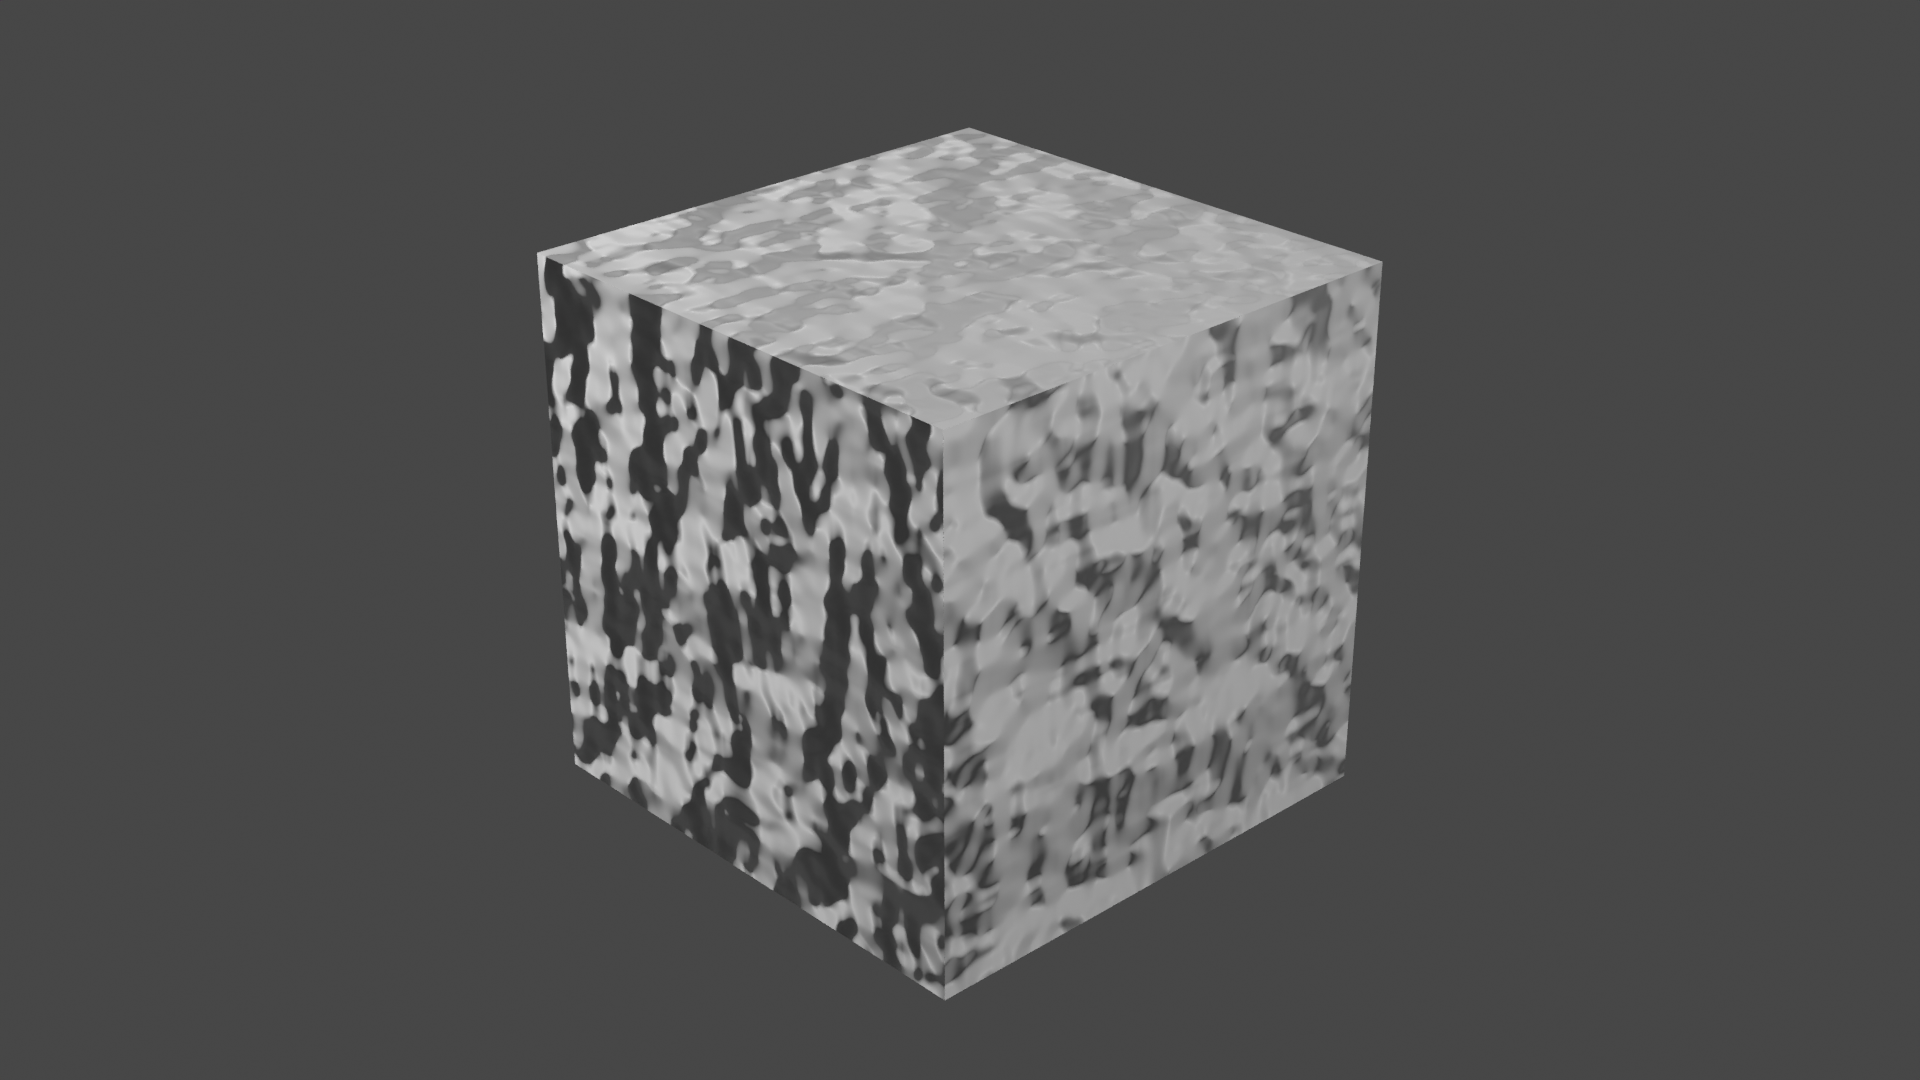
With a test render, you may notice that it doesn’t look good at all. That is because we need enough vertices to work with. Remember that displacement is actually changing the geometry. Below are two examples. The top image is a basic cube with no additional vertices. On the bottom is a cube with 5 subdivisions as well as a subdivision surface modifier. Although adding vertices may seem to defeat the purpose of keeping the model simple, keep in mind that the model is still a cube, and the number of vertices is only 218 vertices.

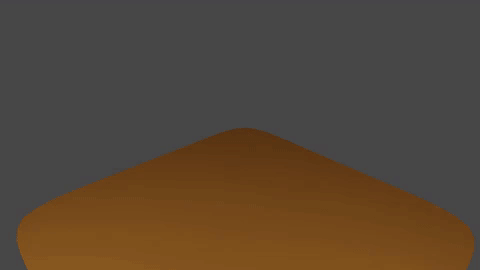
Creating the Land Before Time
One potential use of displacement is to create terrain. Using a displacement map with a simple plane and subdivision surface can create a quick terrain. Below is an animation with just those basic components. I animated the strength from 0 to 1.7.
If you need a more interesting starting model to apply displacement to, one option is to convert a 2D image into a 3D model using Inkscape and Blender — it’s a quick way to get a unique base mesh without sculpting from scratch.
Displacement vs Normals: Why Choose One When You Can Have Both
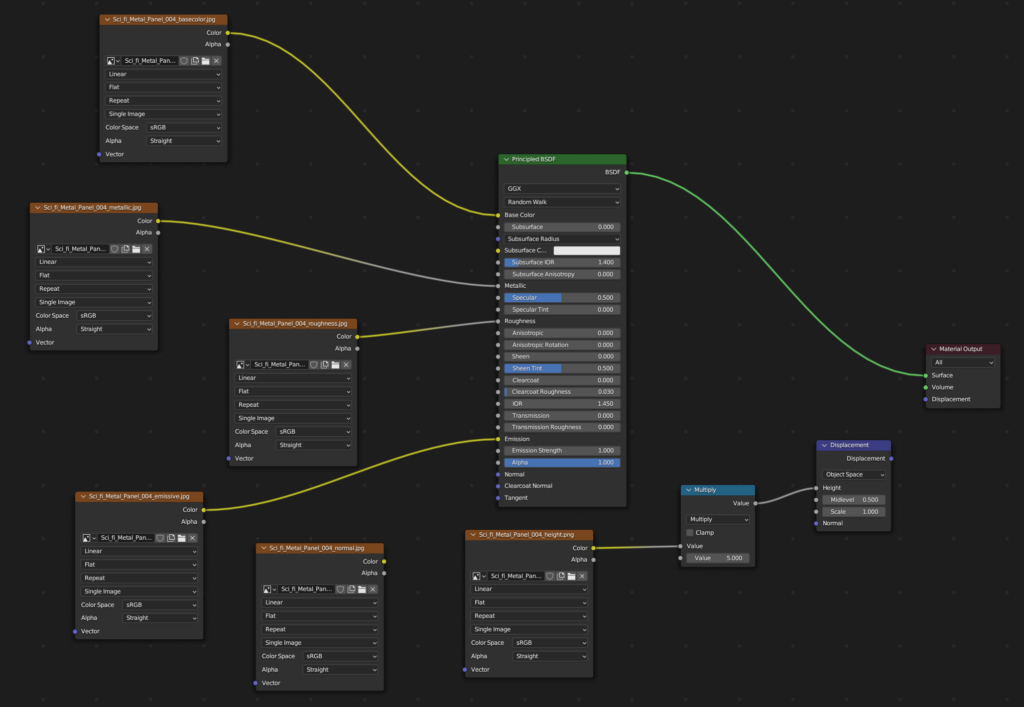
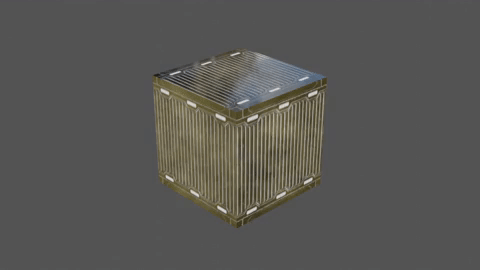
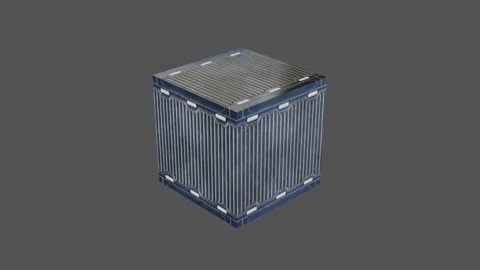
Although we talked about the benefits of displacement vs normals, you can actually use both in the same model. Displacement can be used for parts of the model that need bigger depth. Below is a metal crate that uses both a displacement map and a normal map. You can download the textures for this model here.

Below are the nodes used to create the crate.
Here is an animation that shows the difference between no displacement on the left and displacement on the right. You can particularly notice the difference on the top. Without the depth, it looks flat and glossy.
Conclusion
There is so much that you can do with displacement maps using this basic setup. In this post, we used the noise node to generate the texture. However, you can paint the texture or find textures online. Hopefully, in a future post, I can show how to create a displacement map from a complex model and apply it to a simple model like a cube.
Displacement isn’t just for static models either — it’s useful any time you want to add surface detail without extra geometry. For a practical example, see how I used it to add realism to a Blender liquid viscosity simulation. If you’re interested in other Blender simulations, this smoke simulation tutorial is a good next step. And if you want to keep exploring procedural techniques, Blender’s Geometry Nodes open up a whole other world of non-destructive modeling.
Additional Resources
- Displacement Map in 3D Coat
- Difference Between Displacement, Bump, and Normal Maps
- Normal vs Displacement Map