
One of my favorite camera moves is the rotation around an object (or orbit). This camera movement gives depth to the object and shows the complexity of the texture by the way the camera perceives light bouncing off of the object. Sometimes, you can cheat by rotating the object and not the camera. However, this doesn’t always work. Sometimes the scene or lighting may be too complex. Therefore, you just want to rotate the camera.
I know that there are a number of tools, like the Turnaround Camera, that will do this for you. Feel free to drop some other tools in the comments in case people want the easy solution. For this post, I wanted the challenge of implementing this myself in Python using the NumPy module.
The Code
Here is the full code. We will walk through this code step by step to understand how it works.
#import the modules
import bpy
import numpy as np
import math
import mathutils

# Create a variable to hold the camera object and the origin of the camera
camera = bpy.data.objects['Camera']
cameraOrigin = np.array(camera.location)

# Create a variable to hold the focus object
focusObject = bpy.data.objects['Cube']

# Angle (in radians) that the camera will rotate each frame
theta = 2*math.pi/250


def rotateCamera(scene):
    """Rotate the camera around an object. Takes the scene as parameter from handler."""


    newTheta = theta*scene.frame_current
    rotationMatrix = np.array([[math.cos(newTheta),-math.sin(newTheta),0],
                                [math.sin(newTheta), math.cos(newTheta),0],
                                [0,0,1]])
    camera.location = np.dot(cameraOrigin,rotationMatrix) + focusObject.location

def setRotation():
    """ Set handlers to call the rotateCamera function."""
    # clear old handlers
    bpy.app.handlers.frame_change_pre.clear()
    #register a new handler
    bpy.app.handlers.frame_change_pre.append(rotateCamera)

setRotation()
NumPy for Blender
The Blender Python implementation includes a library called NumPy. NumPy was developed for scientific purposes. Specifically, it creates arrays and conducts fast math operations on the arrays. For our purposes, NumPy provides some easy methods for manipulating matrices. If you want additional information on NumPy, check out Rich Colburn’s NumPy for Blender. You can also check out the NumPy reference guide.
The Basics
This script works by creating a function that sets the camera position based on the current frame number. The script also includes a function that creates a handler. A handler in Blender is an event trigger. When the event occurs, the handler runs. In our case, we set the handler to call the rotation function immediately before the frame is changed. If I write the basic shell of the script, it looks like this.
def rotateCamera(scene):
    # Set the position of the camera based on the current frame
    # Set handlers to call the rotateCamera function before changing the frame

def setRotation():
    # Clear old handler if it exists
    # Register a new handler

setRotation()
Rotation Matrix
To calculate the rotation of the camera around the object, we will use the rotation matrix. The rotation matrix is a transformation matrix that converts an angle into x and y coordinates. In this post, we will not go into the math, but if you are interested, check out this explanation.
The rotation calculation is handled by the rotateCamera function. This function first calculates the angle the camera needs to move from the origin position. We multiply the frame number by theta (the amount the camera should rotate in one frame). You can change the speed of the camera rotation (technically, I think this is an orbit) by multiplying this by a some factor. For example. If you want the camera to rotate more slowly, you would multiply by 0.5.
(2*math.pi/250)*0.5The camera would take 500 frames to orbit entirely around the object where previously, it only took 250 frames.
Now that we have our angle to move each frame, we create a rotation matrix. Our rotation matrix will rotate the camera around the z axis.

In Python, we create this by the following code:
rotationMatrix = np.array([[math.cos(newTheta),-math.sin(newTheta),0],
                           [math.sin(newTheta), math.cos(newTheta),0],
                           [0,0,1]])
To use this rotation matrix, we simply calculate the dot product between the original camera position (cameraOrigin) and the rotation matrix. This results in a new position.
camera.location = np.dot(cameraOrigin,rotationMatrix)Handlers
We want to change the camera location with every frame. We also want the camera position to be correct if we jump to a new frame in the preview. As noted above, we accomplish this by creating a handler. We will use the frame_change_pre handler, which will trigger immediately before the frame is changed. When this handler fires, we call our rotateCamera function.
Tracking the Cube
For the final step in the process, we need to focus the camera on our target object. To do this, we will set up a tracking constraint. First, select the camera. On the right side of the screen, select object constraints. In the drop down select “Track To”. In the target box, select your target object (in our case the default cube). This ensures the camera is always aimed toward the cube.
That’s It?
This simple script saves us a lot of time keyframing the camera or setting up a curve for the camera to follow. We can easily apply it to new scenes by loading the script, changing the camera and object variables, and running the script. However, keep in mind that if you change the location of the camera or the object, you need to re-run the script.
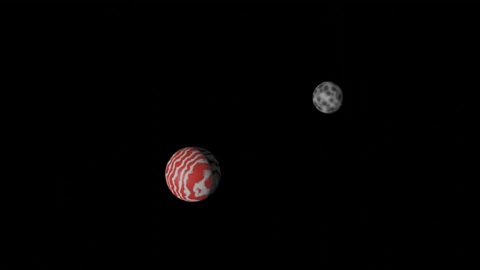
This script doesn’t have to be used just for cameras. You could also use for other orbiting objects. For example, in the image to the right, we created a planet and a moon.
We would love any comments or questions.


One Comment