One of the features of Blender that I think is both really cool and really frustrating is Open Shading Language. In this post, I will provide a quick overview of Open Shading Language (also called OSL) and some examples to get you started.
What is Open Shading Language?
Open Shading Language is a programmable shader language. Open Shading Language was developed by Sony Imageworks to replace existing C++ plugins. It was released as open source, and, according to the OSL GitHub page, OSL is now the “de facto standard shading language for VFX and animated features”.
Some examples from a 2020 Open Shading Language Reel.
What Makes Open Shading Language so Great?
Open Shading Language allows for much more complicated shaders. An OSL shader calculates the way that light scatters over a surface. This is important particularly for physically based shaders.
For me, I enjoy being able to create shaders through code. In particular, I like using OSL to make procedural textures. You can create any texture that can be described by a math formula, including textures that are either not possible, or at least are very difficult to create using just nodes. In Blender, you can also integrate your OSL shader with other nodes.
Downside of Open Shading Language
There are a few downsides to Open Shading Language worth knowing. GPU support was added in Blender 3.5 (March 2023) via the OptiX backend, so older tutorials saying OSL is CPU-only are no longer accurate — but GPU OSL comes with its own constraints, covered in the section below. The other ongoing limitation is the learning curve: OSL still lacks beginner-friendly resources, and compilation errors can be difficult to diagnose.
Second, Open Shading Language also lacks examples or learning resources. I could find the OSL Language Specification and a few examples using OSL, but otherwise nothing. This lack of resources makes learning OSL difficult (and frustrating).
Should You Use OSL? A Practical Decision Guide
OSL is powerful, but it’s not the right choice for every situation. Here’s a quick way to decide:
| Use OSL when… | Skip OSL when… |
|---|---|
| You’re writing custom procedural shaders that can’t be built with standard nodes | You’re using only Blender’s built-in shader nodes — there’s no benefit and a potential performance cost |
| You’re porting shaders from another DCC (Houdini, Arnold, RenderMan) that already use OSL | You need broad GPU support — OptiX only, no AMD/Intel GPU |
| You’re building complex math-driven or procedural materials | You’re rendering volumetrics on GPU — OSL adds ~50% render overhead even if no OSL shaders are active |
Short version: enable OSL only when you’re actually writing OSL shaders. Leaving it on permanently adds overhead without benefit.
OSL on GPU: What Works and What Doesn’t (Blender 3.5+)
Blender 3.5 added GPU OSL rendering via the OptiX backend — a significant change for anyone on NVIDIA hardware. Here’s what you need to know:
- Works on GPU (OptiX): Most OSL shaders run on GPU without modification.
- Falls back to CPU automatically: Cell noise, Simplex noise, and Gabor noise are not supported on GPU. Blender falls back to CPU for those automatically — which can cause unexpected slowdowns if you’re using them in a GPU render.
- Volumetrics penalty: Enabling OSL with volumetrics adds approximately 50% render time on GPU, even if no OSL shaders are active in the scene. Toggle OSL off for volumetric renders unless you specifically need it.
- AMD / Intel GPU: OptiX is NVIDIA-specific. AMD and Intel GPU OSL support is not available as of Blender 5.0.
Our First Shader
Now that we have the background on OSL, let’s write our first OSL shader. We are going to create a simple diffuse shader. Yes, I know, this is pointless for a real project, but it is useful for us to show the basic structure.
Here is the code:
surface diffuseShader (color inputColor = color(1), output closure color BSDF = diffuse(N)){
    BSDF = inputColor * diffuse(N);
}
Compile and Run
To compile and run, first change the render engine to Cycles and enable Open Shading Language.
Next, go to the script and create a new script and label it diffuse.osl. A quick note, Blender has built-in templates for an OSL shader. This is useful so you don’t have to remember how to structure the shader.
Change to the render tab and add a new scripting node. Select “Internal” and in the drop down select diffuse.osl. Click the “Script Node Update” button (looks like circular arrows). Cross your fingers and if everything compiles correctly, you will see a yellow dot on the left of the node with inputColor and a green dot with BSDF on the right.

If it did not compile correctly, you may need to check the console to see the error. Most likely mistyped code.
What is happening here?
First, “surface diffuseShader” describes a surface shader function. OSL includes three types of shaders: “volume”, “displacement”, and “shader” (generic shaders).
Following the shader name, we add a list of optional parameters. In this shader, we show both an input parameter and an output parameter. The input parameter allows us to input a color.
color inputColor = color(1)The parameter is of type color and set to a default of white. We also have an output parameter.
output closure color BSDF = diffuse(N)This notes that the parameter is an output. The type of output is a closure color, which we will describe below. In Blender shading nodes, an output closure connects to a BSDF node. We give this closure a default value of diffuse(N), which is a built in function for lambertian smooth surface. N is a built in variable describing the Normal of the area to be shaded.
The default values in the parameters are required. I frequently forget these, leading to a compilation error.
What is a closure?
The concept of a closure is a little complicated. A closure is a function that is needed for a later calculation. In shaders, this later calculation occurs during the rendering process.
Essentially, a closure tells the renderer how to calculate the amount of light that is radiating from a surface and the direction of that light. This allows a cleaner workflow, because when building the shader, we don’t need to worry about the lighting in the scene. The renderer will take care of that.

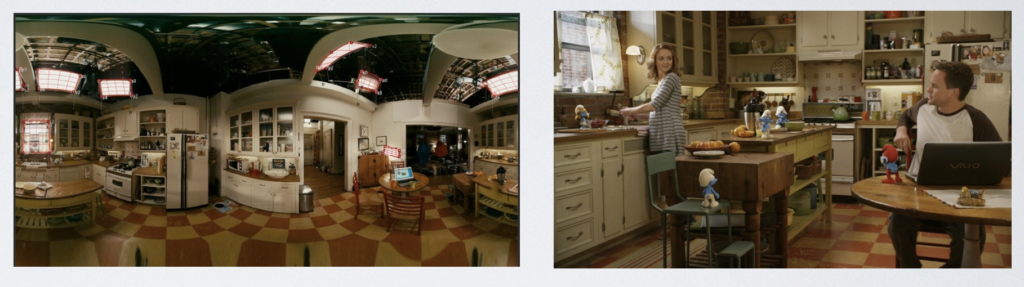
OSL is designed to be very efficient. Unlike some other shaders, we are not defining exactly how the surface will look. Instead, we are telling the shader how to calculate the surface. OSL then combines our function with all other functions affecting the surface, such as the direct or reflected lights. The images below are taken from an Open Shading presentation. They show how easy it is to change the lighting source (in this case HDRI) with OSL nodes.
The Need for Speed
Open Shading Language is designed to be fast. During compilation, OSL includes a step to remove unnecessary code. For example, a variable assignment that is never used would be removed. Similarly, any part of the calculation that does not affect the result will be automatically deleted, leading to the efficient operation. This can make debugging complicated. For example, although OSL includes a print function for debugging to the console, it is sometimes difficult to get the print function to work due to the optimization.
Is that all you’ve got?
You are probably thinking, great, I just did a lot of work to create a diffuse node that Cycles already has. Thankfully, the power of Open Shading Language is not limited to creating a diffuse node.
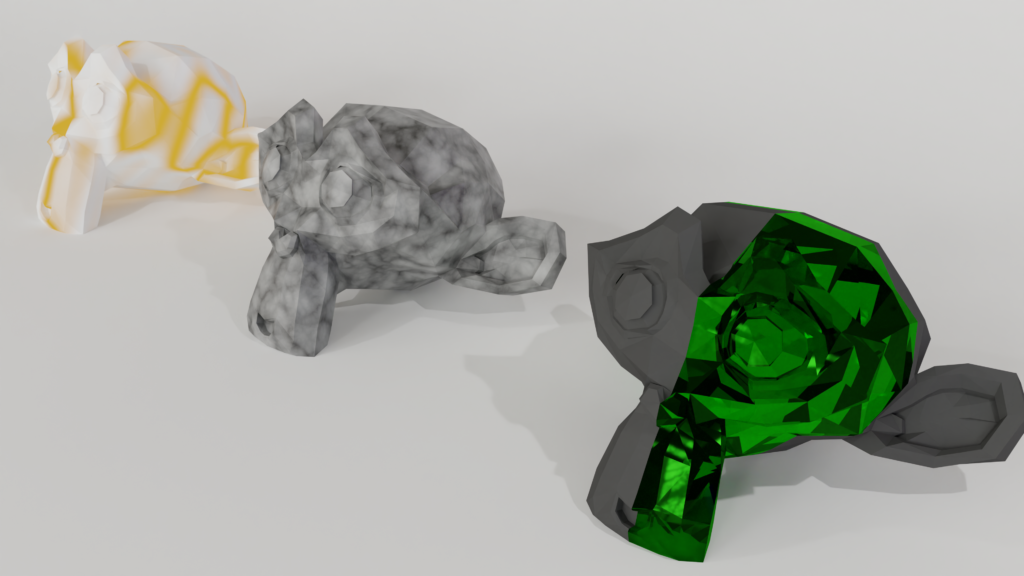
For our second script, we are going to mix a diffuse and a refraction (glass) shader. We are going to use a noise generator function to create a floating point number. This floating point number determines whether to apply the refraction or diffuse. Cycles nodes could create this same result, but now we are able to combine in a single node. We also have more flexibility for how it operates. For now, we are using existing functions for diffuse and refraction. From here, we can implement our own functions depending on how we want the material to look.
surface test (output closure color BSDF=diffuse(N),float fIOR=1 /*Index of refraction*/) {
// Use noise generation function to generate a floating point number
float fNoise = (float)noise("cell", P);
// If the noise is greater than 0.5, shade as refraction. If the noise is greater than or equal to 0.5, apply diffuse.
if(fNoise > 0.5) {
// A closure color can be multiplied by a color
BSDF = refraction(N,fIOR)*color(0,1,0);
} else {
BSDF = diffuse(N)*color(1,0,0);
}
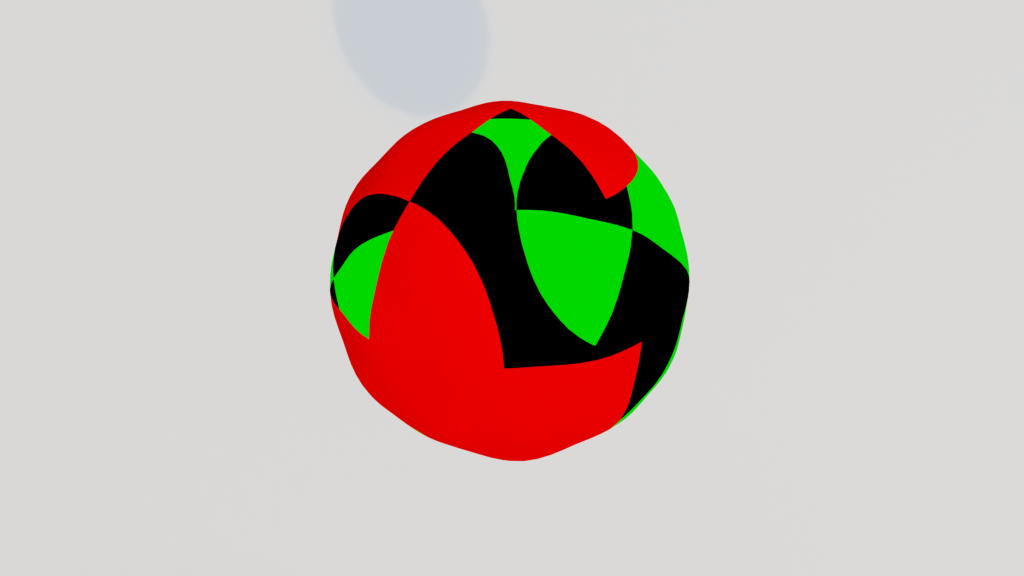
}This code generates the following result. Although not visually stunning, it is a small step toward understanding OSL.
What’s New in Blender 4.x and 5.0
OSL is actively maintained in Blender — it’s not deprecated and worth learning. Here’s what’s changed recently:
- Blender 4.4: Upgraded to OSL 1.14 Beta. Adds custom OSL camera support — you can write a shader that controls how rays are generated, enabling non-standard projections. Improved MaterialX closure compatibility.
- Blender 5.0: OSL camera UI improvements shipped. OSL remains on the active development roadmap.
Getting started with Open Shading Language in Blender is easy. However, OSL includes incredible power. In future posts, we will provide more examples of OSL, but to get started, check out some sample OSL scripts in Downloads.