When making new materials or models, I like to use HDRI lighting. However, I don’t want to see the HDRI image in the background. Therefore, I made a quick add-on to create the world nodes.
You can download the full code here. This is located in the Blender tools project under the file world_nodes.py.
In this post, I am going to take a slightly different approach to explaining the code. The code is very repetitive, so explaining line by line would not be very helpful. Therefore, I am going to explain by concept. The code that I give below can be used in the Blender Python console (REPL) to test. One of the things I love about Python is the REPL. It is an incredibly easy way to explore and prototype code. After learning Python, C/C++ feels so slow, because you have to compile and run every time you want to test something.
print("Let's get started")print("Let's get started")The Basic Setup
Here is the node setup that I typically use:

Although we are working with the world nodes, they are really just a material like any other material. However, instead of being attached to an object, it is attached to the world datablock. If you want to generalize even further, the approach we discuss here applies to any of the nodes used in Blender (i.e., shader, compositor, geometry).
The Node Tree
You can access the nodes attached to a material through a NodeTree object (called node_tree). I struggled with the name of this object as a node tree, when the shader nodes are a directed graph. However, as I thought about this more, I realized that node tree represents the tree data structure used to store information about the nodes as opposed to the graph itself. This only really became clear to me when I made the hierarchy below.
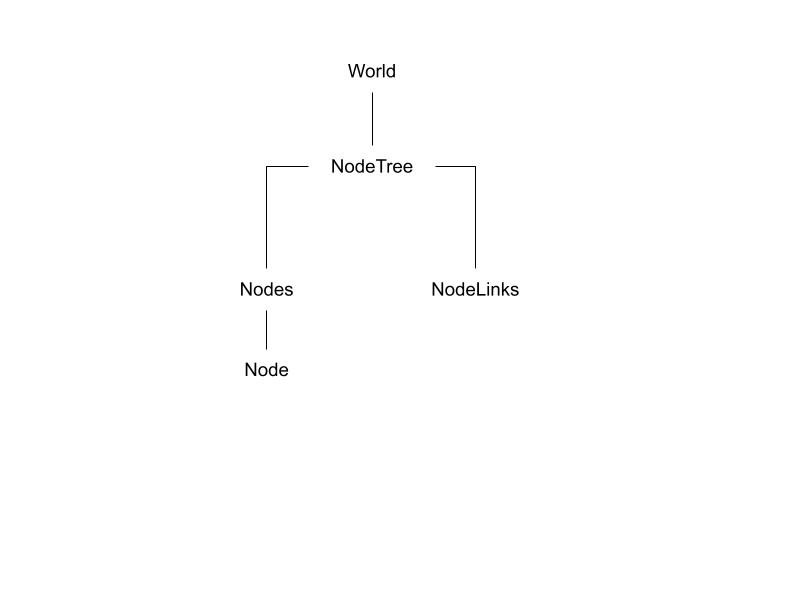
Within the NodeTree object, we are most interested in the members nodes and links (in graph terminology these represent vertices and edges).
# Accessing the world node tree
node_tree = bpy.data.worlds['World'].node_tree

# Node Tree member nodes
for node in node_tree.nodes:
    print(node.name)

print('Number of links:', len(node_tree.links))
Adding a node is very simple. The Nodes object contains a method to add a new node. The method takes one parameter, which is the type of node we want to create. There are a lot of options. We will use the following types of nodes:
- ShaderNodeOutputWorld: World output node
- ShaderNodeBackground: Background color node
- ShaderNodeMixShader: Node that mixes two shader based on an input factor.
- ShaderNodeTexEnvironment: Environment texture that we use for the HDRI lighting.
- ShaderNodeLightPath: Node that tells us whether the current light path is a camera path or not.
# Add a node
new_node = node_tree.nodes.new('ShaderNodeTexEnvironment')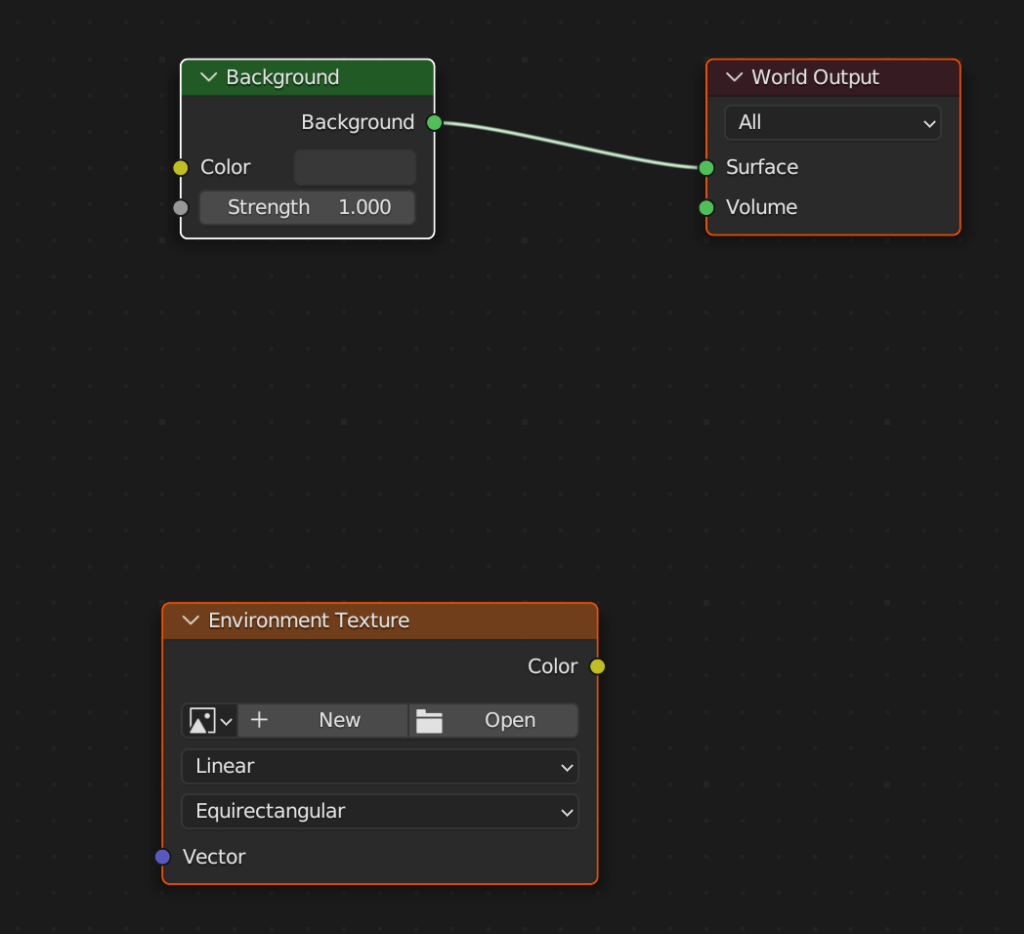
Adding Links
Next, we need to add links between the nodes. NodeTree contains a member called links, which is a collection of node links.
# Iterate links
for link in node_tree.links:
    print('From:',link.from_node.name,'To:',link.to_node.name)
Each node contains a member called inputs (NodeInputs) and outputs (NodeOutputs). Both are a collection of node sockets. You can access the sockets by subscript or by identifier.
# Access a node socket
for socket in new_node.outputs:
    print(socket.name)

# Access input sockets by subscript
print(node_tree.nodes['Background'].inputs[0].name)

# Access input sockets by name
for value in node_tree.nodes['Background'].inputs['Color'].default_value:
    print(value)
Similar to adding a new node, NodeLinks includes a method that allows us to add a new link. The new link takes two input parameters, an input node socket and an output node socket. There is a third optional parameter that determine whether to delete any existing link. In our case, we leave the default, which deletes the existing.
# Add a link
node_tree.links.new(node_tree.nodes['Background'].inputs['Color'], new_node.outputs['Color'])
Clean up the View
The final piece is housekeeping. We don’t want the nodes to be messy, so we modify the location of each node to create a clean node setup.
# Set location
new_node.location = Vector((0,0))
Example Code
Here is the full example code we used for learning purposes above:
import bpy
from mathutils import Vector

# Accessing the world node tree
node_tree = bpy.data.worlds['World'].node_tree

# Node Tree member nodes
for node in node_tree.nodes:
    print(node.name)

print('Number of links:', len(node_tree.links))

# Add a node
new_node = node_tree.nodes.new('ShaderNodeTexEnvironment')

# Iterate links
for link in node_tree.links:
    print('From:',link.from_node.name,'To:',link.to_node.name)

# Access a node socket
for socket in new_node.outputs:
    print(socket.name)

print(node_tree.nodes['Background'].inputs[0].name)
for value in node_tree.nodes['Background'].inputs['Color'].default_value:
    print(value)

# Add a link
node_tree.links.new(node_tree.nodes['Background'].inputs['Color'], new_node.outputs['Color'])

# Set location
new_node.location = Vector((0,0))
Add-on Code
There is some additional code that is necessary to create the add-on and to make a UI for the add-on. We will not cover that code here, but if you are interested, you can check out our previous posts.
An Easier Way
If we were not interested in creating through Python. We could alternatively create an asset in the asset library. To do this, right click on the material name and select “Mark as Asset”
Potential Future Enhancements
This add-on will save me a few minutes every time I create a new file. In the future, I would like to add a file selector that allows you to pick a file. The second enhancement would be a dialog box that confirms the completion. Otherwise, you don’t know that it executed correctly.
Thank you for reading. If this was useful for you, or if there is an add-on that you would like to see, please like this post and leave a comment below.