In this post, we are going to use Open Shading Language (OSL) to create three simple shapes and then show how we can use the shapes in a few different ways to make some interesting materials.
Sometimes, when I am working with Open Shading Language (OSL), I feel like I need to do everything in code. However, this is not true. Instead, we can combine OSL script nodes with other nodes. The inspiration for this post is Sanat Charankar’s blog post.
For an introduction to OSL, check out our previous post.
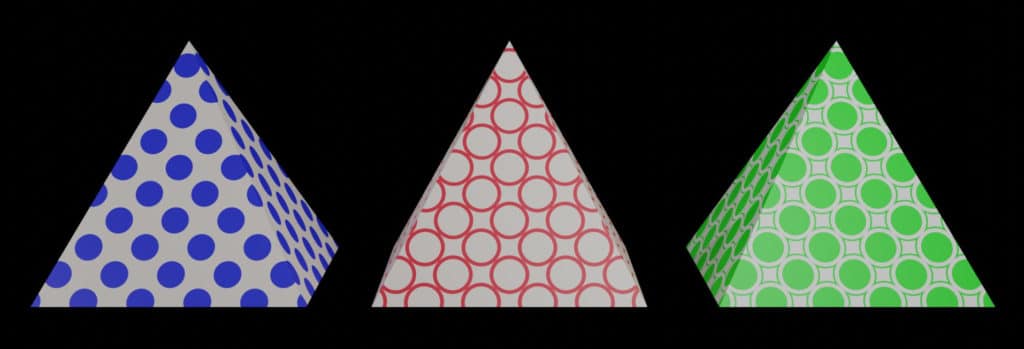
Creating the OSL Shapes
We will create a circle, cross, and doughnut. The code for each of these is not complicated. I started with the basic code from the blog post above with a few minor modifications.
We use mostly the same parameters for each of the shader functions:
- uv: uv mapping vector
- s_position, t_position: offset of the shape
- pat_color: pattern color
- bak_color: background color
OSL Circle
We start with a basic circle.
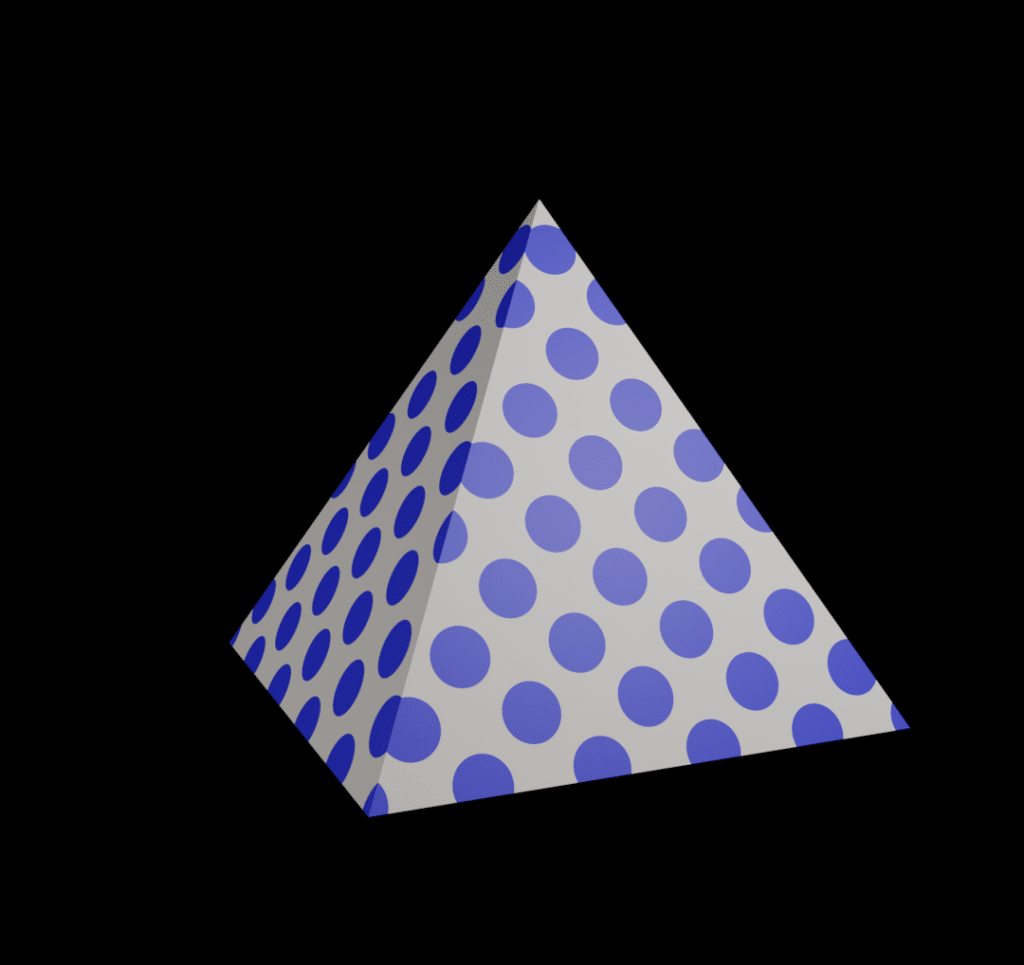
// Create a basic circle
// Based on code from https://www.sanatcharankar.com/osl-st-shading

shader circle(vector uv=vector(u,v,0),
              float s_position = 0.5,
              float t_position = 0.5,
              float radius = 0.75,
              color pat_color = color(1, 1, 1),
              color bak_color = color(0, 1, 0),
              output color resultRGB = 0)
{
    float s = uv[0];
    float t = uv[1];

    float ss = s - floor(s);
    float tt = t - floor(t);

    float dist = distance(point(s_position,t_position,0), point(ss,tt,0));

    if(dist <= radius)
       resultRGB = pat_color;
    else
       resultRGB = bak_color;
}
We add a radius parameter that specifies the radius of the circle.
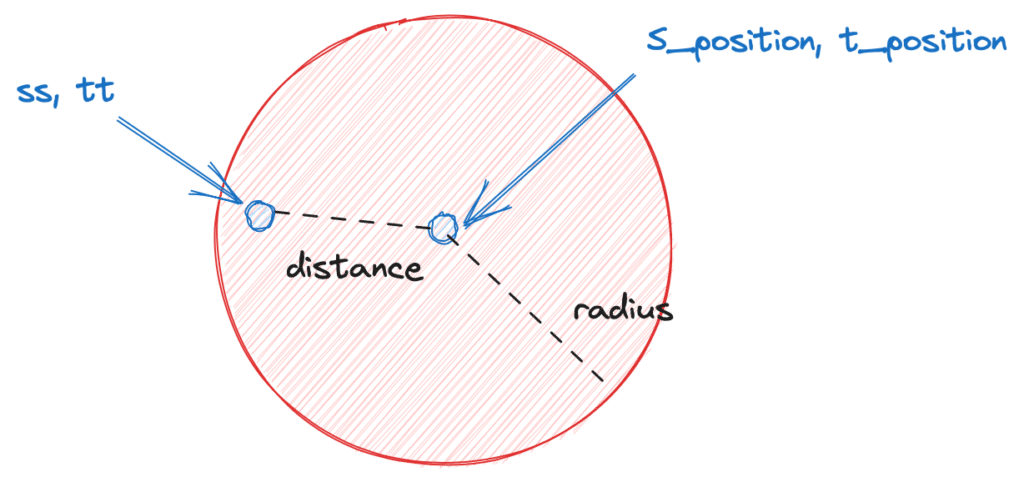
The function first finds the fractional part of u and v values (the texture mapping) and stores in ss and tt. For example, if u is 2.5, then ss = 0.5.
Next, we find the distance from the point (ss,tt) to the mid-point position (s_position, t_position). If the distance is within the radius, then we use the pattern color, otherwise, we use the background color.
OSL Doughnut
This script creates a doughnut, which is just two circles with the space between the circles receiving the pattern color and anything outside the space receiving the background color.
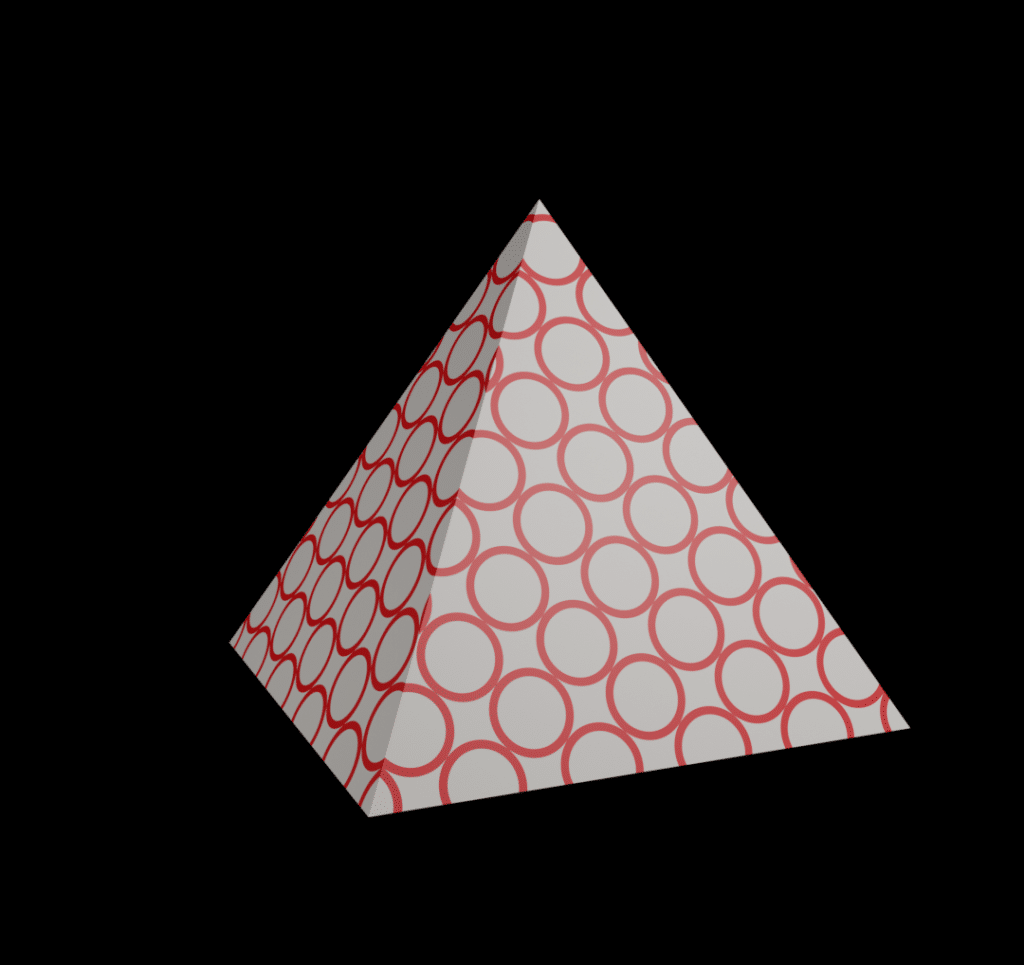
The code is the same as the circle with the exception of a more complicated *if* statement to determine if the distance is between the inner and outer circles (dist <= r_max && dist >= r_min).
// Create a basic doughnut
// Based on code from https://www.sanatcharankar.com/osl-st-shading

shader name(vector uv=vector(u,v,0),
            float s_position = 0.5,
            float t_position = 0.5,
            float r_max = 0.5,
            float r_min = 0.4,
            color pat_color = color(1, 1, 1),
            color bak_color = color(0, 1, 0),
            output color resultRGB = 0)
{
    float s = uv[0];
    float t = uv[1];

    float ss = s - floor(s);
    float tt = t - floor(t);

    float dist = distance(point(s_position,t_position,0), point(ss,tt,0));

    if(dist <= r_max && dist >= r_min)
        resultRGB = pat_color;
    else
        resultRGB = bak_color;
}
OSL Cross
The final shape that we will use is the cross.
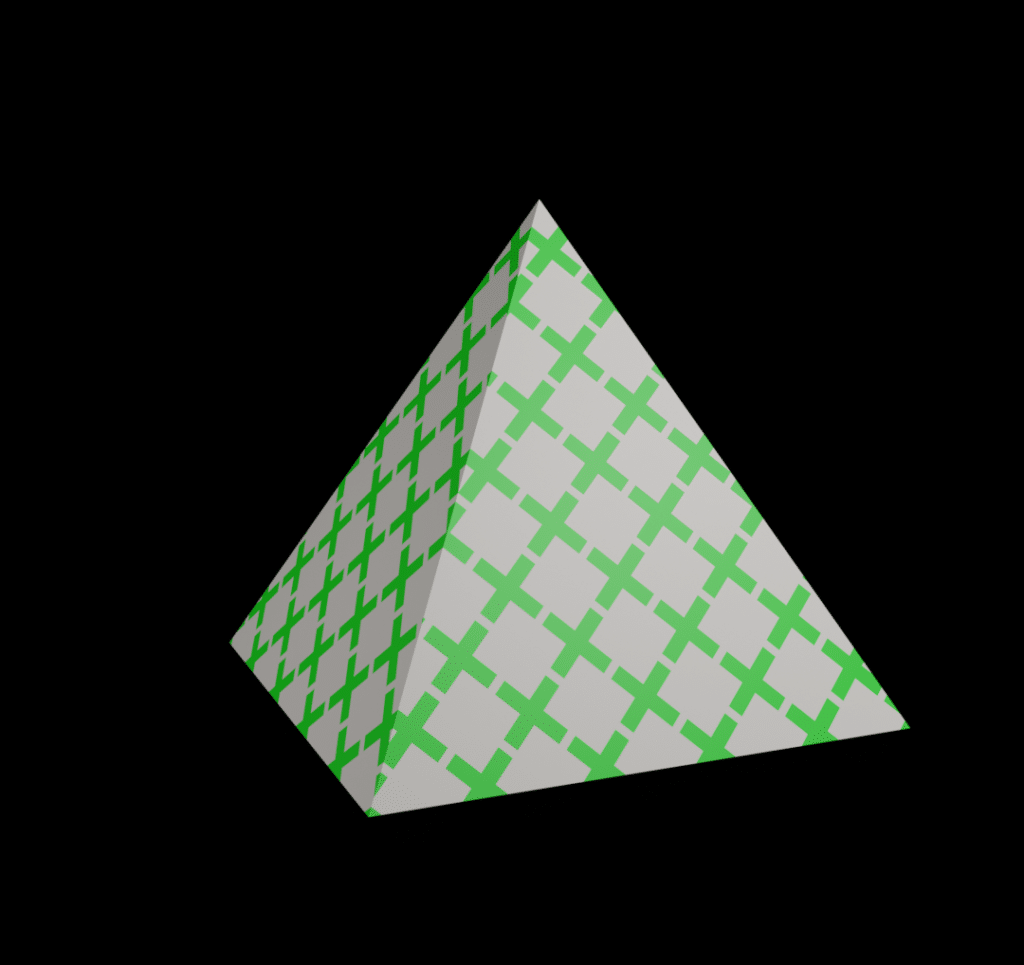
I made the most significant changes to this code versus the original post. Unlike the circle and doughnut, the original code for this did not allow repeating the pattern. It just created one cross that stretched in different directions. Therefore, I added the code from the circle that allows us to get the fractional part of u and v (allowing us to repeat). I also added a length parameter and logic to the if statement that allows us to make the cross smaller.
// Create a basic cross
// Based on code from https://www.sanatcharankar.com/osl-st-shading

shader cross(vector uv=vector(u,v,0),
             float s_width = 0.2,
             float s_position = 0.5,
             float t_width = 0.2,
             float t_position = 0.5,
             float max_length = 1,
             color pat_color = color(1,0,0),
             color bak_color = color(1,1,0),
             output color resultRGB = 0)
{
    float s = uv[0];
    float t = uv[1];

    float ss = s - floor(s);
    float tt = t - floor(t);
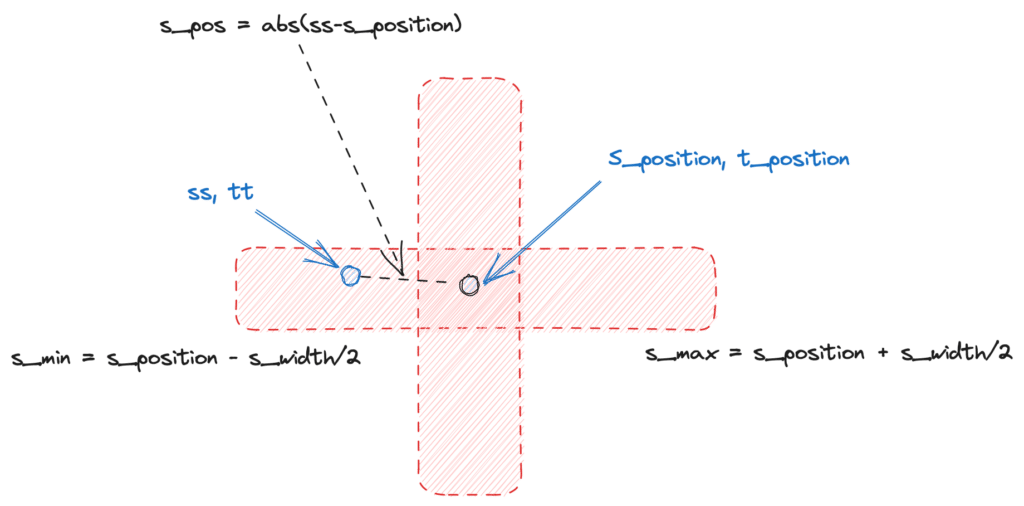
    float t_pos = abs(tt-t_position);
    float s_pos = abs(ss-s_position);

    float t_max = t_position + t_width/2;
    float t_min = t_position - t_width/2;

    float s_max = s_position + s_width/2;
    float s_min = s_position - s_width/2;

    if(((s_pos <= max_length/2 && tt >= t_min && tt <= t_max) ||
        (t_pos <= max_length/2 && ss >= s_min && ss <= s_max)))
        resultRGB = pat_color;
    else
        resultRGB = bak_color;
}
To create the cross shape, we create variables s_max and s_min. We then check whether ss is between these values. We also added s_pos to adjust the length of both the horizontal and vertical parts of the cross.
Using the OSL Shapes
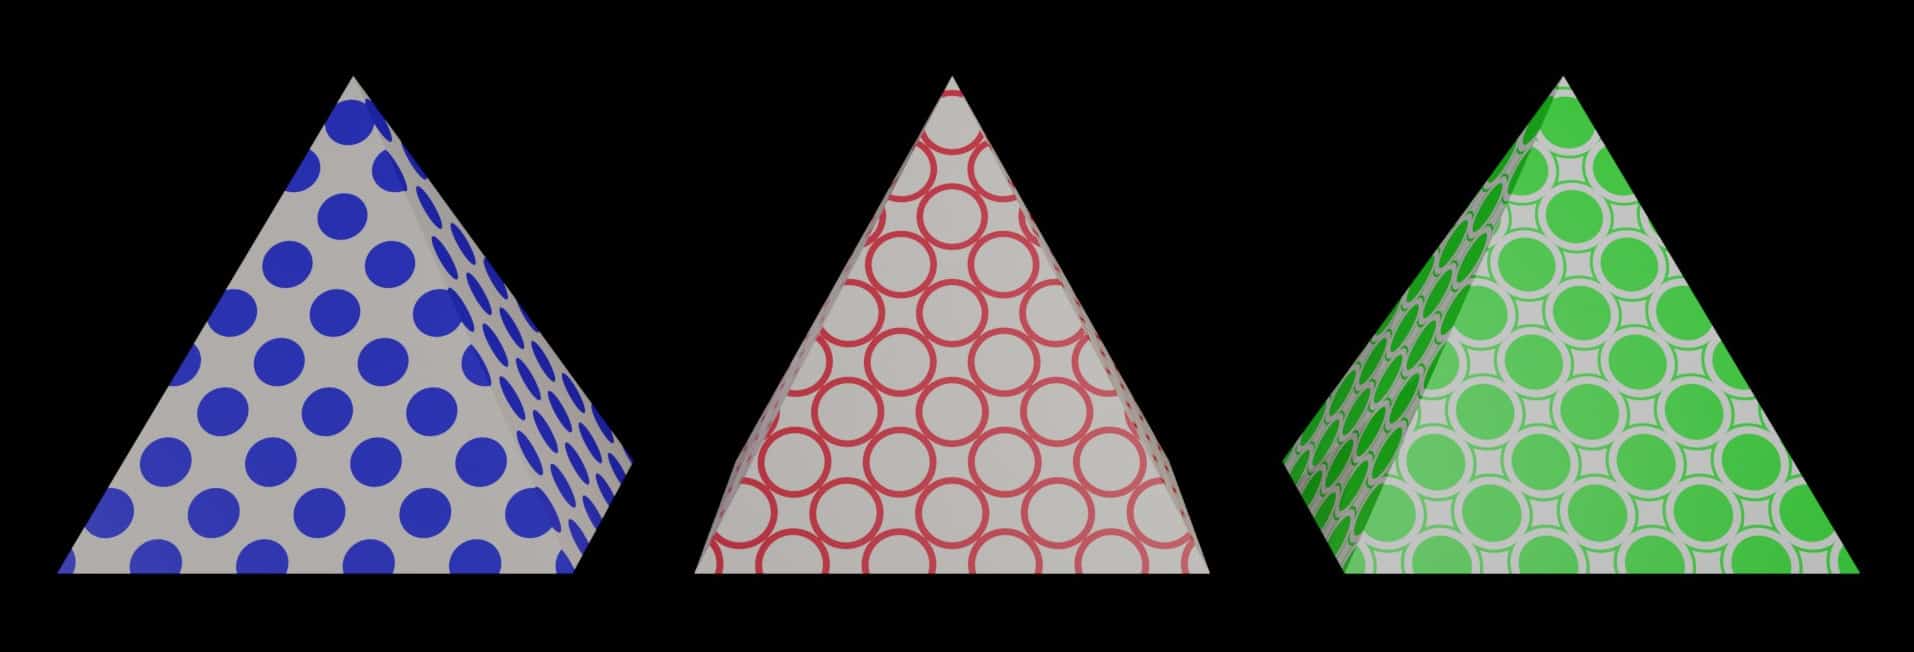
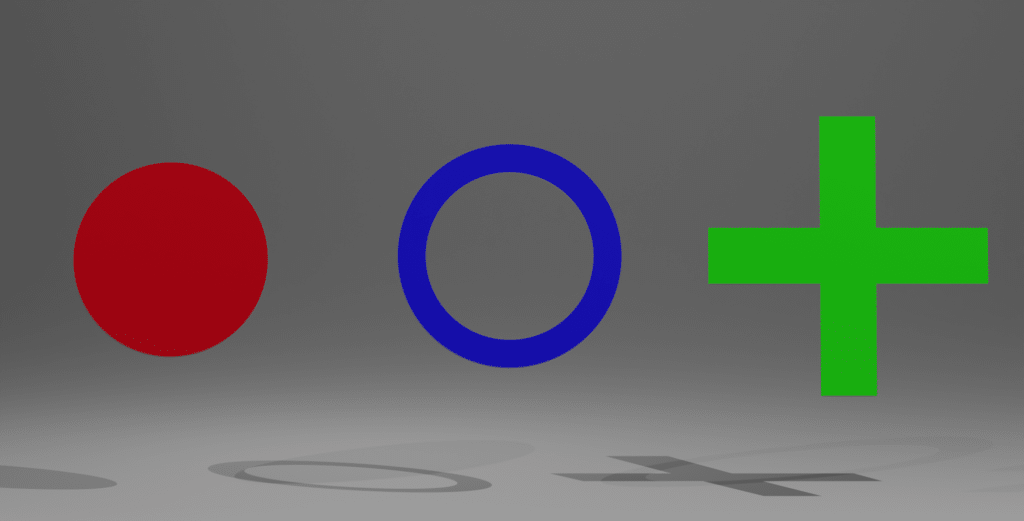
Now that we have the basic shapes, there are many ways that we can use them. We will show three different ways: basic, transparency, and pattern.
Basic Use
Of course, we can use these functions in a very basic form.
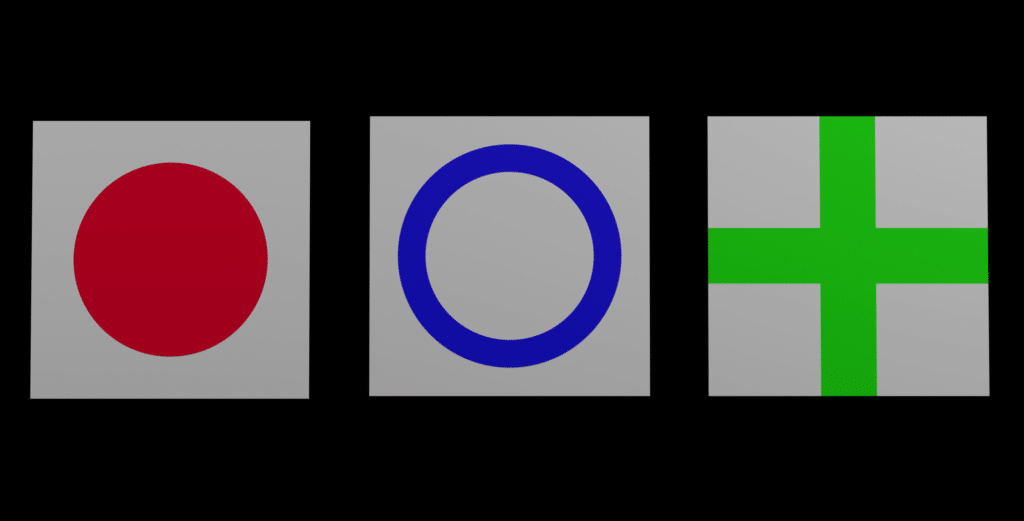
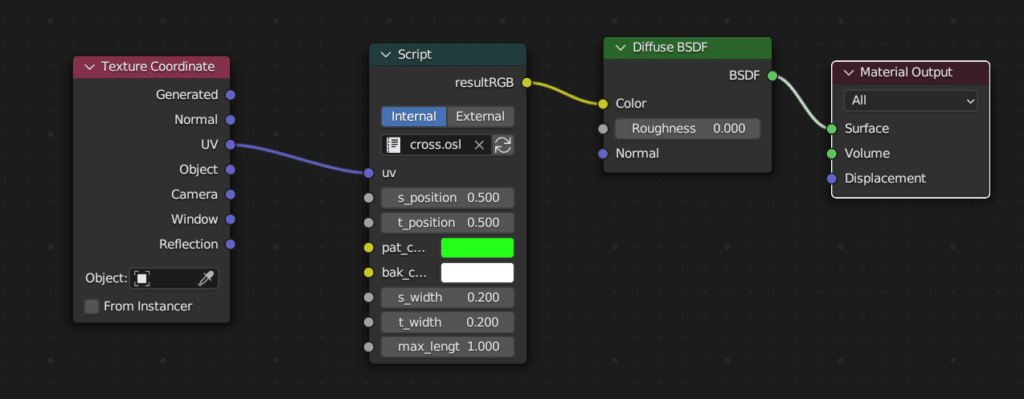
Here are the nodes. We plug a texture coordinate uv node into the script (all three work the same). The output from the script goes into a diffuse BSDF node.
Transparency
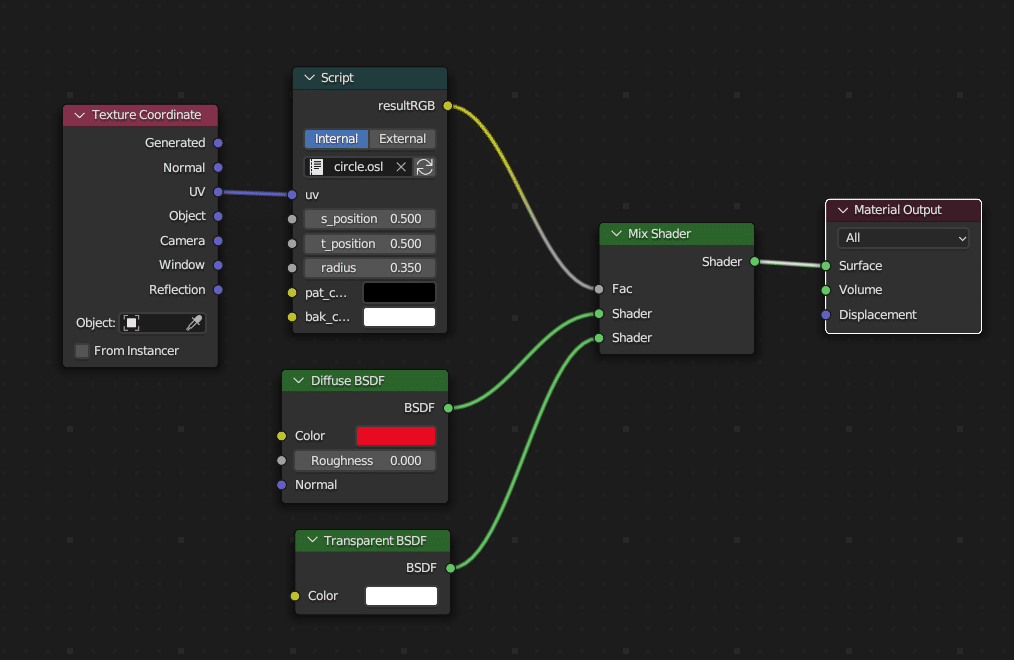
We can also use with a mix shader node to drive transparency.
Below are the nodes. To create this, we add transparent BSDF and mix shader nodes. We then use the OSL script as an input to the mix factor.
Patterns
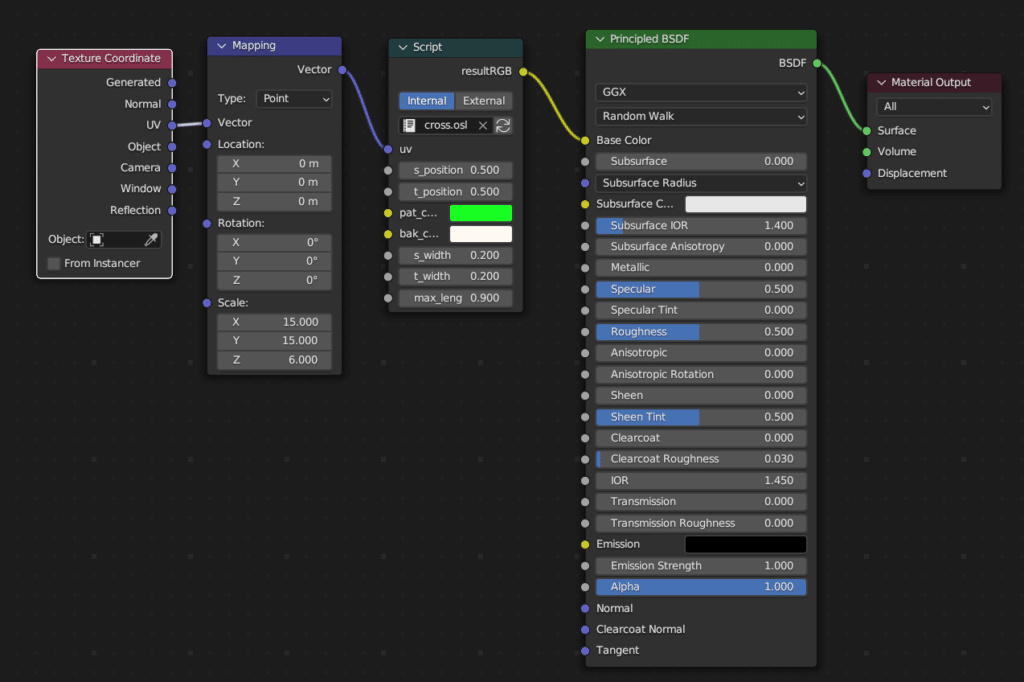
We can also use a mapping node to create a pattern. We have actually already shown this in some of the examples above.

Here are the nodes. We add a mapping node between the texture coordinate and the OSL script. We can change how many of the shape appear using the scale factor. This is possible because of the way the code is written. Rather than using the absolute location of the UV point, we use a relative position.
Mixing OSL Patterns
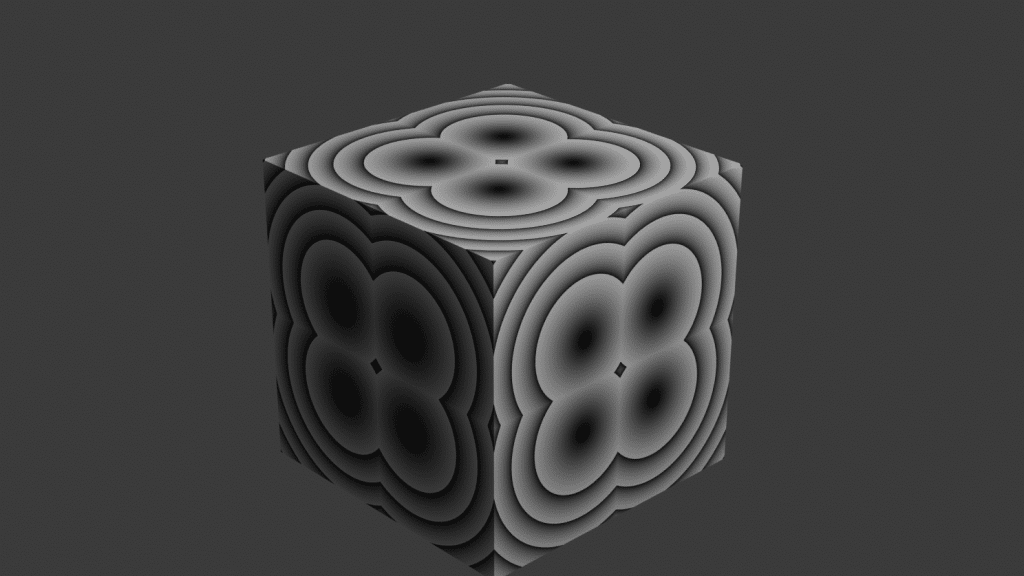
Finally, we can mix two of the shapes to create a more complicated pattern mixing circles and doughnuts.
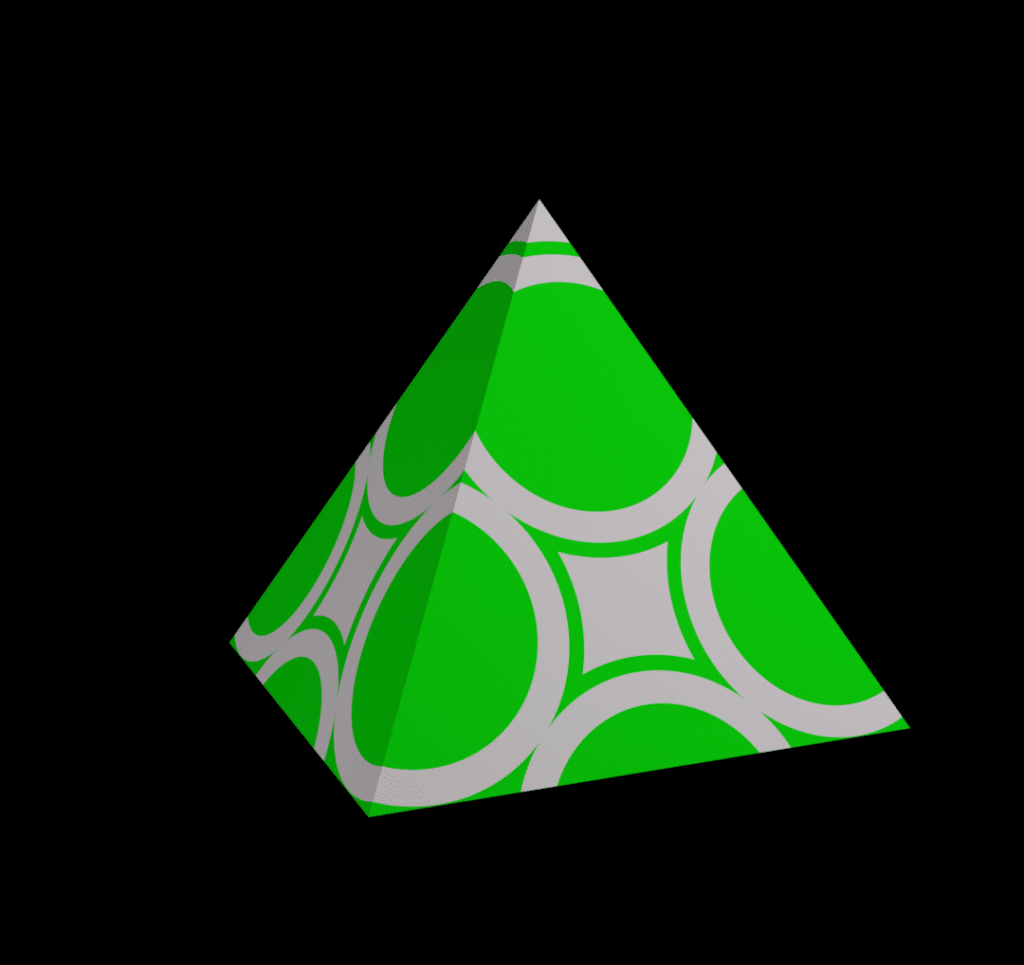
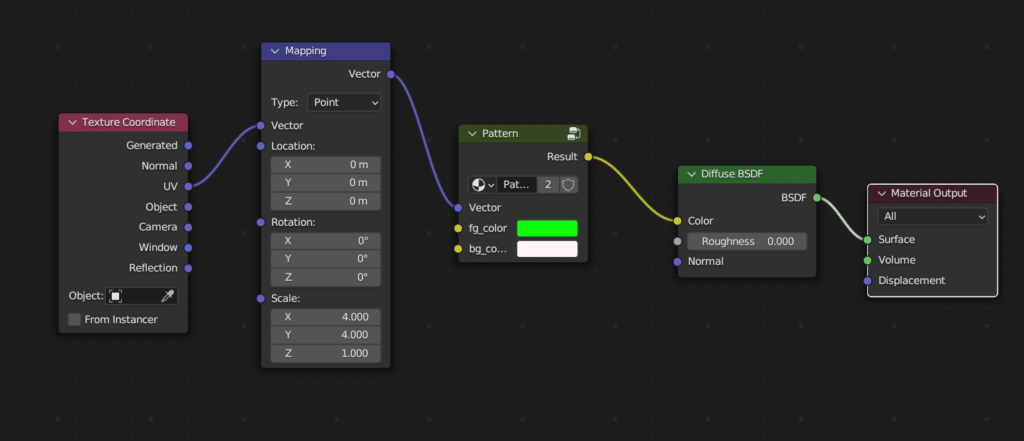
The nodes for this material are a little more complicated. To keep it simple, I created a node group. We use a mapping node into the pattern group and then the output into a diffuse BSDF.
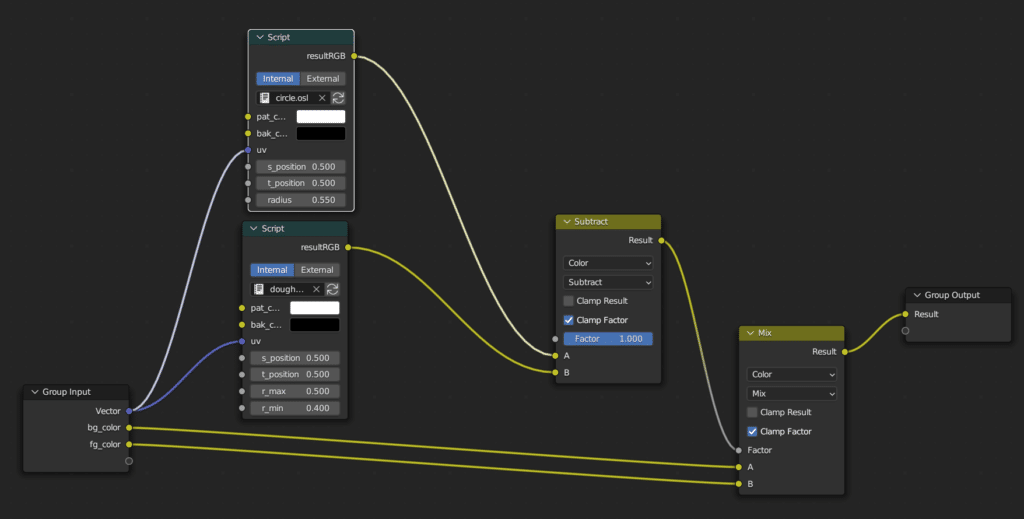
The pattern group nodes are below. We created three inputs into the group: vector (which we use for the UV vector) and two colors (background and foreground). Next, we use our two scripts. We set the colors to black and white, which makes the color math easier. We feed these into a subtract node (subtract the doughnuts from the circles). These are then used as the mix factor between the foreground and background colors.
Conclusion
This post shows how to make basic shapes using Open Shading Language (OSL) and different ways to use those scripts with shader nodes. Hopefully, you found this helpful. I would love to see what you are able to create. Drop a link to your creations in the comments below.
