Part of the challenge of creating new shaders in Open Shading Language (OSL) is coming up with ideas for new shaders to make. Recently, I came across the Gooch Shader. I set out to create an OSL shader version.
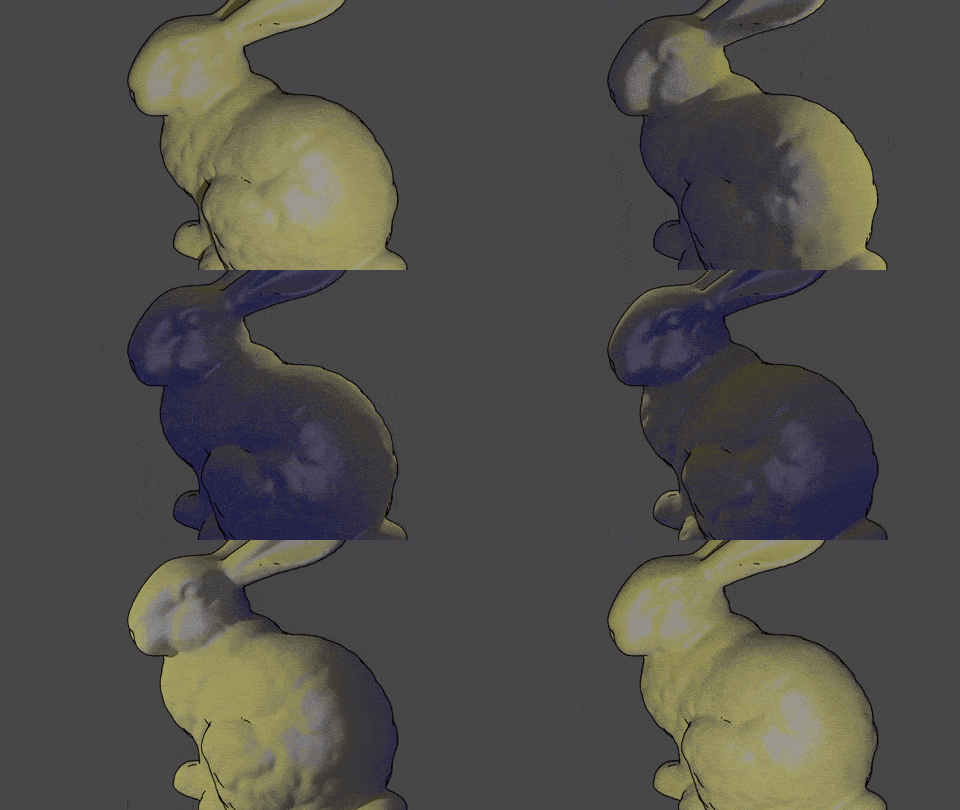
Typically, we think of trying to achieve more photorealistic renders; however, there are times when you may not want photorealism. The Gooch Shader is an example of a non-photorealistic renderer (NPR). NPRs can be used for various purposes including technical illustrations and stylized computer graphics. The Gooch Shader, in particular, was designed for technical illustration. It uses color shifts to give a visual representation of the surface direction (called the surface normal) relative to the light and the viewer.
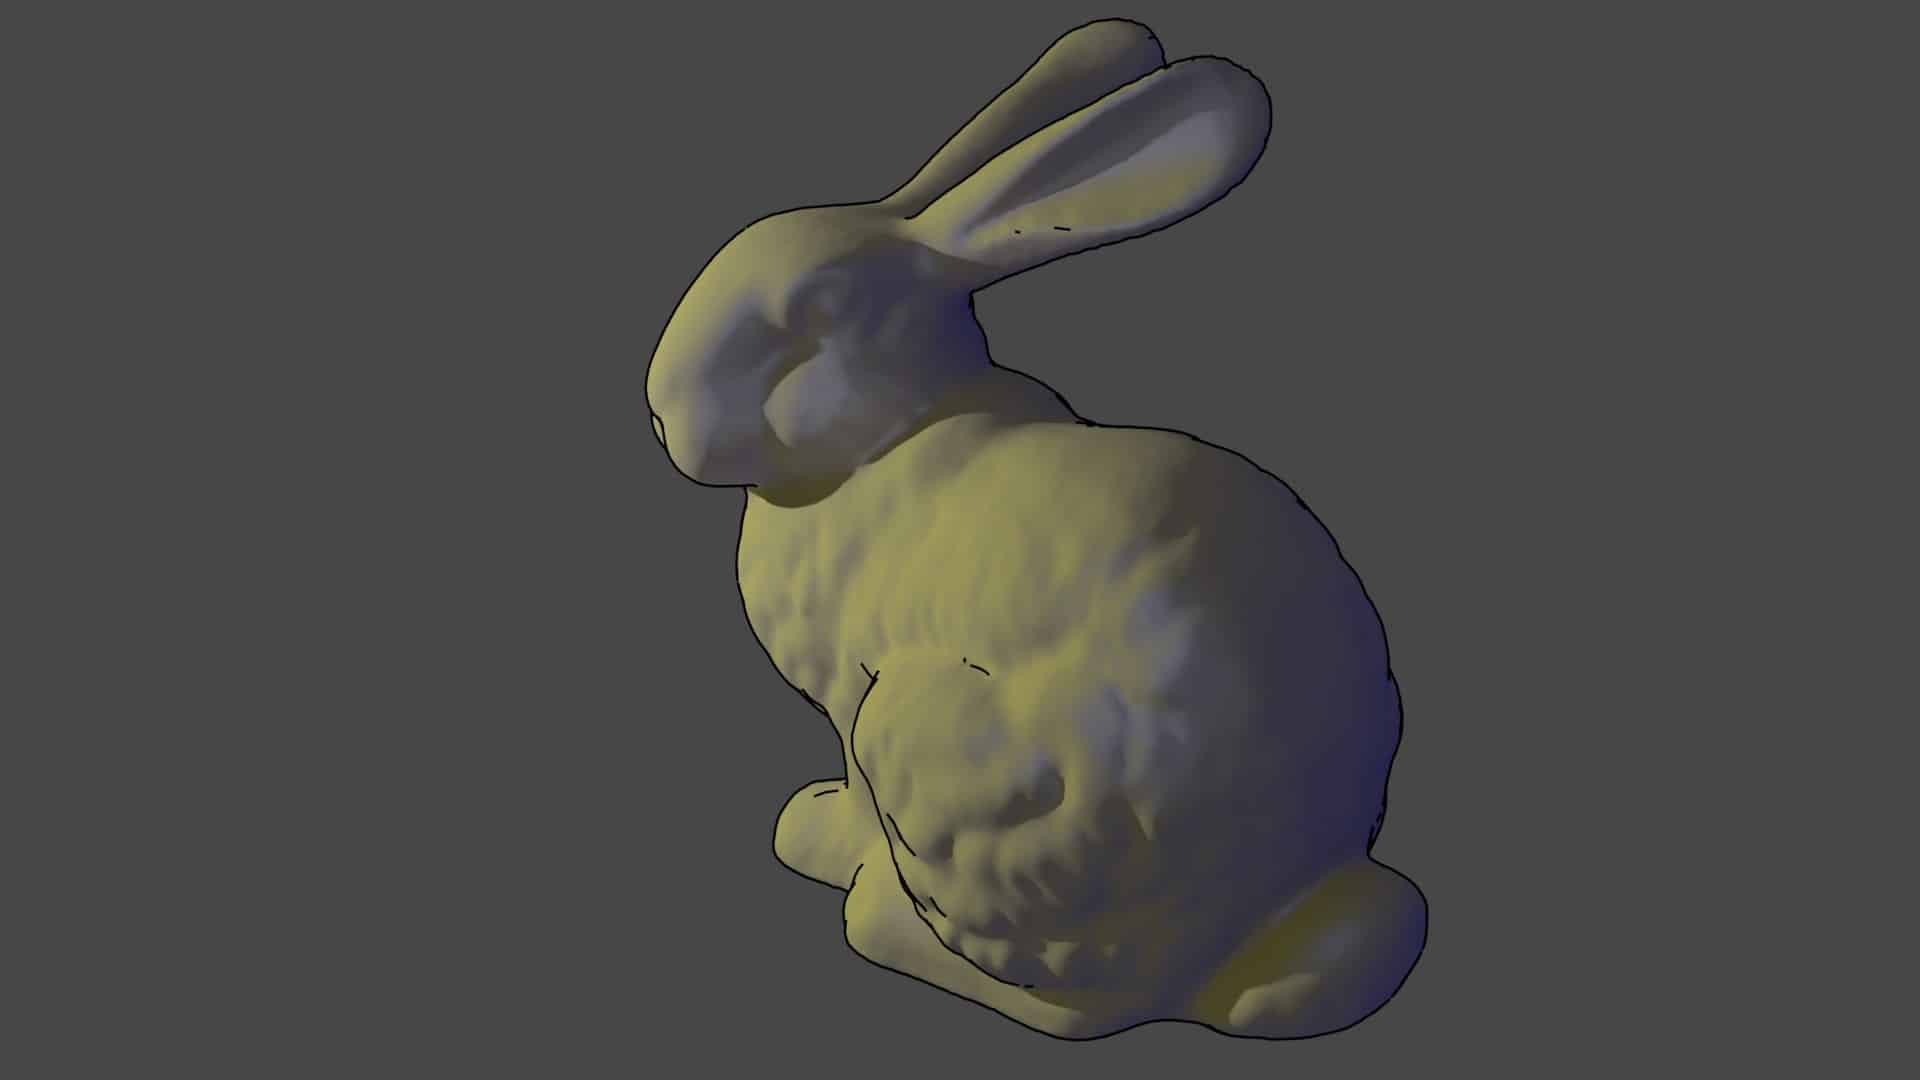
To test our shader in action, we used the Stanford Bunny. It is easily available and has enough geometry (and complexity of geometry) to be interesting. If you need a refresher on Open Shading Language, check out our previous post.
The OSL Code
Here is the full shader code:
shader gooch(
    vector inputVector = vector(0,0,0),
    color baseColor = color(1.0, 1.0, 1.0),
    color highlight = 1,
    color warmColor = color(0.3, 0.3, 0),
    color coolColor = color(0, 0, 0.55),
    float exponent = 2.0,
    output closure color out_color = 0.0
    )
{
    // Color Shift
    color coolFinal = coolColor + 0.25 * baseColor;
    color warmFinal = warmColor + 0.25 * baseColor;

    vector L = normalize(inputVector);
    float t = (dot(N,L) + 1)/2;

    float specular = pow((dot(N,I) + 1)/2,exponent);

    // Debug
    //printf("Specular: %f   Warm: %f   Cool: %f\n",specular,(1-specular)*t, (1-t));

    out_color = specular * highlight * diffuse(N) + (1 - specular) * t * warmFinal * diffuse(N) + (1-t) * coolFinal * diffuse(N);
}
The Approach
The Gooch shader shades points based on the direction of the surface normal relative to another object (in our case a light). If the surface normal points toward the light, the base color is shifted toward a warmer color (kwarm). If the surface normal is pointing away from the light, the color is shifted toward a cooler color (kcool).
We use the following equation (for additional details, see the full paper):

$latex \hat{l}$ is a normalized vector in the direction of the lamp. $latex \hat{n}$ is a normalized vector in the direction of the surface normal.
The Surface Normal
While using a shading language, we frequently use the surface normal (frequently represented as n(hat)). The surface normal just tells us which direction the surface of the point that we are shading is pointing. For example, if you had a book sitting on a table, if the book cover was facing up, the surface normal would be facing directly up in the z direction. The normal vector would be (0,0,1). However, if the book cover was face down, the surface normal would be pointing down toward the table in the negative z direction (0,0,-1).
Typically we bold n to denote that it is a vector, and the hat on top tells us that the vector is normalized, which means that the length of the vector is 1.
Dot Product Refresher
In our calculation, we use the dot product. The dot product is represented as a dot between two vectors. The dot product is a mathematical operation that takes two vectors and returns a single number (in math, this is called a scalar). The dot product describes the relationship between the two vectors. The equation for dot product is:

⍬ is the angle between vectors a and b.
If a and b are in the same direction (i.e., parallel to each other), then cos 0 = 1. If a and b are perpendicular (90° angle between them), cos 90° = 0.
If a and b are pointing in opposite directions, then cos 180° = -1.
If a and b are unit vectors, then the length factors drop out and the range of cos is [-1,1]. To use this, we need it in the range [0,1], which we can achieve by the following equation:
(1 + dot(l,N))/2
For example, (-1 + 1)/2 = 0
(1+1)/2 = 1
Our full equation is:

For the cool factor, we add 1 and divide by two which gives us a range of [0,1]. This is perfect. This results in full cool color when a and b are parallel, 0.5 of cool color when they are perpendicular, and 0 when they point in opposite directions (i.e., the face normal points away from the light).
For the warm factor, we take the inverse of the cool factor (1-cool).
Understanding the OSL Shader
Now that we understand the math, the shader is fairly simple. We have shader inputs for the basecolor, highlight (specular) color, warm color, and cool color. We also have an exponent that we will use for the specular falloff. The output is a closure representing the combined colors multiplied by a diffuse shader.
The shader also takes an input vector as an input. One complexity of OSL is that it does not provide information on the lights in the scene. Therefore, we need to tell the shader where the light is. Obviously, this doesn’t work for more complicated scenes with multiple lights (or HDRI) lighting. However, for our simple uses it works.
We start by mixing the warm and cool colors with the base color:
color coolFinal = coolColor + 0.25 * baseColor;
color warmFinal = warmColor + 0.25 * baseColor;
Next, we normalize the inputVector. Remember, we want the output of the dot product to range from [-1,1] which requires us to use unit vectors.
vector L = normalize(inputVector);normalize() is a built in function in OSL.
Now we calculate t, which is simply our equation above:
float t = (dot(N,L) + 1)/2;dot() is a built in function in OSL.
We then calculate the amount of specular. This depends on the angle between the viewer and the surface normal. We use exponential falloff. If the vectors point toward each other, it is full specular. As the surface normal points away from the viewer, then the specular factor decreases exponentially. For example:
When cos 0°: specularity = 1
When cos 45°: specularity = 0.5
When cos 90°: specularity = 0.5^2 = 0.25
float specular = pow((dot(N,I) + 1)/2,exponent);Add it All Up: The Final OSL Shader
The final line of code adds each element multiplied by a diffuse. I also added a commented out debug statement that let’s you see the weight of each factor.
// Debug
    //printf("Specular: %f   Warm: %f   Cool: %f\n",specular,(1-specular)*t, (1-t));

    out_color = specular * highlight * diffuse(N) + (1 - specular) * t * warmFinal * diffuse(N) + (1-t) * coolFinal * diffuse(N);
Adding an Outline to the OSL shader
If you want to use this shader for a technical illustration, you may also want to add an outline. In Blender, you can go to render properties and click “Freestyle”. This adds a black outline around the model. You can change the settings of Freestyle in the Layer Properties tab.
Conclusion
This post shows how to create a non-photorealistic Gooch shader that is useful for illustrations. As you can see neither the math nor the shader itself is very complicated. You will see the general approach used in many different shaders. We shade a point based on the relationship between the surface normal and either the viewer vector or a vector to the light source.
