We are continuing our series to develop a game in Unity. In our previous posts, we built the basic structure of the game. We set up the city, the basic player controls, and the ordering system. In this article, we are going to create the target that shows us where to pick up and drop off the pizza.
Create the Object
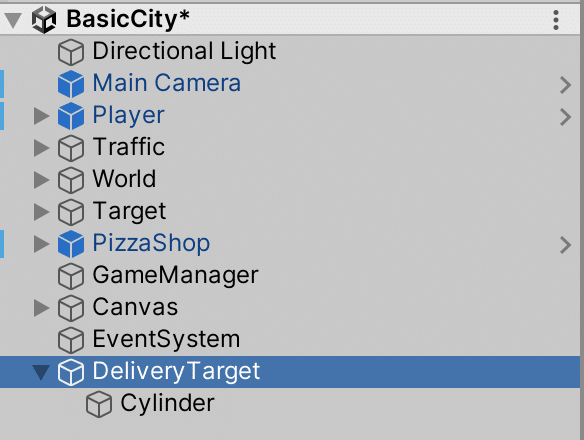
We will start by creating the object. First, create an empty Game Object and name it Delivery Target. Next, create a Cylinder Game Object->3D Object->Cylinder. Drag the cylinder onto the Delivery Target object.
The Shader Graph Package
Now that we have the object, we need the material. We will create the material by using a shader. The shader is a key part of rendering the object in the render pipeline. Unity offers several different render pipelines: the Built-In Render Pipeline, the Universal Render Pipeline, and the High Definition Render Pipeline. In our case, we are using the Built-In Render Pipeline. The Built-In Render Pipeline is the default pipeline. Although it offers less customization, it is easy and meets our basic needs.
We will create the shader using the Unity Shader Graph. The Shader Graph allows you to create the shader visually by connecting different nodes together to create our desired result. If you are familiar with Blender, it is similar to Cycles Nodes. As an alternative, you can write the shader in HLSL, but that is beyond the scope of this post.
Install the Shader Graph Package
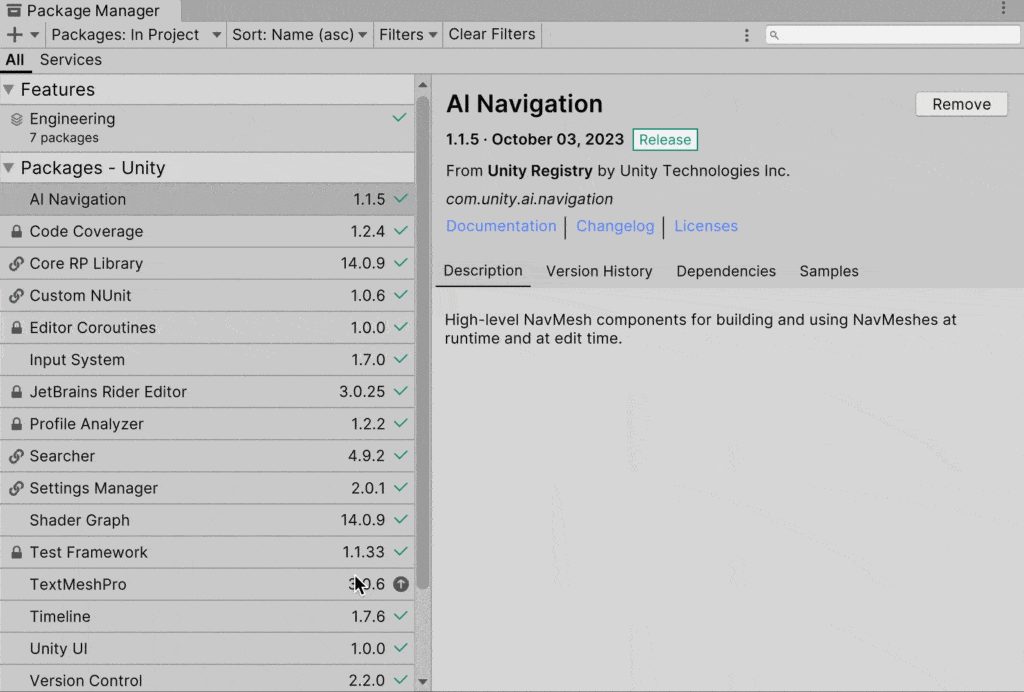
To get started, we need to install the Shader Graph package in the package manager. In the menu bar, click Window->Package Manager. In the top left corner of the package manager, change from Packages In Project to Unity Registry.
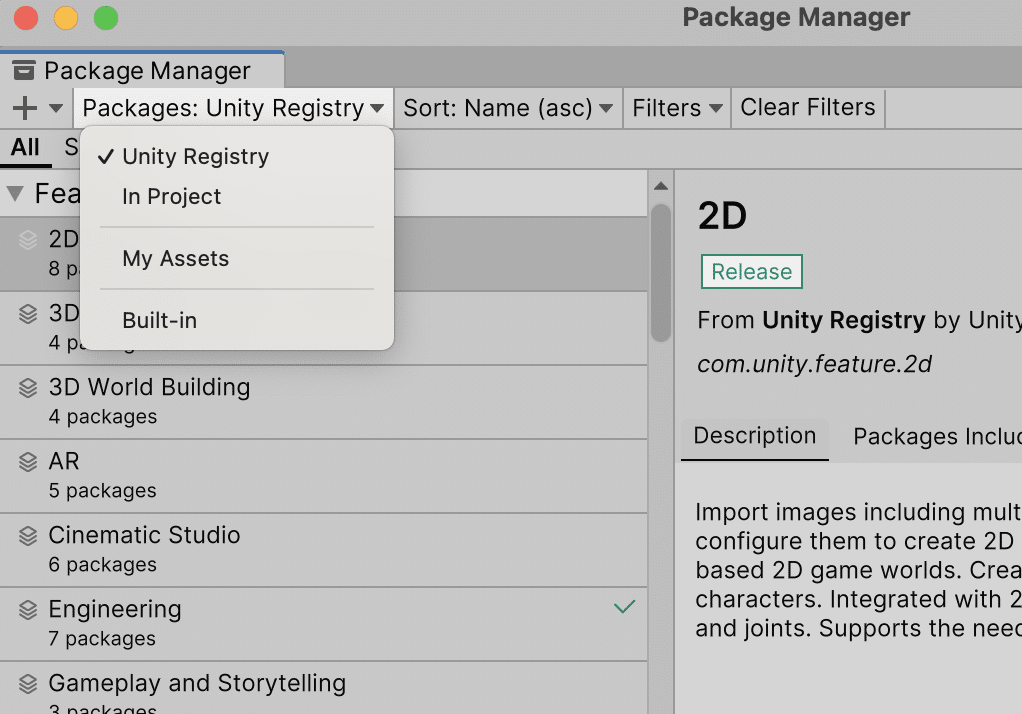
Search for Shader Graph and click Install.
Create the Shader
Next, we need to create the shader. In the assets window, right click and select Create->Shader Graph->Builtin->Unlit.
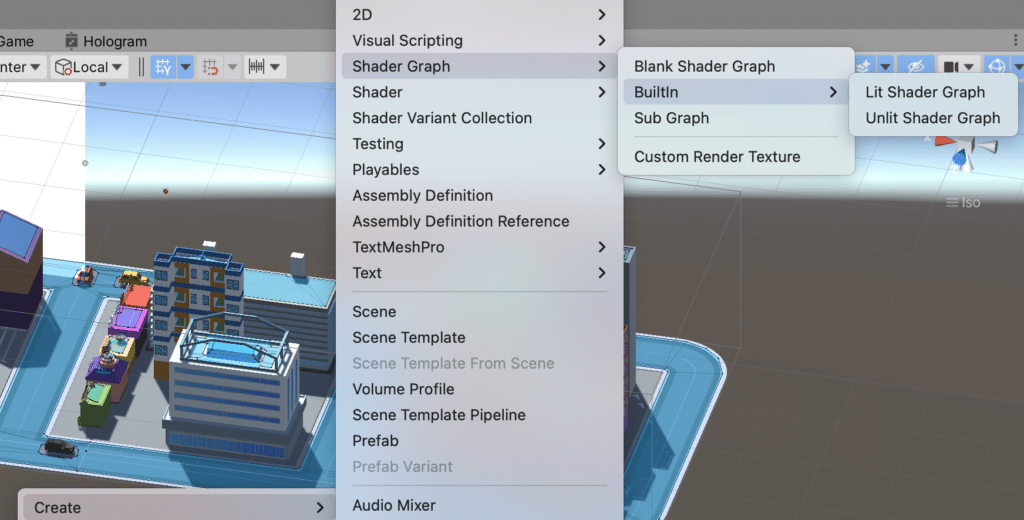
An Unlit Shader is used when you don’t need a material that is affected by lighting. This type of shader is much faster than a Lit Shader since it doesn’t involve any light calculations.
Set the name of the Shader. I used “Hologram”.
Edit the Graph
Now with the shader created, we will set up the nodes. Double click on the new asset to open the shader graph. For some reason, I always struggle with the controls in the shader graph. To pan in the shader graph, hold Alt (Option on Mac) on the keyboard and the left mouse button. Zoom in or out using the scroll the scroll wheel, and add a node by pressing the spacebar.
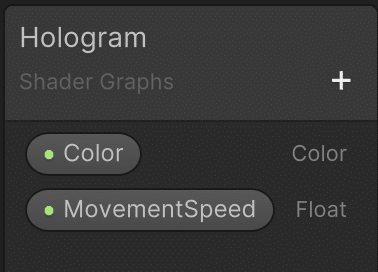
If it is not open, click the button marked “Blackboard”. A window will pop up on the left of the graph. The Blackboard allows you to add properties to the shader graph. This will allow us to change parts of the shader in the inspector. For example, we want to add an input color that we can change for different objects.
To add the input color, in the Blackboard press the plus button and select color. You can keep the name color. Drag this node onto the Shader Graph. Connect the color into the fragment base color.
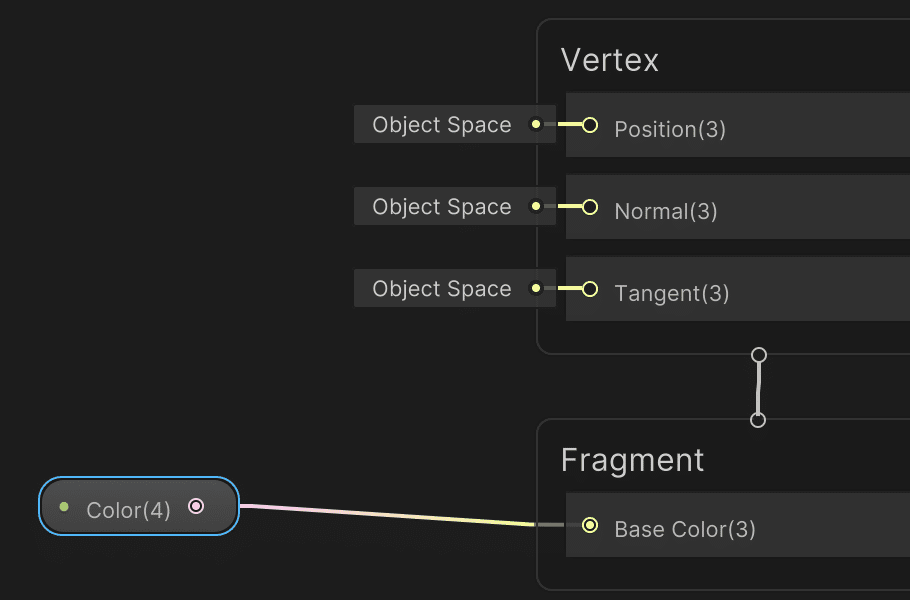
Create the Alpha
The main part of our shader is the transparency. Therefore, most of the nodes will be connected to the alpha node of the fragment.
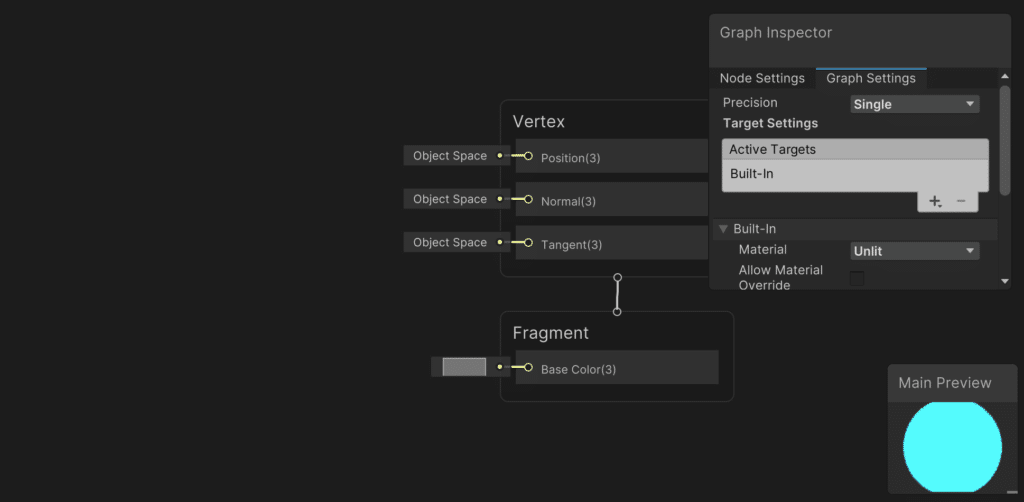
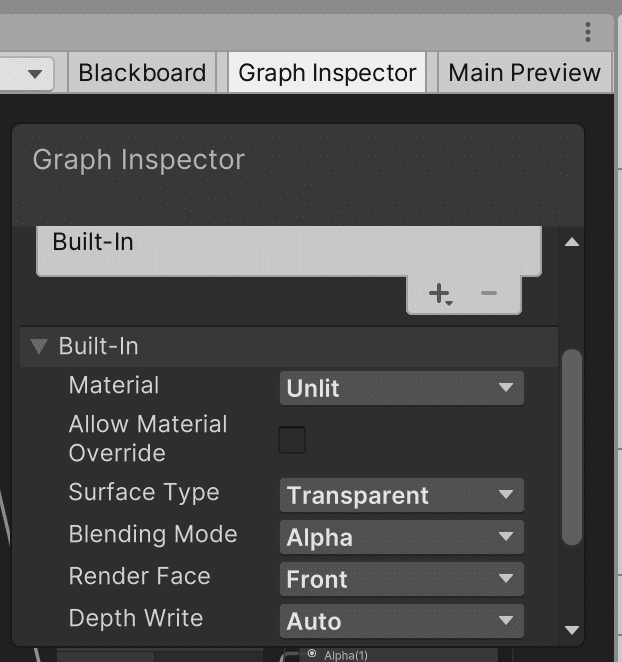
First, we need to add the alpha. In the graph inspector, select the Graph Settings tab. Scroll down and change the surface type from opaque to transparent.
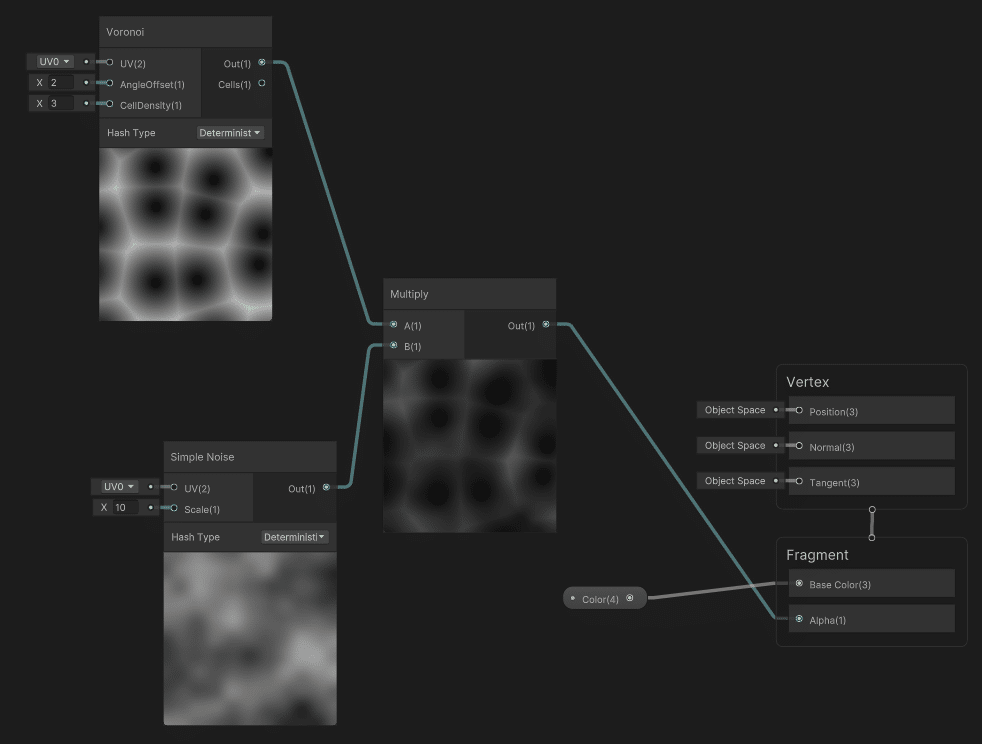
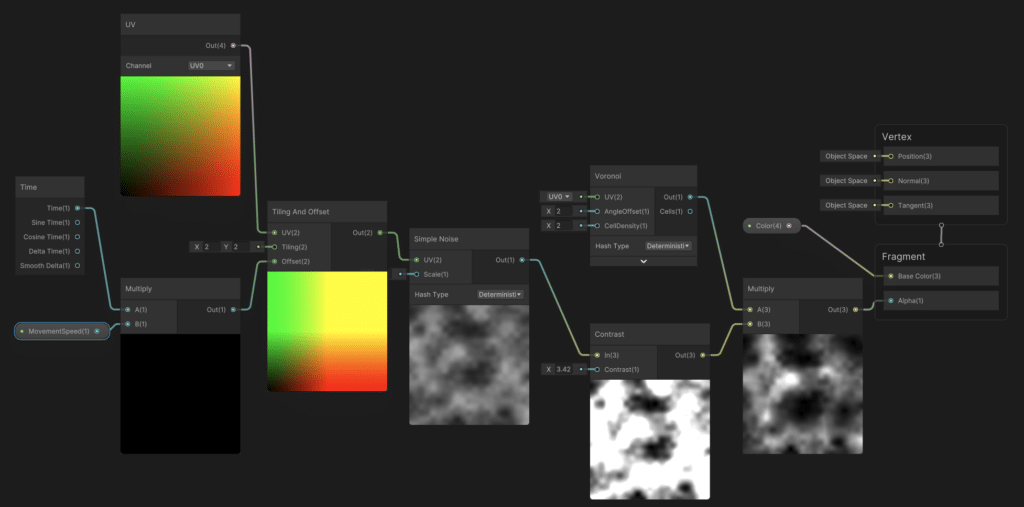
Now for the nodes, the core of our alpha will be the Voronoi texture. The Voronoi texture will allow us to create portions of the hologram that are denser (and less transparent). We will also be able to animate this later. Press the spacebar and select Procedural -> Noise -> Voronoi.

We will set the angle offset input to 2 and the cell density to 3.
We are going to multiply this by a Simple Noise (Procedural -> Noise -> Simple Noise). Change the scale to 10. Next, we want to add a multiply node and connect the Voronoi and Simple Noise textures into the multiply node and the multiply node into the alpha.
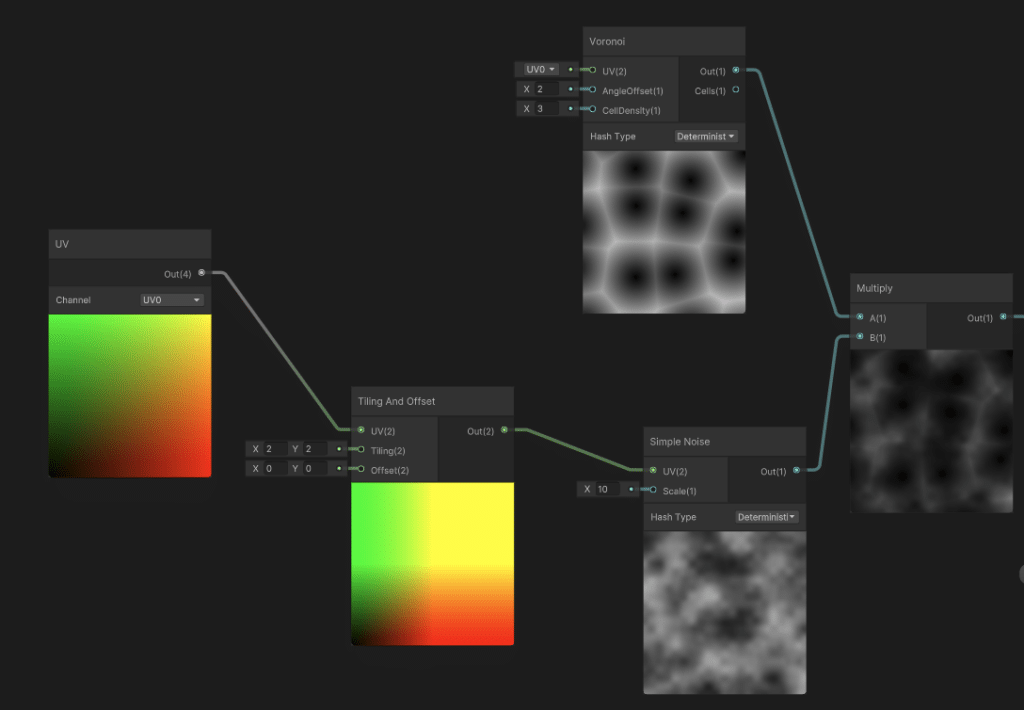
Now that we have the basics, we will add UV nodes that will allow us to use the UV mapping of the cylinder. Add a UV node (Input->Geometry->UV) and a Tiling And Offset node (UV->Tiling And Offset). Connect the UV out to the Tiling And Offset UV input. Change the tiling X and Y each to 2. Connect the Tiling And Offset output to the Simple Noise UV input.
Adding Some Movement
In the next step, we will add some movement to the noise. We got inspiration from this video. We will create a new float property in the Blackboard called MovementSpeed. Drag the MovementSpeed node onto the graph.
Next, add a Time node (Input->Basic->Time) and a Multiply node (Math->Basic->Multiply). Drag the MovementSpeed input and the Time into the Multiply. Finally, drag the multiply output into the Tiling And Offset input. The time node provides access to various time components. In our case, we use the basic time property that provides a linear change over time. We multiply the time component by the MovementSpeed. We then input the product into the Tiling and Offset Node.

Increase the Contrast
Once we had the basic nodes, we wanted to make the colors a little more vibrant, so we added a Contrast node between the Simple Noise node and the Multiply node. Here is the final Shader Graph.
Create the Material
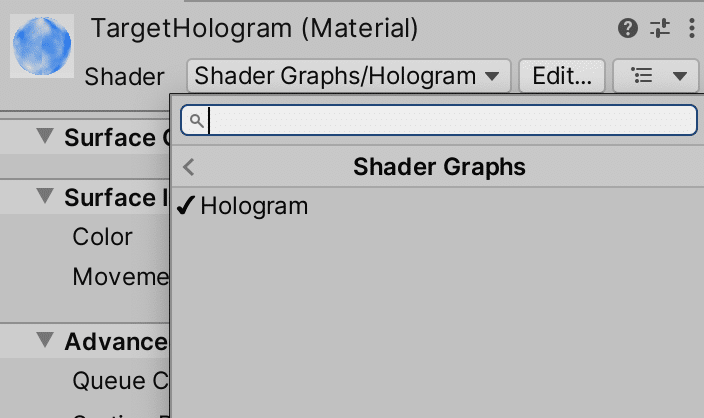
Now that we have the shader, we need to create a material. In the Asset Browser, right click and select Create -> Material. Set the name of the material, such as “TargetHologram.” In the material, click the dropdown labeled Shader at the top of the material and select Shader Graph -> Hologram.
Apply the Material
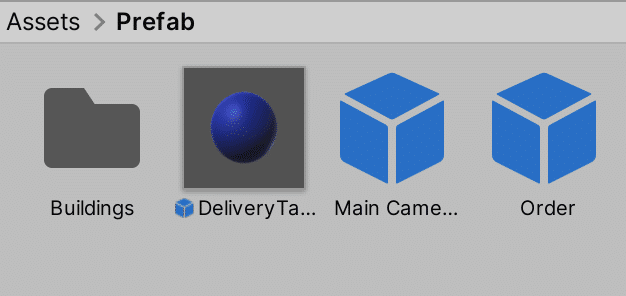
To apply the material, you can drag the material onto the cylinder we created at the beginning. Once I applied, I created a prefab by dragging the cylinder into the Asset Browser.
Conclusion
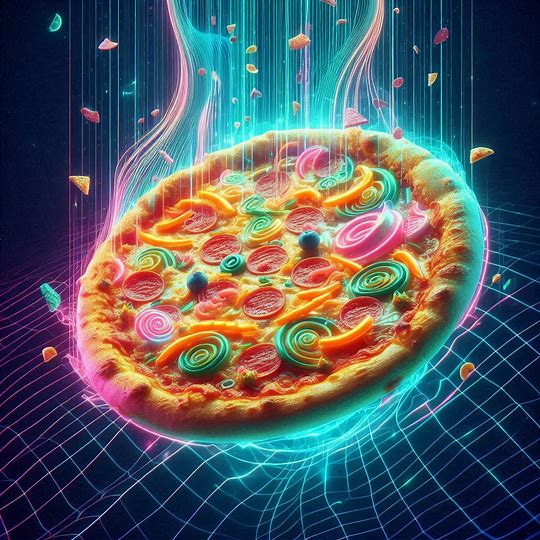
In our ongoing Unity game development series, we’ve laid the groundwork for our game by creating the basic structure, setting up the city environment, implementing player controls, and establishing an ordering system. In this post, we showed how to create the Delivery Target. This target will guide players on where to pick up and drop off their precious pizzas. Using Unity Shader Graph, we crafted a visually appealing shader for our target. By combining Voronoi and Simple Noise textures, we achieved a holographic effect that enhances the overall game experience. In the next post, we will begin creating the UI for the game. Happy game development! 🎮✨