We are in the middle of a series, creating a game using Unity. In our prior posts, we created the player car and designed the city. Now we need some AI traffic. In this post, we will add a few non-player character (NPC) cars and code to move them.
Add the NPC Models
Our first step is to add the models. This is similar to our approach when we created the car.
I am using a car from Simplepoly City. However, if you are interested in a free alternative, check out kenney.nl. The Simplepoly City assets are all in one file, so I used Blender to extract the car. I appended it to a new file (deleting the camera and light). Next, I separated the wheels from the body (although with the angle we use in the game, you can’t see the wheels moving or not moving). I saved the Blender file in the Assets folder. You can do this for every NPC car that you want to create.

Import Into Unity
In our Unity project, add an empty (GameObject -> Create Empty). Name this object “Taxi”. Find the car model in the assets folder, and drag it onto the Taxi object. This will make the model a child of the Taxi object. You may need to scale the car to a good size.
Create the AI Traffic
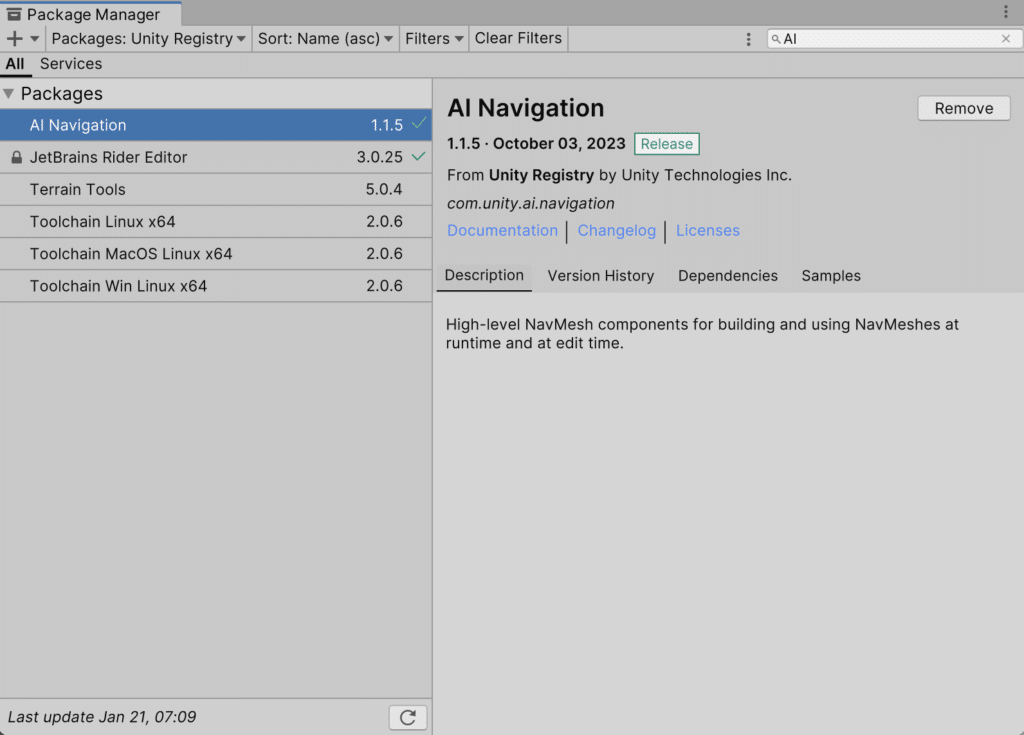
Next, we will set up the Navigation. In prior versions of Unity, pathfinding was built into Unity. However, in Unity 2022, NavMesh was moved to a package called AI Navigation. To install, add the package to the project in the Package Manager: Window->Package Manager->AI Navigation->Install.
The basic components are:
- NavMeshSurface: areas where the NPCs can go
- NavMeshModifier: remove objects from the NavMeshSurface
- NavMeshAgent: the NPC
- NavMeshObstacle: an object that the NPC should avoid
NavMeshSurface
The first step is to set up the NavMeshSurface. The NavMeshSurface describes where the NPCs can go in the scene. In our case, we want the NPC to be able to drive on the road.
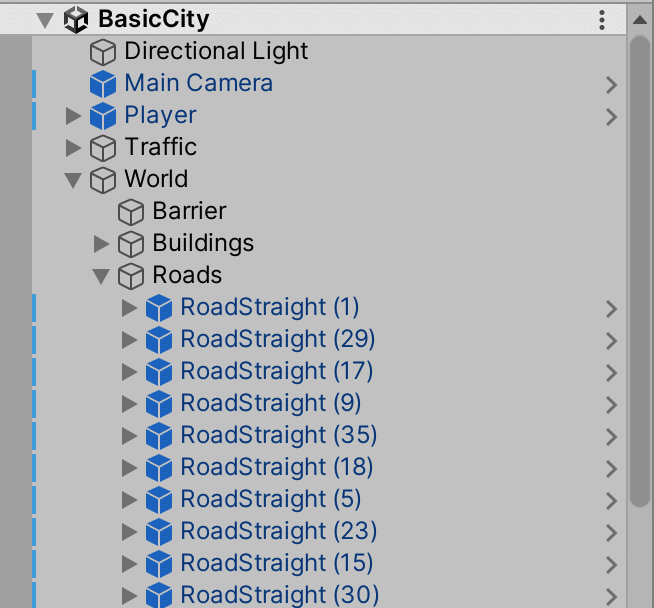
I collected the roads, buildings, and barriers into a World object. I created a new object (GameObject->Create Empty), named it World, and I added the roads, buildings, and barriers to the new object.
Next, I added a NavMeshSurface component to this object.
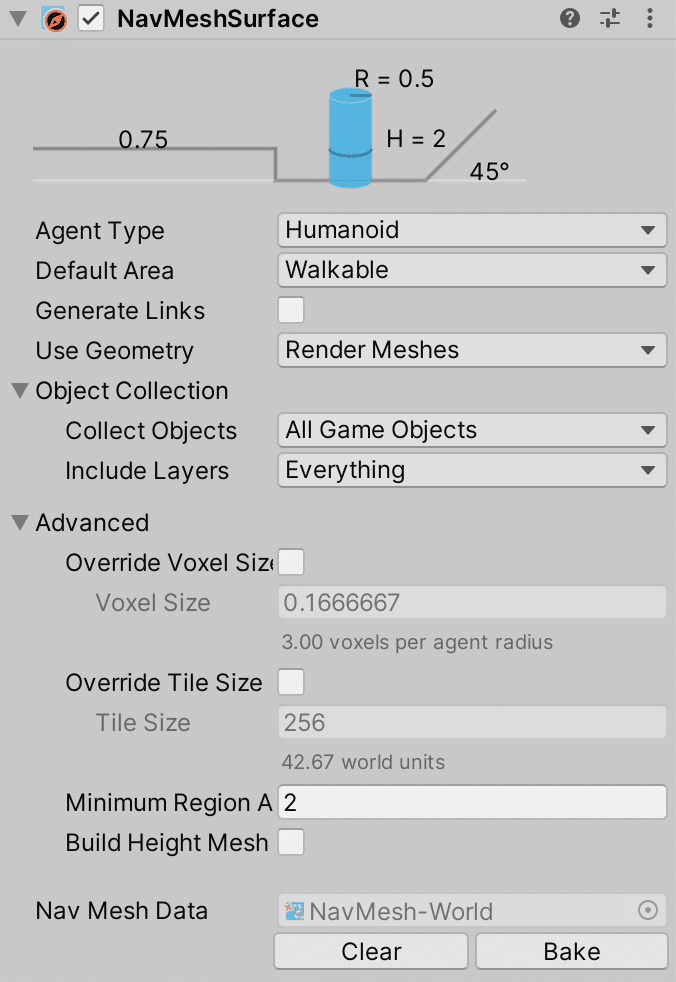
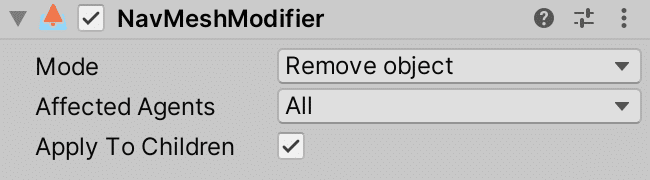
I want to keep the cars on the road. Therefore, we need to exclude the area covered by the buildings. We need to remove these from the NavMeshSurface. To do this, I added a NavMeshModifier. In the mode, select “Remove Object”.
Finally, we need to bake the surface. Go to the World object and click “Bake” in the NavMeshSurface component.
NavMeshAgent
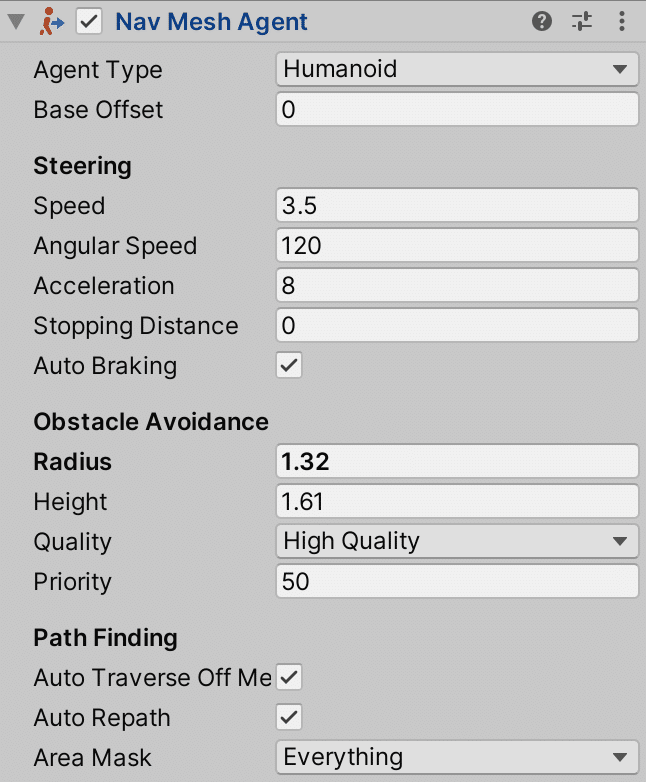
Now, we will add the NavMeshAgent. On our NPC car, we will add the component, NavMeshAgent. We will adjust the speed to 3.5 and set the obstacle avoidance radius to 1.32.
Places to Go: NPC Movement Script
Once we have our NavMesh established, we need a script to move the NPC around the world. We will use sample code from Unity for this.
using System.Collections;
using System.Collections.Generic;
using UnityEngine;
using UnityEngine.AI;

public class MoveTo : MonoBehaviour
{
    public Transform[] points;

    private NavMeshAgent agent;
    private int destPoint = 0;

    // Start is called before the first frame update
    void Start()
    {
        agent = GetComponent<NavMeshAgent>();
        agent.autoBraking = false;

        GotoNextPoint();
    }

    void GotoNextPoint() {
        if (points.Length == 0)
            return;

        agent.destination = points[destPoint].position;

        destPoint = (destPoint + 1) % points.Length;
    }

    // Update is called once per frame
    void Update()
    {
        if(!agent.pathPending && agent.remainingDistance < 0.5f)
            GotoNextPoint();
    }
}
Start Method
In the Start method, we get a reference to the agent.
Agent = GetComponent<NavMeshAgent>();We don’t want the NPC to slow down as it approaches a waypoint, so we turn off auto braking.
agent.autoBraking = false;Finally, we set the initial destination point by calling the method GotoNextPoint().
Setting the Destination
The next method is GotoNextPoint. First, we check that the array of points contains one or more points.
if (points.Length == 0)
  return;
Next, we set the destination point to the current location in points.
agent.destination = points[destPoint].position;Finally, we increment the destination pointer. To do this, we add one to the previous pointer. If we go past the number of destination points, we need to reset to 0. Therefore, we use the modulus operator.
destPoint = (destPoint + 1) % points.Length;For example, if the current destPoint is 3 and points has 4 points in it, then the result is 0 (remember that the destPoints range from 0 to 3).
Update Function
Lastly, we will create the update function. This is really simple. We just need to know if we are within range of the current destination. If so, then we call GotoNextPoint to update our target location.
void Update()
{

  if(!agent.pathPending && agent.remainingDistance < 0.5f)
    GotoNextPoint();

}
Adding the Destination Points
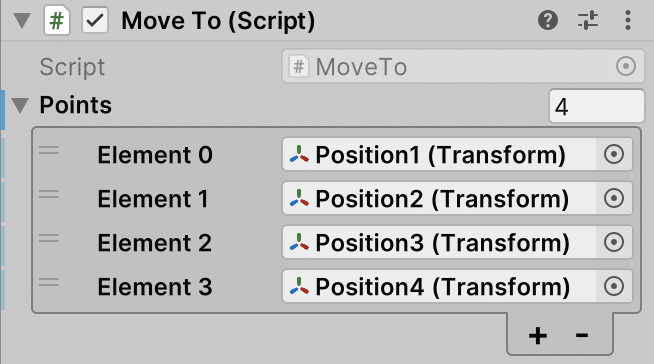
Once we have the code, we need to add the points in the Unity Editor. Add the Move To script to one of the NPC objects. To add points, click the plus sign. You need to drag a transform into each element that you create. To test this, I added a test cylinder to the scene. I moved it around the map, dragging it into each element on the MoveTo script at each target location. In my case, I set the targets as the four corners of the map.
After testing, I had to make some minor adjustments. For example, I had to rotate the taxi so it was driving in the correct direction. In addition, I adjusted the collision box.
I also added a second car, and I reversed the direction of the waypoints so the car was driving in the opposite direction.
Conclusion
In this post, we took a significant step forward in our game. We created some NPC traffic driven by the Unity AI Navigation. We walked through the steps to add the NPC cars, create the NavMesh, and created a script to set target locations. In our next post, we will start ordering pizzas. We will set up the order generation system that will create an order with a random destination.